光学字符识别(OCR)

使用图像上的多种形状执行光学字符识别(OCR)任务。通过此模板,您可以使用形状标识区域,并为图像的特定区域转录相关文本。
标注配置
<View>
  <Image name="image" value="$ocr"/>
  <Labels name="label" toName="image">
    <Label value="Text" background="green"/>
    <Label value="Handwriting" background="blue"/>
  </Labels>
  <Rectangle name="bbox" toName="image" strokeWidth="3"/>
  <Polygon name="poly" toName="image" strokeWidth="3"/>
  <TextArea name="transcription" toName="image"
            editable="true"
            perRegion="true"
            required="true"
            maxSubmissions="1"
            rows="5"
            placeholder="Recognized Text"
            displayMode="region-list"
            />
</View>
关于标注配置
所有标注配置必须包含在View标签内。
使用Image对象标签来指定需要标注的图像:
<Image name="image" value="$ocr"/>使用Labels控制标签来指定哪些标签可用于添加到图像上的不同形状:
<Labels name="label" toName="image">
    <Label value="Text" background="green"/>
    <Label value="Handwriting" background="blue"/>
</Labels>您可以修改每个Label的value值,为OCR任务中的区域分配不同标签,例如"字母"和"数字"或其他内容。
使用Rectangle控制标签添加未标记的矩形:
<Rectangle name="bbox" toName="image" strokeWidth="3"/>使用矩形标签而非RectangleLabels标签意味着可以让标注人员分三步完成OCR标注:首先创建区域来高亮文本,然后为每个区域关联标签,最后转录每个区域的文本。这也使得为OCR任务添加预标注变得更加容易。
使用Polygon控制标签添加未标记的多边形:
<Polygon name="poly" toName="image" strokeWidth="3"/>strokeWidth 参数控制多边形轮廓线的宽度。
使用TextArea控件标签为图像上绘制的每个区域(无论是矩形还是多边形)添加文字转录内容。
<TextArea name="transcription" toName="image"
            editable="true"
            perRegion="true"
            required="true"
            maxSubmissions="1"
            rows="5"
            placeholder="Recognized Text"
            displayMode="region-list"
/>editable="true"参数允许标注者在提交后编辑文本,而displayMode="region-list"表示文本框会显示在与每个矩形或多边形关联的区域列表中,以便更轻松地更新文本。perRegion="true"表示每个文本框应用于特定区域,required="true"表示标注者必须在每个文本框中添加文本才能提交标注。placeholder参数允许您指定在标注者编辑文本框前显示的占位文本。
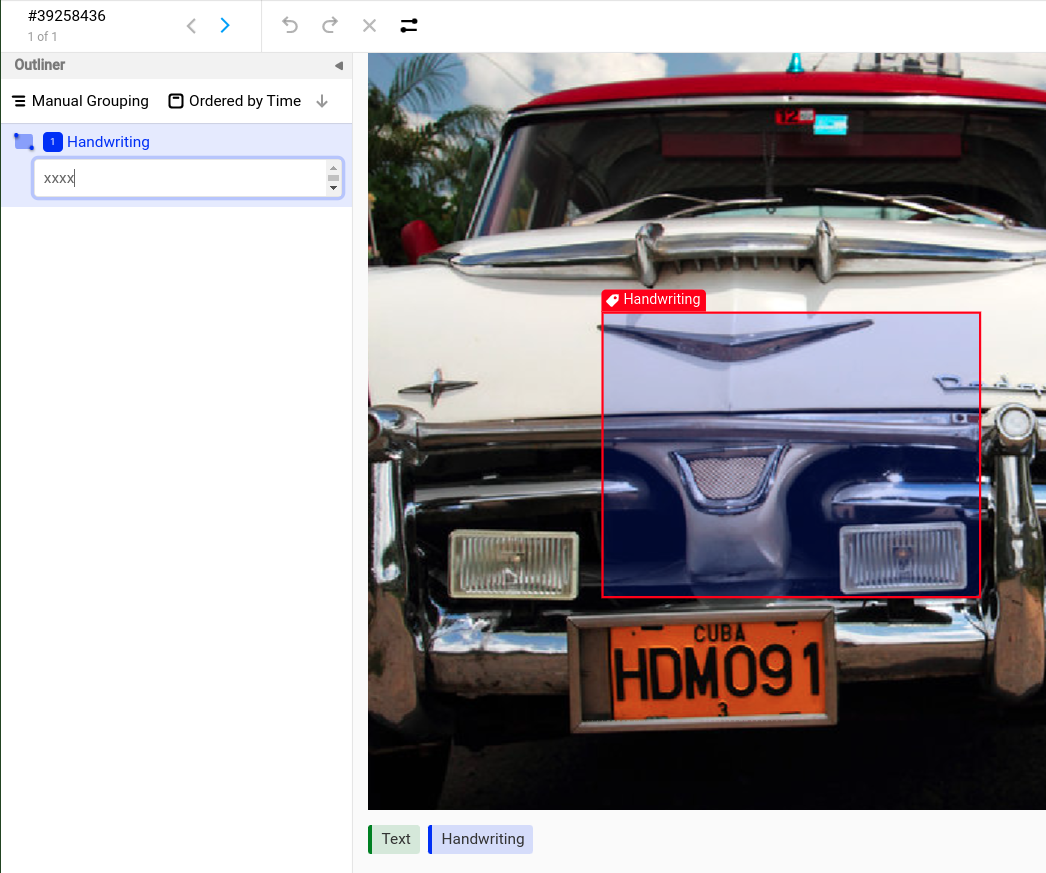
关于标注流程
- 选择一个标签(例如“手写”),创建一个新的边界框并选中它。
- 如果大纲面板尚未打开,请打开它。通常它位于左侧。
- 为每个边界框添加文本。否则你会收到关于缺失文本的警告,因为标注配置使用了
required="true"。