本页面为开发者提供构建特定应用GPT Action的说明与指南。在继续之前,请确保您已熟悉以下信息:
此特定GPT操作概述了如何连接到Jira(Atlassian的项目和工单管理工具)。该操作基于用户上下文,允许他们对指定项目中的问题进行读写操作。
价值与示例商业应用场景
价值: 用户现在可以利用ChatGPT的自然语言能力直接连接Jira Cloud
示例用例:
- 用户可以加载特定项目的最新问题,并使用ChatGPT提供解决方案
- 用户可以通过指示ChatGPT创建和修改问题及子任务,并分配给特定用户
应用信息
应用密钥链接
在开始之前,请查看应用程序中的这些链接:
- 应用网站: https://
.atlassian.net/jira - 应用API文档:https://developer.atlassian.com/cloud/jira/platform/rest/v3/intro/
- 应用OAuth 2.0文档:https://developer.atlassian.com/cloud/jira/platform/oauth-2-3lo-apps/
应用前提条件
在开始之前,请确保您已在应用程序环境中完成以下步骤:
- 确保您拥有在Atlassian Cloud Developer Console中创建应用程序的访问权限和权限
ChatGPT 步骤
自定义GPT指令
创建自定义GPT后,请将以下文本复制到指令面板中。有问题吗?查看入门示例详细了解此步骤的操作方法。
**Context**: you are specialized GPT designed to create and edit issues through API connections to Jira Cloud. This GPT can create, read, and edit project issues based on user instructions.

**Instructions**:
- When asked to perform a task, use the available actions via the api.atlassian.com API.
- When asked to create an issue, use the user's input to synthesize a summary and description and file the issue in JIRA.
- When asked to create a subtask, assume the project key and parent issue key of the currently discussed issue. Clarify with if this context is not available.
- When asked to assign an issue or task to the user, first use jql to query the current user's profile and use this account as the assignee.
- Ask for clarification when needed to ensure accuracy and completeness in fulfilling user requests.
OpenAPI 规范
创建自定义GPT后,在操作面板中复制以下文本。有问题吗?查看入门示例了解此步骤的详细操作方式。
注意:将URL中的占位符
openapi: 3.1.0
info:
  title: Jira API
  description: API for interacting with Jira issues and sub-tasks.
  version: 1.0.0
servers:
  - url: https://api.atlassian.com/ex/jira/<CLOUD_ID>/rest/api/3
    description: Jira Cloud API
components:
  securitySchemes:
    OAuth2:
      type: oauth2
      flows:
        authorizationCode:
          authorizationUrl: https://auth.atlassian.com/authorize
          tokenUrl: https://auth.atlassian.com/oauth/token
          scopes:
            read:jira-user: Read Jira user information
            read:jira-work: Read Jira work data
            write:jira-work: Write Jira work data
  schemas:
    Issue:
      type: object
      properties:
        id:
          type: string
        key:
          type: string
        fields:
          type: object
          properties:
            summary:
              type: string
            description:
              type: string
            issuetype:
              type: object
              properties:
                name:
                  type: string
paths:
  /search:
    get:
      operationId: getIssues
      summary: Retrieve a list of issues
      parameters:
        - name: jql
          in: query
          required: false
          schema:
            type: string
        - name: startAt
          in: query
          required: false
          schema:
            type: integer
        - name: maxResults
          in: query
          required: false
          schema:
            type: integer
      responses:
        '200':
          description: A list of issues
          content:
            application/json:
              schema:
                type: object
                properties:
                  issues:
                    type: array
                    items:
                      $ref: '#/components/schemas/Issue'
  /issue:
    post:
      operationId: createIssue
      summary: Create a new issue
      requestBody:
        required: true
        content:
          application/json:
            schema:
              type: object
              properties:
                fields:
                  type: object
                  properties:
                    project:
                      type: object
                      properties:
                        key:
                          type: string
                    summary:
                      type: string
                    description:
                      type: string
                    issuetype:
                      type: object
                      properties:
                        name:
                          type: string
      responses:
        '201':
          description: Issue created successfully
          content:
            application/json:
              schema:
                $ref: '#/components/schemas/Issue'
  /issue/{issueIdOrKey}:
    get:
      operationId: getIssue
      summary: Retrieve a specific issue
      parameters:
        - name: issueIdOrKey
          in: path
          required: true
          schema:
            type: string
      responses:
        '200':
          description: Issue details
          content:
            application/json:
              schema:
                $ref: '#/components/schemas/Issue'
    put:
      operationId: updateIssue
      summary: Update an existing issue
      parameters:
        - name: issueIdOrKey
          in: path
          required: true
          schema:
            type: string
      requestBody:
        required: true
        content:
          application/json:
            schema:
              type: object
              properties:
                fields:
                  type: object
                  properties:
                    summary:
                      type: string
                    description:
                      type: string
                    issuetype:
                      type: object
                      properties:
                        name:
                          type: string
      responses:
        '204':
          description: Issue updated successfully
  /issue:
    post:
      operationId: createSubTask
      summary: Create a sub-task for an issue
      requestBody:
        required: true
        content:
          application/json:
            schema:
              type: object
              properties:
                fields:
                  type: object
                  properties:
                    project:
                      type: object
                      properties:
                        key:
                          type: string
                    parent:
                      type: object
                      properties:
                        key:
                          type: string
                    summary:
                      type: string
                    description:
                      type: string
                    issuetype:
                      type: object
                      properties:
                        name:
                          type: string
      responses:
        '201':
          description: Sub-task created successfully
          content:
            application/json:
              schema:
                $ref: '#/components/schemas/Issue'
security:
  - OAuth2:
      - read:jira-user
      - read:jira-work
      - write:jira-work
认证说明
以下是设置Jira身份验证的说明。有问题吗?查看入门示例了解该步骤的详细操作方式。
Jira 操作步骤
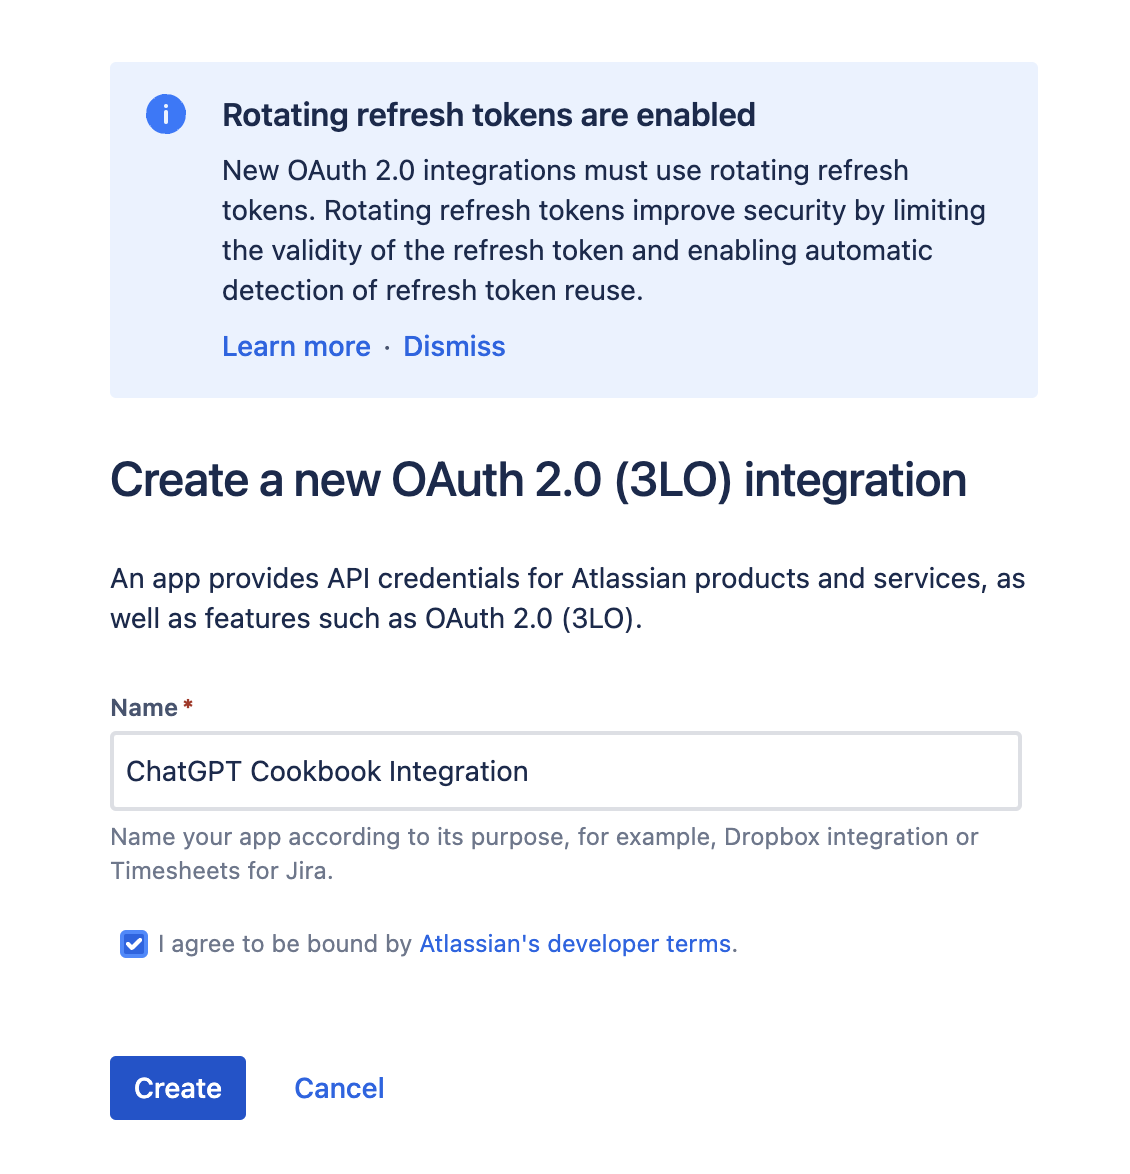
- 创建应用程序: 第一步是在Jira中创建一个新应用程序用于与ChatGPT集成。这可以通过访问Atlassian开发者控制台,点击创建并选择OAuth 2.0集成来完成。
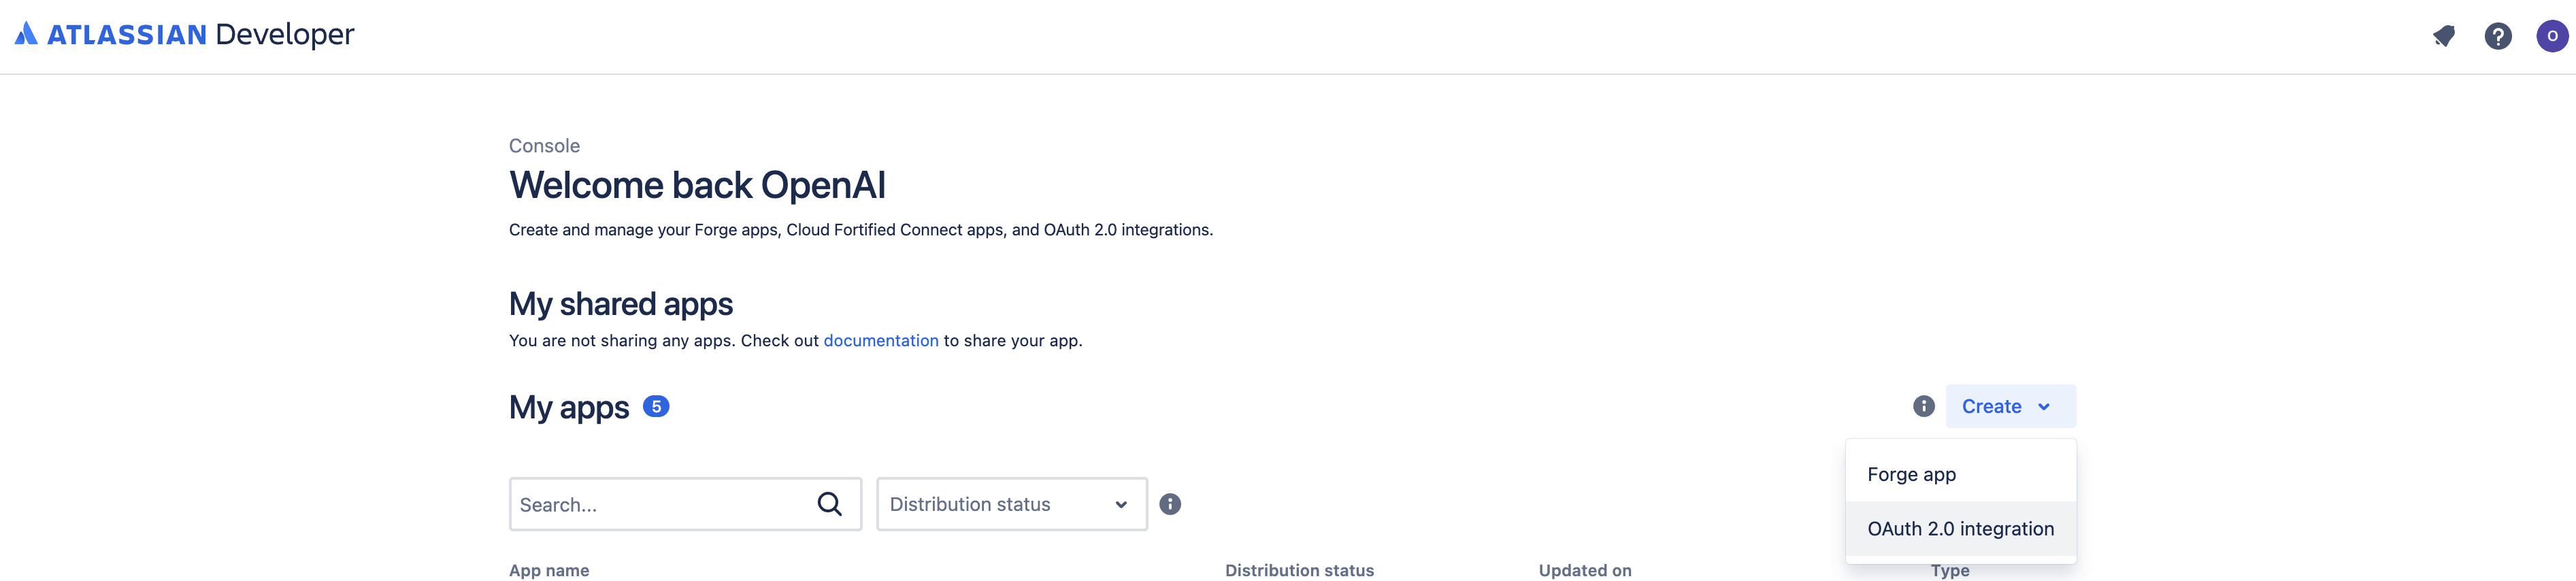
从这里开始,只需输入您的集成名称并点击创建。
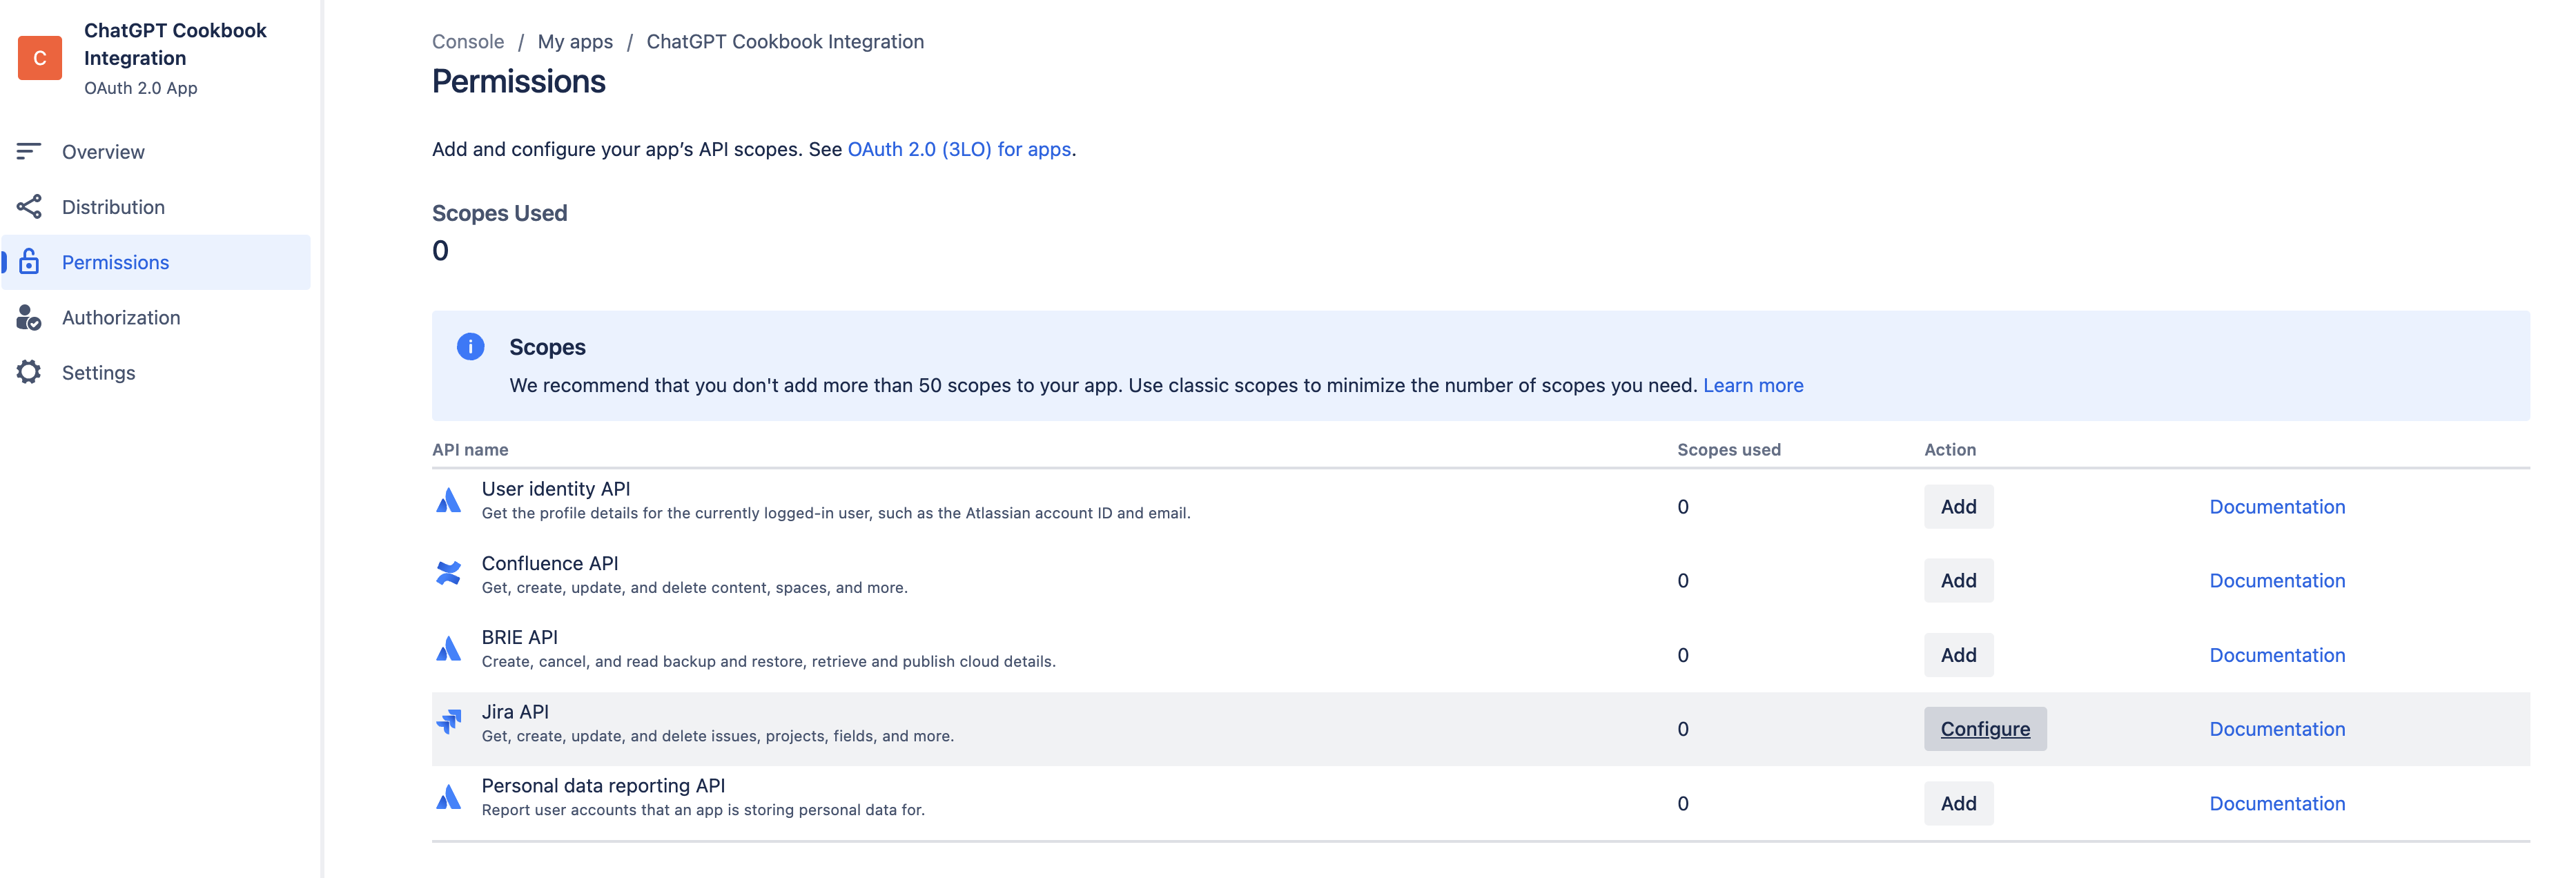
- 定义权限: 接下来我们需要为应用程序提供所需的权限。在新应用程序中,从侧边栏打开权限菜单,找到Jira API并点击添加,然后点击配置。
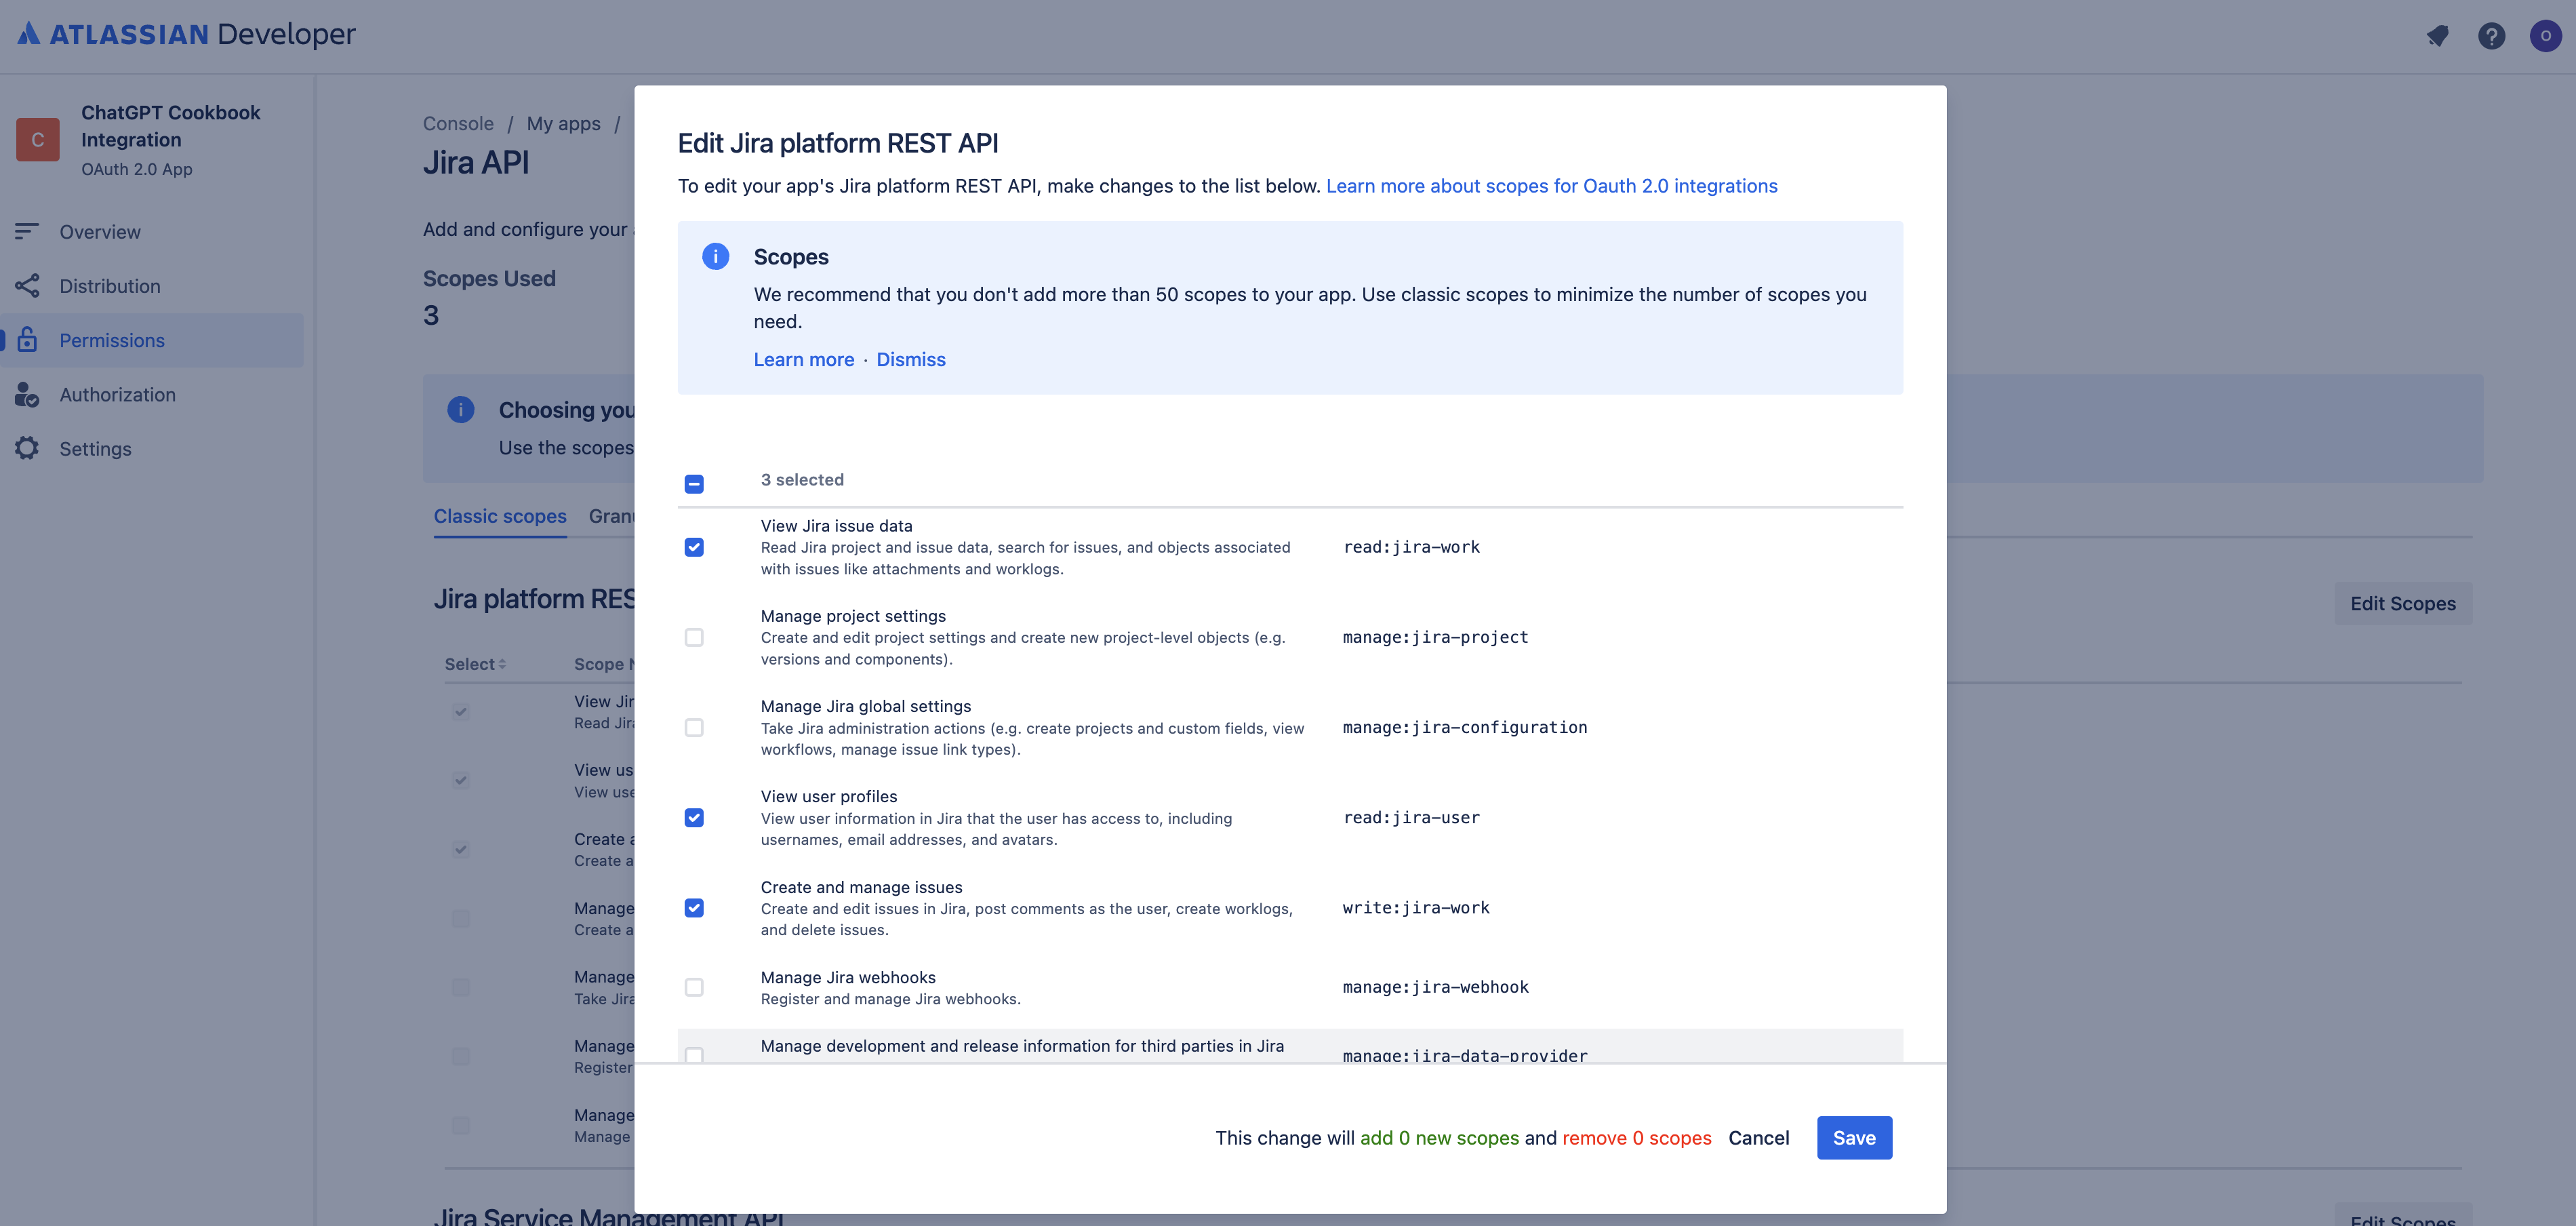
所需权限会根据GPT的预期功能而有所不同。在此场景中,我们希望读写Jira问题,因此点击编辑权限范围,在Jira平台REST API下选择以下范围:
- 读取:jira工作
- 编写:jira工作
- read:jira-user
选择后,点击保存
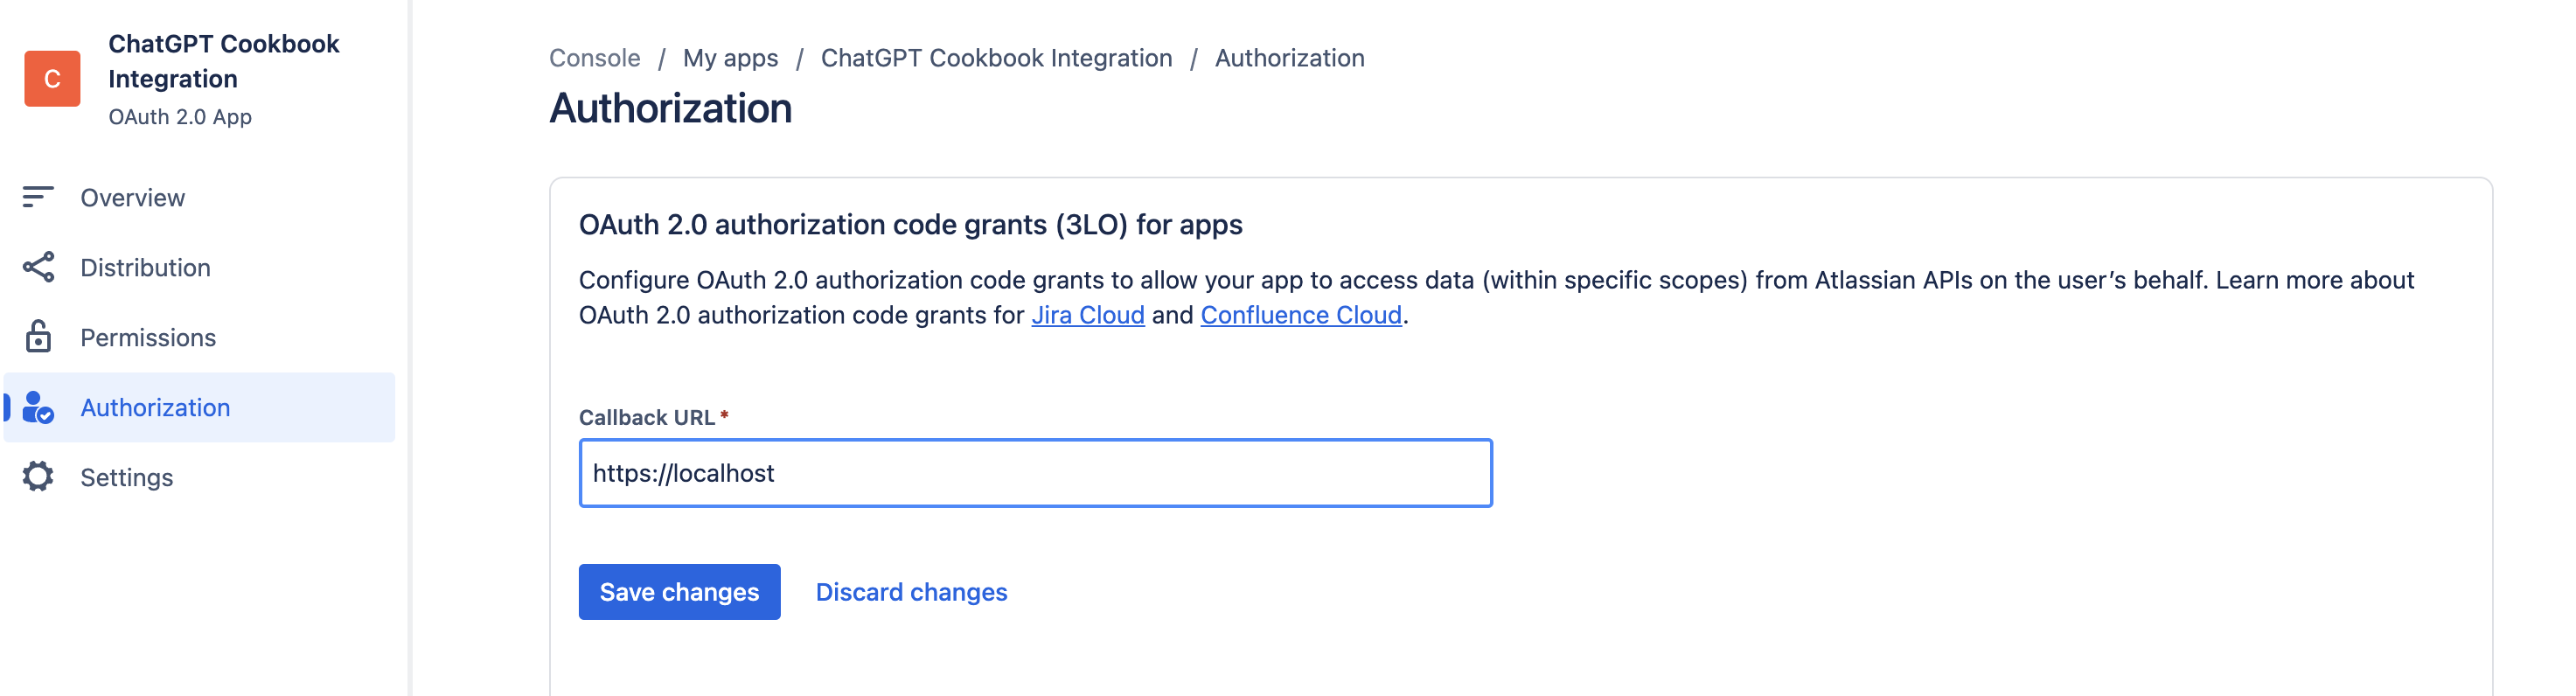
- 配置占位回调URL: 为了完成以下步骤并获取客户端ID和密钥以实现ChatGPT与Jira之间的安全认证,我们首先需要添加一个占位回调URL。我们可以通过点击侧边栏中的授权,然后点击OAuth 2.0 (3LO)旁边的配置来实现。在此处只需输入一个占位URL并点击保存更改。
-
应用客户端ID/密钥: 下一步是找到客户端ID和密钥,用于启用ChatGPT与Jira之间的安全认证。我们可以通过点击侧边栏中的设置并向下滚动到认证详情来找到这些值。
请保持此页面打开,因为在下一阶段的配置中我们将需要这些值!

在ChatGPT中
在ChatGPT中,点击"认证"并选择"OAuth"。输入以下信息。
- Client ID: Jira配置步骤3中的Client ID
- Client Secret: Jira配置步骤3中的密钥
- 授权URL: https://auth.atlassian.com/authorize
- 令牌URL: https://auth.atlassian.com/oauth/token
- 范围: read:jira-work write:jira-work read:jira-user
- 令牌交换方法: 默认 (POST 请求)
后续操作步骤
在ChatGPT中设置好身份验证后,按照应用程序中的以下步骤完成Action的最终设置。
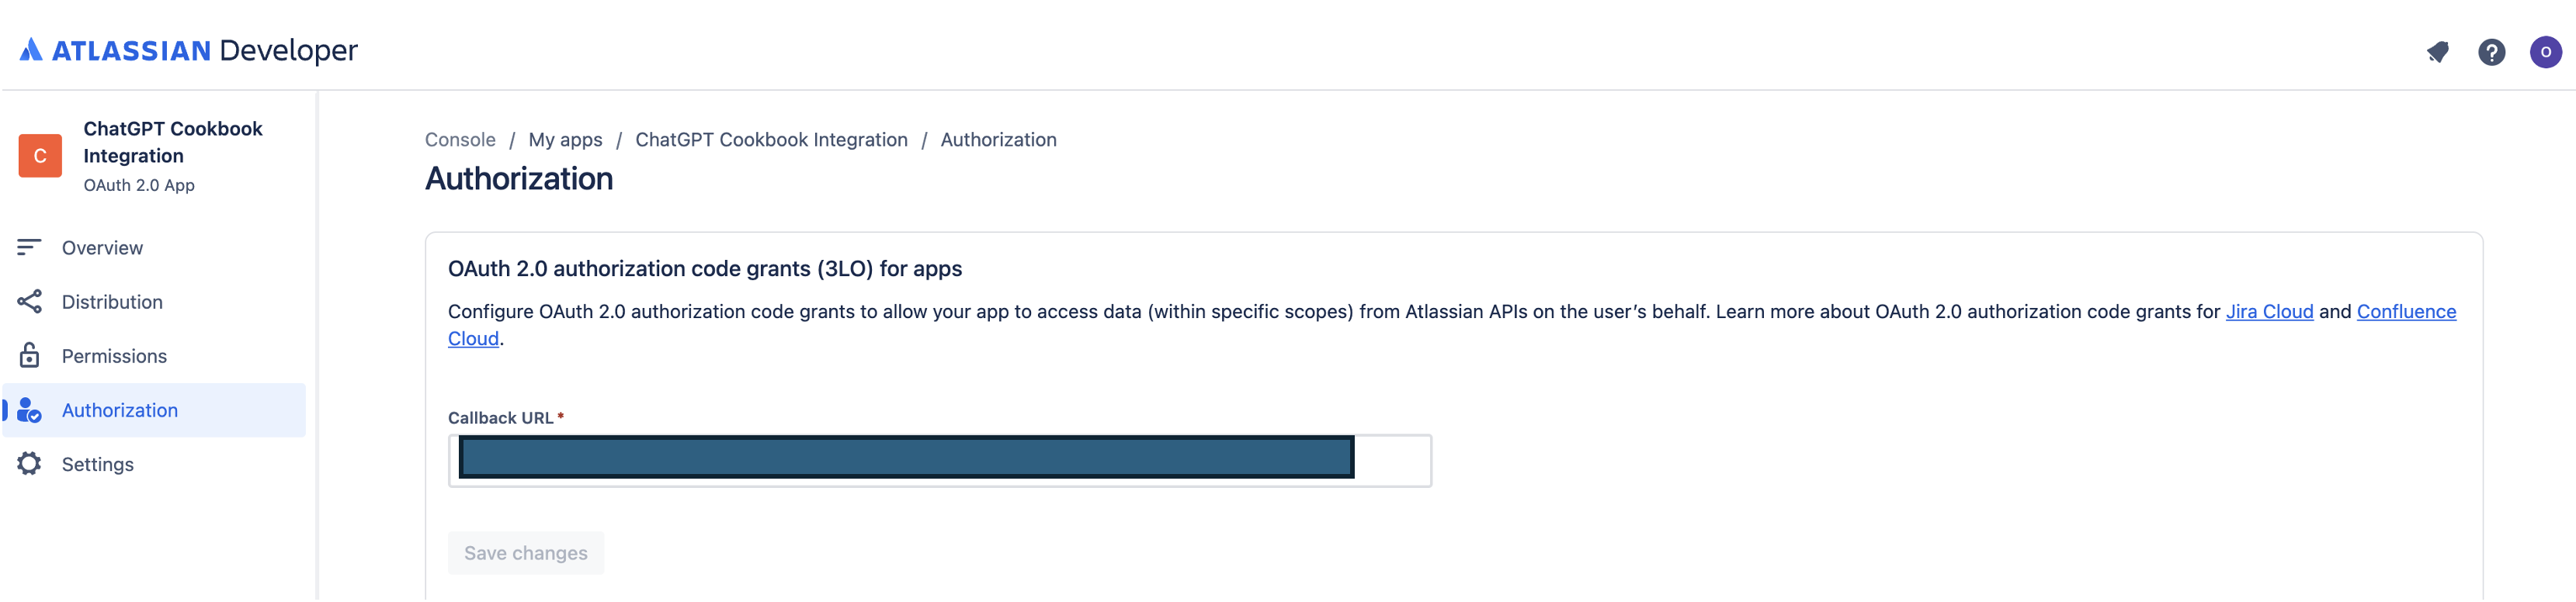
- 从GPT Action复制回调URL
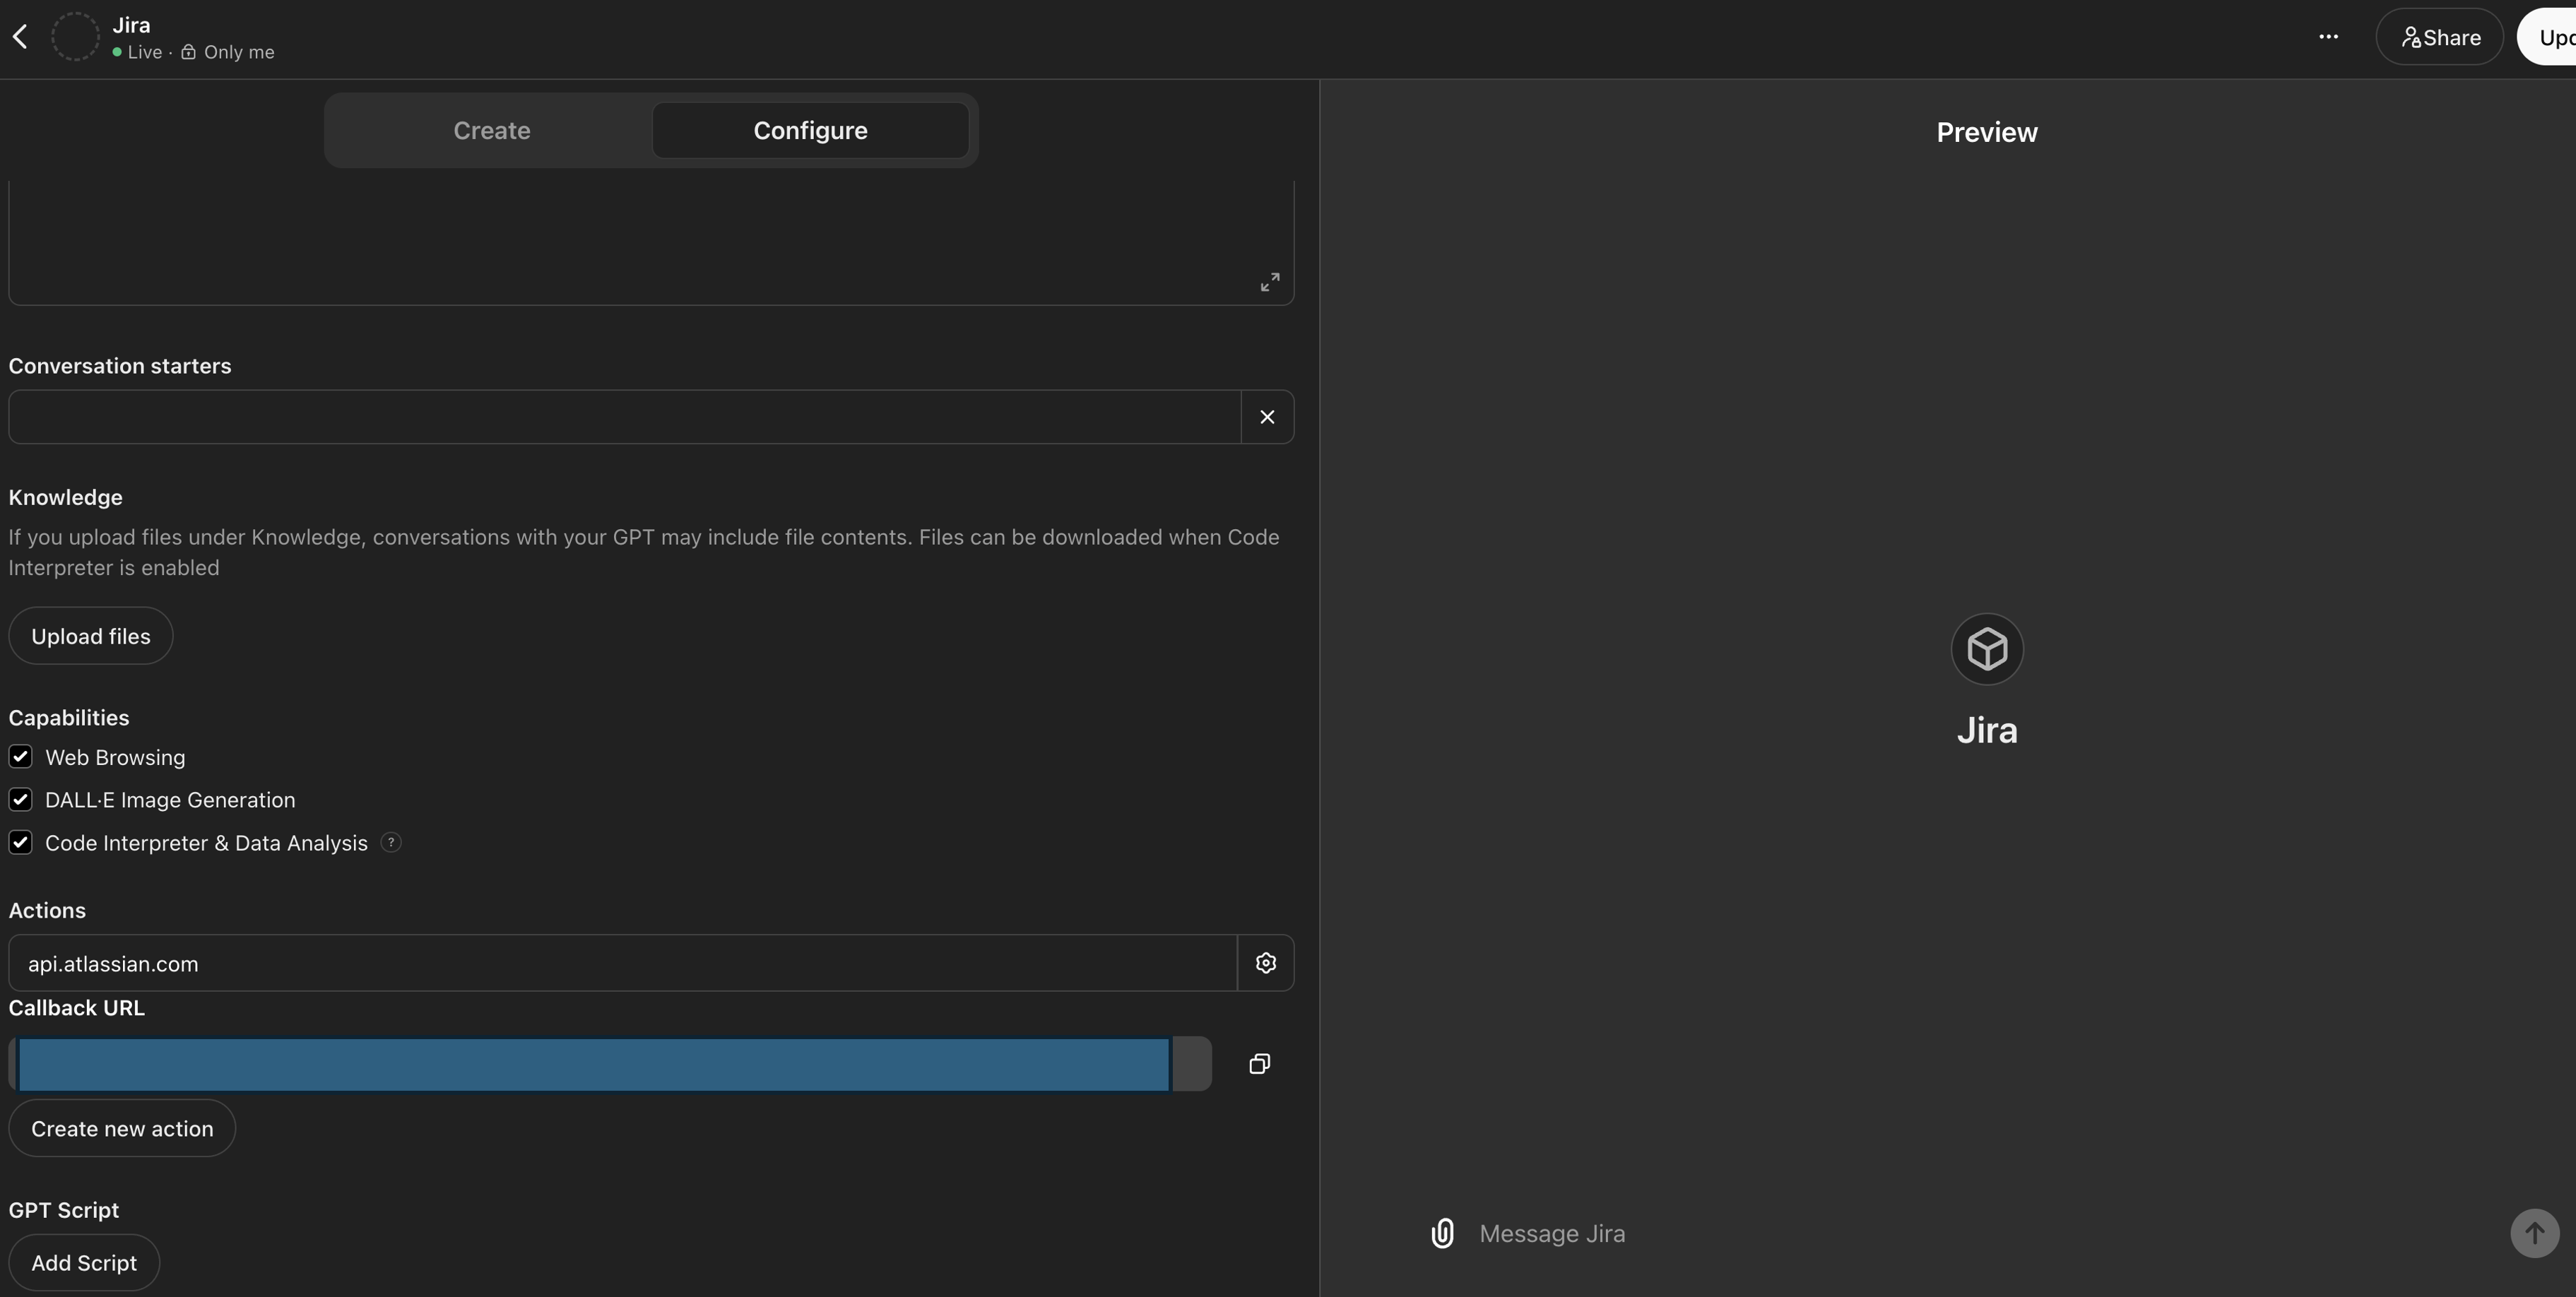
- 在Atlassian开发者控制台的应用中,导航至授权侧边栏选项卡,在OAuth 2.0 (3L0)旁边点击配置,并在回调URL下添加您的回调URL
常见问题与故障排除
- 回调URL错误: 如果在ChatGPT中遇到回调URL错误,请仔细检查回调URL值,因为该值可能会因认证设置的更改而发生变化
是否有您希望我们优先考虑的集成方案?我们的集成是否存在错误?请在GitHub上提交PR或问题,我们会尽快查看。