文本#
如何提取所有文档文本#
该脚本将获取一个文档文件名,并从其所有文本生成一个文本文件。
文档可以是任何 支持的类型。
该脚本作为命令行工具运行,期望将文档文件名作为参数提供。它在脚本目录中生成一个名为“filename.txt”的文本文件。页面的文本由换页符分隔:
import sys, pathlib, pymupdf
fname = sys.argv[1]  # get document filename
with pymupdf.open(fname) as doc:  # open document
    text = chr(12).join([page.get_text() for page in doc])
# write as a binary file to support non-ASCII characters
pathlib.Path(fname + ".txt").write_bytes(text.encode())
输出将是普通文本,因为它在文档中是编码的。没有努力以任何方式美化。特别是对于PDF,这可能意味着输出不符合通常的阅读顺序,意外的换行等。
您有许多选项可以纠正此问题 - 请参见章节 附录 2:关于嵌入文件的注意事项。其中包括:
提取HTML格式的文本并将其存储为HTML文档,以便可以在任何浏览器中查看。
通过 Page.get_text(“blocks”) 提取文本作为文本块列表。该列表的每个项目包含其文本的位置信息, 可以用于建立便利的阅读顺序。
通过 Page.get_text(“words”) 提取单词列表。它的项目是带有位置信息的单词。使用它来确定给定矩形内包含的文本 – 请参见下一节。
请参阅以下两个部分以获取示例和进一步的说明。
如何提取文本为Markdown#
这在RAG/LLM环境中特别有用 - 请参见以Markdown格式输出。
如何从页面中提取键值对#
如果一个页面的布局在某种意义上是“可预测的”,那么就有一种简单的方法可以快速轻松地找到给定关键词集的值——而无需使用正则表达式。请参见这个示例脚本。
在此上下文中,“可预测”意味着:
每个关键字后面都跟着它的值—中间没有其他文本。
值的边界框底部不高于关键字的边界框。
没有其他限制:页面布局可以是固定的,也可以不是,并且文本也可能作为一个字符串存储。键和值之间可以有任意距离。
例如,以下五个关键值对将被正确识别:
key1               value1
key2
value2
key3
       value3 blah, blah, blah key4 value4 some other text key5 value5 ...
如何从矩形中提取文本#
现在(v1.18.0)有多种方法可以实现这一点。因此我们在PyMuPDF-Utilities库中创建了一个folder,专门处理这个主题。
如何按自然阅读顺序提取文本#
提取PDF文本时常见的问题之一是,文本可能不会以任何特定的阅读顺序出现。
这由PDF创建者(软件或人类)负责。例如,页面标题可能在一个单独的步骤中插入——在文档生成之后。在这种情况下,标题文本将在页面文本提取的末尾出现(尽管它会被PDF查看器软件正确显示)。例如,以下代码片段将向现有PDF添加一些标题和页脚行:
doc = pymupdf.open("some.pdf")
header = "Header"  # text in header
footer = "Page %i of %i"  # text in footer
for page in doc:
    page.insert_text((50, 50), header)  # insert header
    page.insert_text(  # insert footer 50 points above page bottom
        (50, page.rect.height - 50),
        footer % (page.number + 1, doc.page_count),
    )
以这种方式修改的页面提取的文本序列将如下所示:
原始文本
标题行
底部行
PyMuPDF 有几种方法可以重新建立一些阅读顺序,甚至重新生成接近原始的布局:
使用
sort参数的Page.get_text()方法。它将从左上角到右下角对输出进行排序(对于 XHTML、HTML 和 XML 输出将被忽略)。在CLI中使用
pymupdf模块:python -m pymupdf gettext ...,它生成一个文本文件,其中的文本已按照保留布局的模式重新排列。许多选项可用于控制输出。
你也可以使用上面提到的 script 进行修改。
如何 从文档中提取表格内容#
如果您在文档中看到一个表格,通常并不是在查看像嵌入的Excel或其他可识别的对象。它通常只是普通的、标准的文本,格式化为表格数据的样子。
从这样的页面区域提取表格数据意味着您必须找到一种方法来识别表格区域(即其边界框),然后(1) 在图形上指示表格和列的边框,并(2) 然后根据这些信息提取文本。
这可能是一个非常复杂的任务,具体取决于是否存在线条、矩形或其他支持的矢量图形。
方法 Page.find_tables() 为您完成所有这些,具有高精度的表格检测。它的巨大优势在于没有外部库的依赖,也不需要使用人工智能或机器学习技术。它还提供了一个与著名的数据分析 Python 包 pandas 的集成接口。
请查看示例 Jupyter notebooks,它涵盖了标准情况,如在一页上多个表或跨多页连接表片段。
如何标记提取的文本#
有一个标准的搜索功能,可以在页面上搜索任意文本: Page.search_for()。它返回一个包含在发现位置周围的 Rect 对象的列表。这些矩形可以用于自动插入注释,以明显标记找到的文本。
这种方法有优缺点。优点包括:
搜索字符串可以包含空格并且可以跨行
大写或小写字母被视为相等
检测到行尾的单词连字符,并已解决
返回也可以是一个Quad对象的列表,以精确定位与任一轴不平行的文本 - 当页面旋转不为零时,使用Quad输出也是推荐的。
但是你也有其他选择:
import sys
import pymupdf

def mark_word(page, text):
    """Underline each word that contains 'text'.
    """
    found = 0
    wlist = page.get_text("words", delimiters=None)  # make the word list
    for w in wlist:  # scan through all words on page
        if text in w[4]:  # w[4] is the word's string
            found += 1  # count
            r = pymupdf.Rect(w[:4])  # make rect from word bbox
            page.add_underline_annot(r)  # underline
    return found

fname = sys.argv[1]  # filename
text = sys.argv[2]  # search string
doc = pymupdf.open(fname)

print("underlining words containing '%s' in document '%s'" % (word, doc.name))

new_doc = False  # indicator if anything found at all

for page in doc:  # scan through the pages
    found = mark_word(page, text)  # mark the page's words
    if found:  # if anything found ...
        new_doc = True
        print("found '%s' %i times on page %i" % (text, found, page.number + 1))

if new_doc:
    doc.save("marked-" + doc.name)
该脚本使用 Page.get_text("words") 来查找通过 cli 参数传入的字符串。该方法将页面的文本分隔为“单词”,并使用空格作为分隔符。更多说明:
如果找到,包含该字符串的完整单词将被标记(下划线) – 不仅仅是搜索字符串。
搜索字符串可能不包含单词分隔符。默认情况下,单词分隔符是空格和不换行空格
chr(0xA0)。如果您使用额外的分隔字符,例如page.get_text("words", delimiters="./,"),那么这些字符也不应包含在您的搜索字符串中。如图所示,大小写是 被尊重的。但是可以通过在函数 mark_word 中使用字符串方法 lower()(甚至正则表达式)来改变这一点。
没有上限:所有情况都将被检测到。
您可以使用 任何东西 来标记词语:‘下划线’,‘高亮’,‘删除线’或‘方框’注释等。
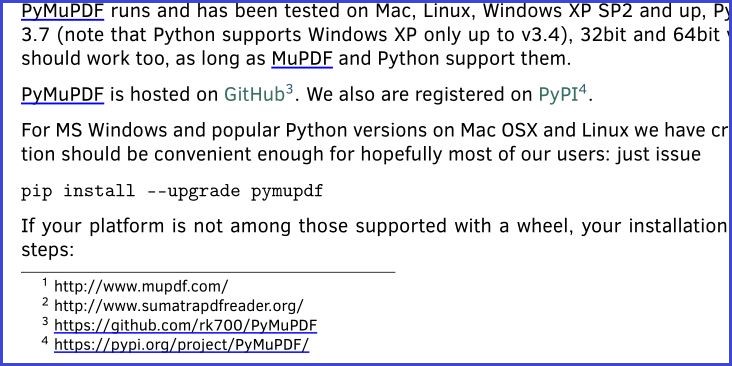
这是本手册页面的一个示例片段,其中“MuPDF”被用作搜索字符串。请注意,所有包含“MuPDF”的字符串均已完全下划线(不仅仅是搜索字符串)。
如何标记搜索的文本#
此脚本搜索文本并标记它:
# -*- coding: utf-8 -*-
import pymupdf
# the document to annotate
doc = pymupdf.open("tilted-text.pdf")
# the text to be marked
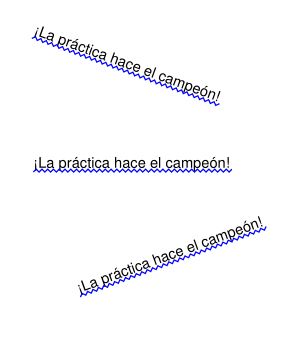
needle = "¡La práctica hace el campeón!"
# work with first page only
page = doc[0]
# get list of text locations
# we use "quads", not rectangles because text may be tilted!
rl = page.search_for(needle, quads=True)
# mark all found quads with one annotation
page.add_squiggly_annot(rl)
# save to a new PDF
doc.save("a-squiggly.pdf")
结果看起来是这样的:
如何标记非水平文本#
前面的部分已经展示了一个标记非水平文本的示例,这是通过文本 搜索 检测到的。
但是使用Page.get_text()的“dict” / “rawdict”选项进行提取文本时,可能会返回与x轴成非零角度的文本。这由行字典的"dir"键的值表示:这是该角度的元组(cosine, sine)。如果line["dir"] != (1, 0),那么其所有span的文本都将被旋转相同的角度!= 0。
然而,该方法返回的“bboxes”只是矩形——而不是四边形。因此,为了正确标记跨度文本,必须从行和跨度字典中恢复其四边形。可以使用以下实用函数(在v1.18.9中新添加)来执行此操作:
span_quad = pymupdf.recover_quad(line["dir"], span)
annot = page.add_highlight_annot(span_quad)  # this will mark the complete span text
如果你想要 标记完整行 或其某个部分的范围,可以使用以下代码片段(适用于 v1.18.10 或更高版本):
line_quad = pymupdf.recover_line_quad(line, spans=line["spans"][1:-1])
page.add_highlight_annot(line_quad)

上面的 spans 参数可以指定 line["spans"] 的任何子列表。在上面的例子中,第二个到倒数第二个的跨度被标记。如果省略,则取整个行。
如何分析字体特性#
要分析PDF中文本的特征,可以使用这个初步脚本作为起点:
import sys

import pymupdf


def flags_decomposer(flags):
    """Make font flags human readable."""
    l = []
    if flags & 2 ** 0:
        l.append("superscript")
    if flags & 2 ** 1:
        l.append("italic")
    if flags & 2 ** 2:
        l.append("serifed")
    else:
        l.append("sans")
    if flags & 2 ** 3:
        l.append("monospaced")
    else:
        l.append("proportional")
    if flags & 2 ** 4:
        l.append("bold")
    return ", ".join(l)


doc = pymupdf.open(sys.argv[1])
page = doc[0]

# read page text as a dictionary, suppressing extra spaces in CJK fonts
blocks = page.get_text("dict", flags=11)["blocks"]
for b in blocks:  # iterate through the text blocks
    for l in b["lines"]:  # iterate through the text lines
        for s in l["spans"]:  # iterate through the text spans
            print("")
            font_properties = "Font: '%s' (%s), size %g, color #%06x" % (
                s["font"],  # font name
                flags_decomposer(s["flags"]),  # readable font flags
                s["size"],  # font size
                s["color"],  # font color
            )
            print("Text: '%s'" % s["text"])  # simple print of text
            print(font_properties)
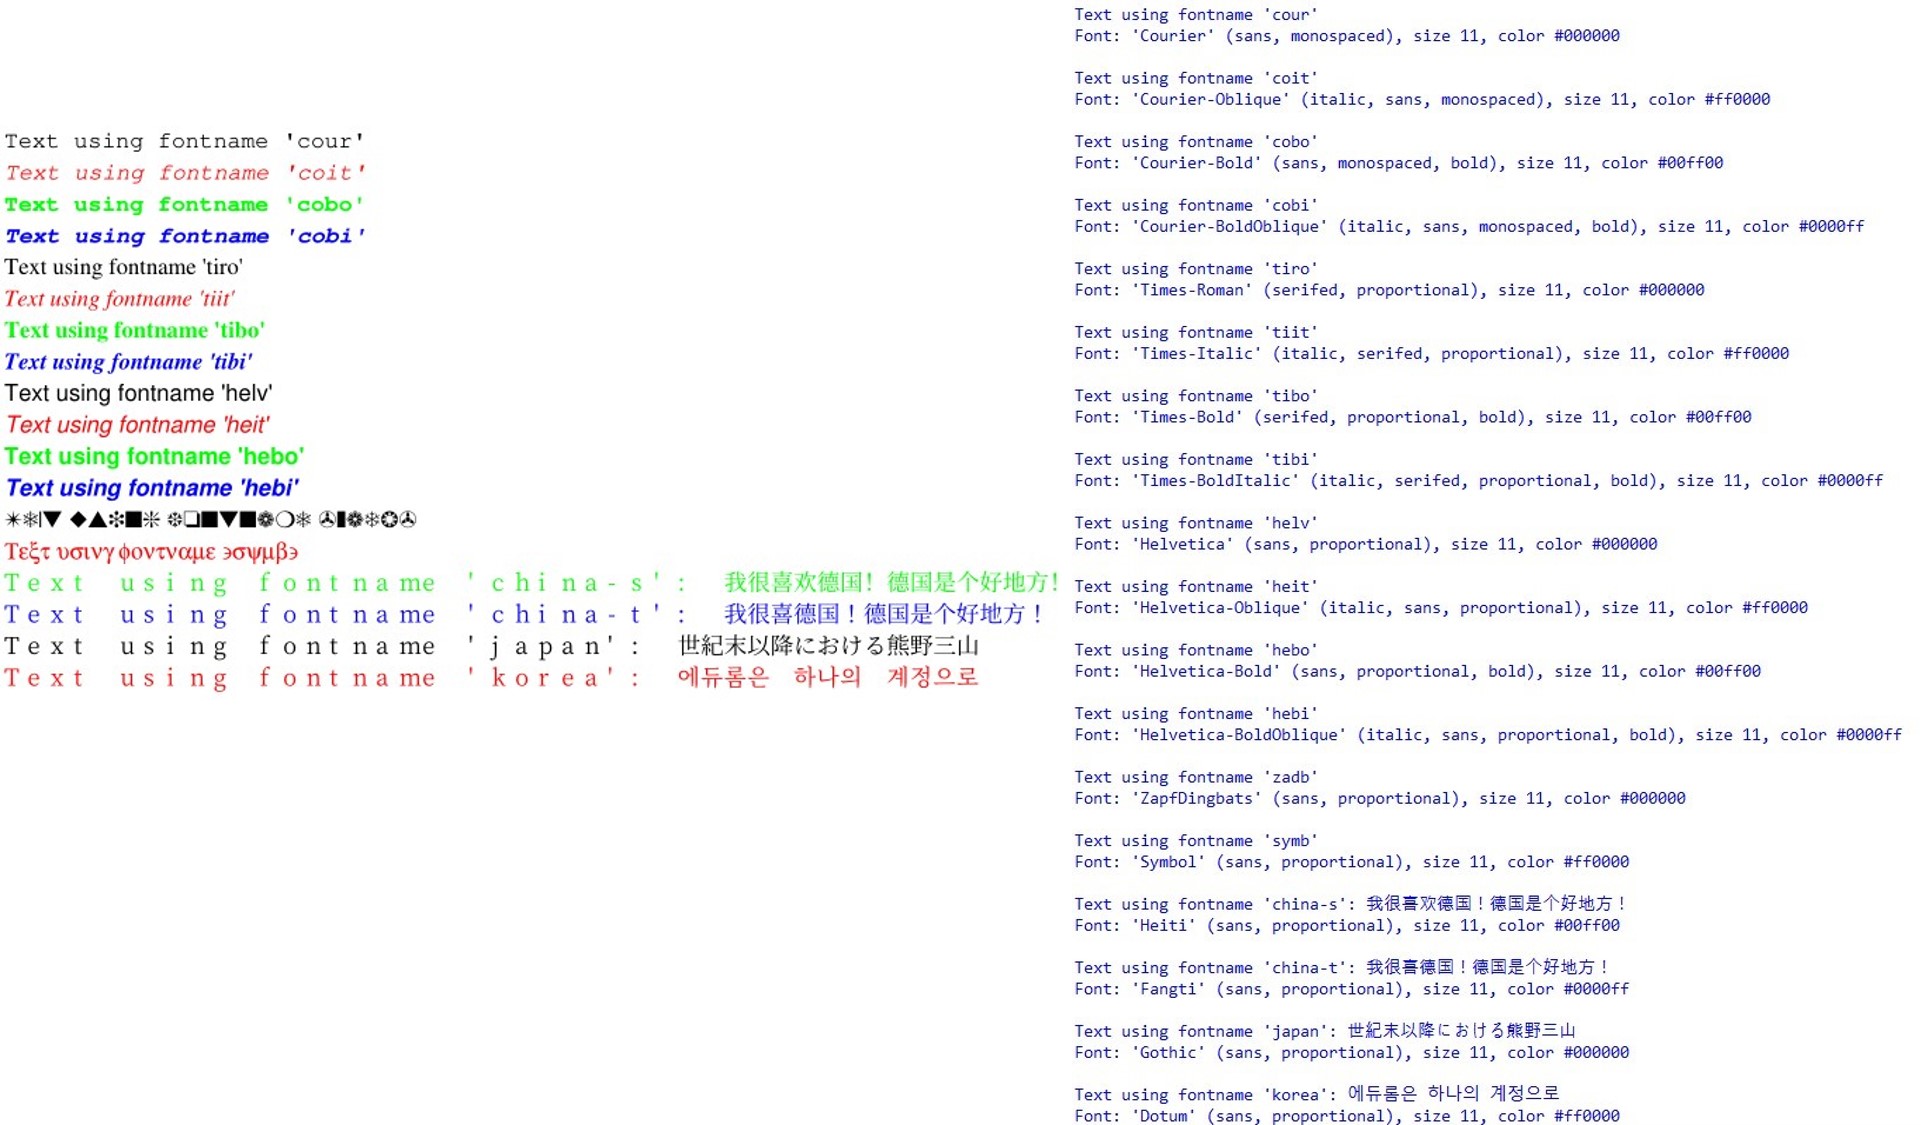
这里是PDF页面和脚本输出:
如何插入文本#
PyMuPDF 提供了在新建或现有 PDF 页面上插入文本的方法,具有以下功能:
选择字体,包括内置字体和可用作为文件的字体
选择文本特征,如粗体、斜体、字体大小、字体颜色等。
以多种方式定位文本:
要么作为从某个点开始的简单行导向输出,
或者将文本适配到提供的矩形框中,在这种情况下,文本对齐选项也可用,
选择文本是否应放在前景中(覆盖现有内容),
所有文本可以任意“变形”,即可以通过一个 矩阵 改变其外观,以实现缩放、剪切或镜像等效果,
独立于形态变化之外,文本还可以以90度的整数倍旋转。
以上所有内容由三种基本的 Page 和 Shape 方法提供:
Page.insert_font()– 为页面安装字体以便后续引用。结果在Document.get_page_fonts()的输出中反映。字体可以是:作为一个文件提供,
通过 Font (然后使用
Font.buffer)已经在这个或其他 PDF 文件中存在,或者
成为一个 内置的 字体。
Page.insert_text()– 写入一些文本行。内部使用的是Shape.insert_text()。Page.insert_textbox()– 在给定的矩形中适合文本。您可以选择文本对齐功能(左对齐、右对齐、居中对齐、两端对齐),并且您可以控制文本是否真正适合。内部使用Shape.insert_textbox()。
注意
两种文本插入方法会根据需要自动安装字体。
如何书写文本行#
在页面上输出一些文本行:
import pymupdf
doc = pymupdf.open(...)  # new or existing PDF
page = doc.new_page()  # new or existing page via doc[n]
p = pymupdf.Point(50, 72)  # start point of 1st line

text = "Some text,\nspread across\nseveral lines."
# the same result is achievable by
# text = ["Some text", "spread across", "several lines."]

rc = page.insert_text(p,  # bottom-left of 1st char
                     text,  # the text (honors '\n')
                     fontname = "helv",  # the default font
                     fontsize = 11,  # the default font size
                     rotate = 0,  # also available: 90, 180, 270
                     )
print("%i lines printed on page %i." % (rc, page.number))

doc.save("text.pdf")
通过这种方法,只有行数将被控制在页面高度之内。多余的行将不会被写入,返回的将是实际的行数。计算使用从fontsize和36个点(0.5英寸)作为底部边距计算得出的行高。
行 宽度被忽略。线条的多余部分将简单地不可见。
然而,对于内置字体,有方法可以提前计算行宽 - 请参见 get_text_length()。
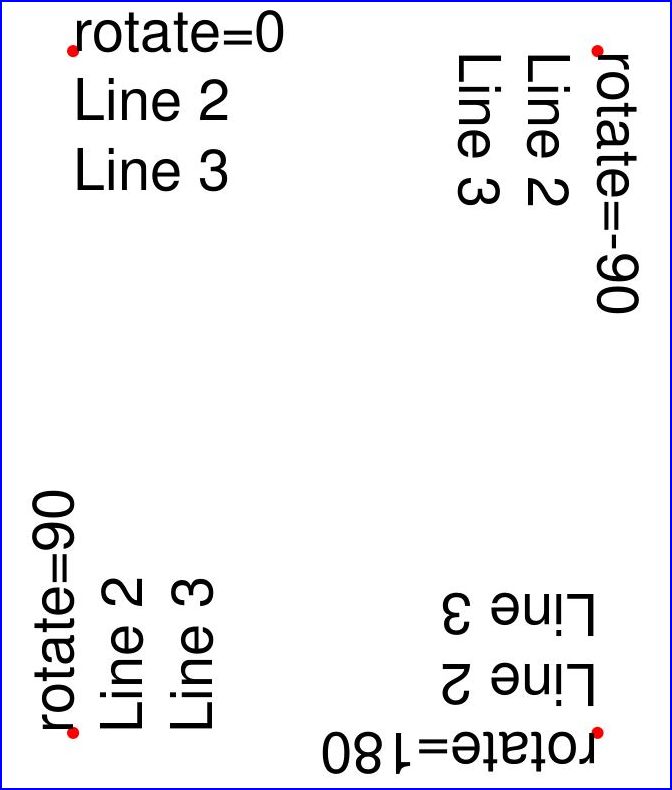
这是另一个例子。它使用四个不同的旋转选项插入4个文本字符串,从而解释了如何选择文本插入点以实现预期结果:
import pymupdf
doc = pymupdf.open()
page = doc.new_page()
# the text strings, each having 3 lines
text1 = "rotate=0\nLine 2\nLine 3"
text2 = "rotate=90\nLine 2\nLine 3"
text3 = "rotate=-90\nLine 2\nLine 3"
text4 = "rotate=180\nLine 2\nLine 3"
red = (1, 0, 0) # the color for the red dots
# the insertion points, each with a 25 pix distance from the corners
p1 = pymupdf.Point(25, 25)
p2 = pymupdf.Point(page.rect.width - 25, 25)
p3 = pymupdf.Point(25, page.rect.height - 25)
p4 = pymupdf.Point(page.rect.width - 25, page.rect.height - 25)
# create a Shape to draw on
shape = page.new_shape()

# draw the insertion points as red, filled dots
shape.draw_circle(p1,1)
shape.draw_circle(p2,1)
shape.draw_circle(p3,1)
shape.draw_circle(p4,1)
shape.finish(width=0.3, color=red, fill=red)

# insert the text strings
shape.insert_text(p1, text1)
shape.insert_text(p3, text2, rotate=90)
shape.insert_text(p2, text3, rotate=-90)
shape.insert_text(p4, text4, rotate=180)

# store our work to the page
shape.commit()
doc.save(...)
这是结果:
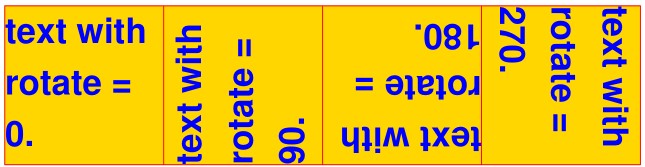
如何填写文本框#
这个脚本用文本填充四个不同的矩形,每次选择一个不同的旋转值:
import pymupdf

doc = pymupdf.open()  # new or existing PDF
page = doc.new_page()  # new page, or choose doc[n]

# write in this overall area
rect = pymupdf.Rect(100, 100, 300, 150)

# partition the area in 4 equal sub-rectangles
CELLS = pymupdf.make_table(rect, cols=4, rows=1)

t1 = "text with rotate = 0."  # these texts we will written
t2 = "text with rotate = 90."
t3 = "text with rotate = 180."
t4 = "text with rotate = 270."
text = [t1, t2, t3, t4]
red = pymupdf.pdfcolor["red"]  # some colors
gold = pymupdf.pdfcolor["gold"]
blue = pymupdf.pdfcolor["blue"]
"""
We use a Shape object (something like a canvas) to output the text and
the rectangles surrounding it for demonstration.
"""
shape = page.new_shape()  # create Shape
for i in range(len(CELLS[0])):
    shape.draw_rect(CELLS[0][i])  # draw rectangle
    shape.insert_textbox(
        CELLS[0][i], text[i], fontname="hebo", color=blue, rotate=90 * i
    )

shape.finish(width=0.3, color=red, fill=gold)

shape.commit()  # write all stuff to the page
doc.ez_save(__file__.replace(".py", ".pdf"))
上面使用了一些默认值:字体大小 11 和文本对齐 “左”。结果将看起来像这样:
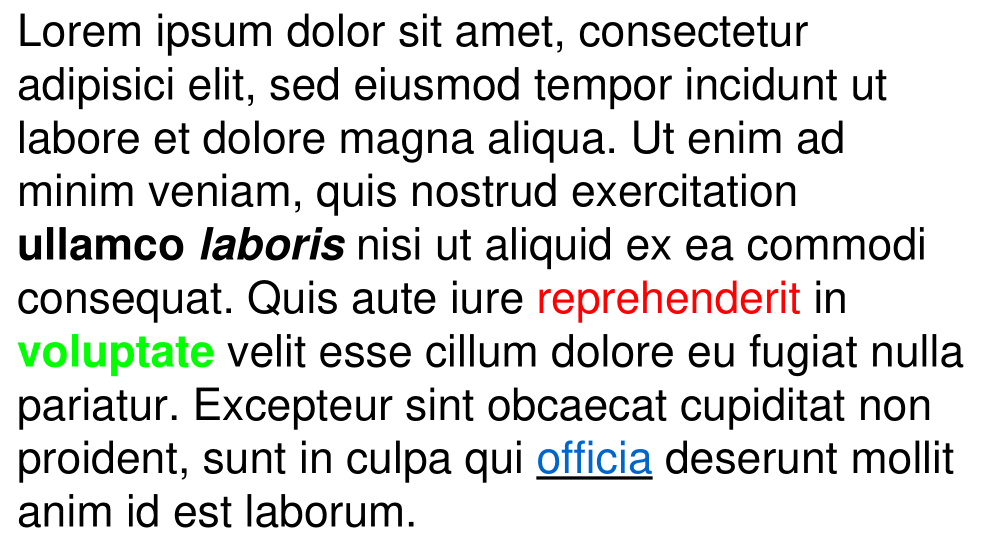
如何用HTML文本填充一个框#
方法 Page.insert_htmlbox() 提供了一种 更强大 的方式来在矩形中插入文本。
此方法接受HTML源,而不是简单的纯文本,HTML源不仅可以包含HTML标签,还可以包含影响字体、字体粗细(粗体)和样式(斜体)、颜色等的样式指令和更多内容。
还可以混合多种字体和语言,输出HTML表格并插入图像和URI链接。
为了更大的样式灵活性,还可以提供额外的CSS源。
该方法基于Story类。因此,复杂的文字系统如天城文、尼泊尔文、泰米尔文等得到了支持,并且得益于使用HarfBuzz库,能够正确书写——该库提供了所谓的“文本排版”功能。
任何必须的字体以输出字符会自动从Google NOTO字体库中拉取 - 作为备选(当可选提供的用户字体未包含某些字形时)。
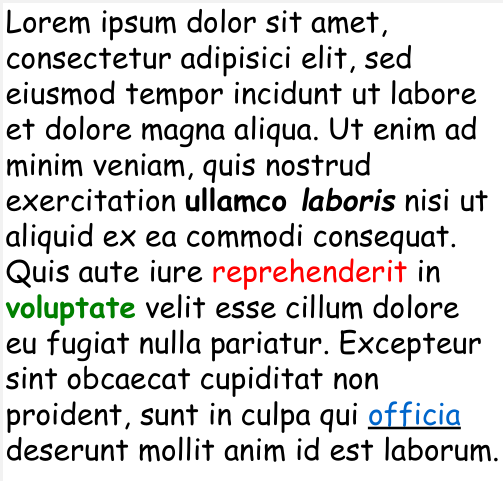
作为这里提供功能的一个小概览,我们将输出以下丰富HTML的文本:
import pymupdf


rect = pymupdf.Rect(100, 100, 400, 300)

text = """Lorem ipsum dolor sit amet, consectetur adipisici elit, sed
    eiusmod tempor incidunt ut labore et dolore magna aliqua. Ut enim ad
    minim veniam, quis nostrud exercitation <b>ullamco <i>laboris</i></b>
    nisi ut aliquid ex ea commodi consequat. Quis aute iure
    <span style="color: #f00;">reprehenderit</span>
    in <span style="color: #0f0;font-weight:bold;">voluptate</span> velit
    esse cillum dolore eu fugiat nulla pariatur. Excepteur sint obcaecat
    cupiditat non proident, sunt in culpa qui
    <a href="https://www.artifex.com">officia</a> deserunt mollit anim id
    est laborum."""

doc = pymupdf.Document()

page = doc.new_page()
page.insert_htmlbox(rect, text, css="* {font-family: sans-serif;font-size:14px;}")

doc.ez_save(__file__.replace(".py", ".pdf"))
请注意“css”参数是如何用于全局选择默认的“sans-serif”字体和14的字体大小。
结果将如下所示:
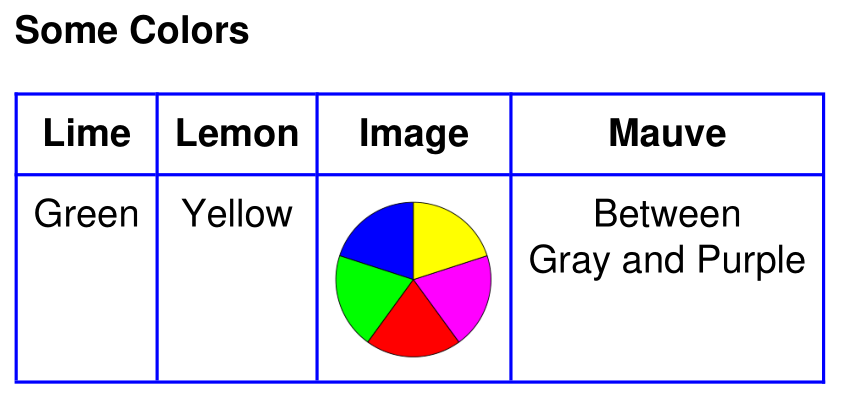
如何输出HTML表格和图片#
这是另一个使用此方法输出表格的示例。这次,我们将所有样式都包含在HTML源代码中。请注意,如何在表格单元格内包含图像:
import pymupdf
import os

filedir = os.path.dirname(__file__)


text = """
<style>
body {
    font-family: sans-serif;
}

td,
th {
    border: 1px solid blue;
    border-right: none;
    border-bottom: none;
    padding: 5px;
    text-align: center;
}

table {
    border-right: 1px solid blue;
    border-bottom: 1px solid blue;
    border-spacing: 0;
}
</style>

<body>
<p><b>Some Colors</b></p>
<table>
    <tr>
    <th>Lime</th>
    <th>Lemon</th>
    <th>Image</th>
    <th>Mauve</th>
    </tr>
    <tr>
    <td>Green</td>
    <td>Yellow</td>
    <td><img src="img-cake.png" width=50></td>
    <td>Between<br>Gray and Purple</td>
    </tr>
</table>
</body>
"""

doc = pymupdf.Document()

page = doc.new_page()
rect = page.rect + (36, 36, -36, -36)

# we must specify an Archive because of the image
page.insert_htmlbox(rect, text, archive=pymupdf.Archive("."))

doc.ez_save(__file__.replace(".py", ".pdf"))
结果将如下所示:
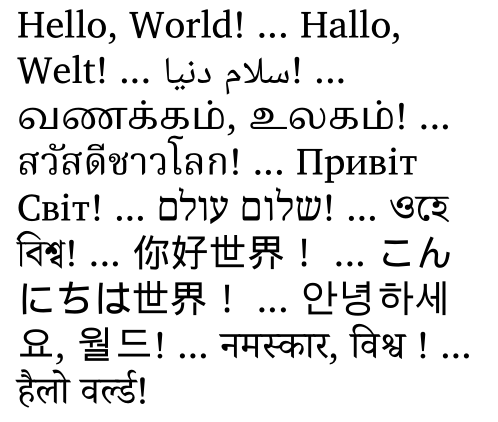
如何输出世界语言#
我们的第三个例子将演示自动多语言支持。它包括对复杂脚本系统如天城文和从右到左语言的自动文本排版:
import pymupdf

greetings = (
    "Hello, World!",  # english
    "Hallo, Welt!",  # german
    "سلام دنیا!",  # persian
    "வணக்கம், உலகம்!",  # tamil
    "สวัสดีชาวโลก!",  # thai
    "Привіт Світ!",  # ucranian
    "שלום עולם!",  # hebrew
    "ওহে বিশ্ব!",  # bengali
    "你好世界!",  # chinese
    "こんにちは世界!",  # japanese
    "안녕하세요, 월드!",  # korean
    "नमस्कार, विश्व !",  # sanskrit
    "हैलो वर्ल्ड!",  # hindi
)
doc = pymupdf.open()
page = doc.new_page()
rect = (50, 50, 200, 500)

# join greetings into one text string
text = " ... ".join([t for t in greetings])

# the output of the above is simple:
page.insert_htmlbox(rect, text)
doc.save(__file__.replace(".py", ".pdf"))
这就是输出:
如何指定您自己的字体#
使用@font-face语句在CSS语法中定义您的字体文件。对于您希望支持的每种字体粗细和字体样式组合(例如,粗体或斜体),您需要一个单独的@font-face。以下示例使用著名的MS Comic Sans字体及其四种变体:常规、粗体、斜体和粗斜体。
由于这四个字体文件位于系统的文件夹 C:/Windows/Fonts,因此该方法需要一个 Archive 定义,指向该文件夹:
"""
How to use your own fonts with method Page.insert_htmlbox().
"""
import pymupdf

# Example text
text = """Lorem ipsum dolor sit amet, consectetur adipisici elit, sed
    eiusmod tempor incidunt ut labore et dolore magna aliqua. Ut enim ad
    minim veniam, quis nostrud exercitation <b>ullamco <i>laboris</i></b>
    nisi ut aliquid ex ea commodi consequat. Quis aute iure
    <span style="color: red;">reprehenderit</span>
    in <span style="color: green;font-weight:bold;">voluptate</span> velit
    esse cillum dolore eu fugiat nulla pariatur. Excepteur sint obcaecat
    cupiditat non proident, sunt in culpa qui
    <a href="https://www.artifex.com">officia</a> deserunt mollit anim id
    est laborum."""

"""
We need an Archive object to show where font files are located.
We intend to use the font family "MS Comic Sans".
"""
arch = pymupdf.Archive("C:/Windows/Fonts")

# These statements define which font file to use for regular, bold,
# italic and bold-italic text.
# We assign an arbitrary common font-family for all 4 font files.
# The Story algorithm will select the right file as required.
# We request to use "comic" throughout the text.
css = """
@font-face {font-family: comic; src: url(comic.ttf);}
@font-face {font-family: comic; src: url(comicbd.ttf);font-weight: bold;}
@font-face {font-family: comic; src: url(comicz.ttf);font-weight: bold;font-style: italic;}
@font-face {font-family: comic; src: url(comici.ttf);font-style: italic;}
* {font-family: comic;}
"""

doc = pymupdf.Document()
page = doc.new_page(width=150, height=150)  # make small page

page.insert_htmlbox(page.rect, text, css=css, archive=arch)

doc.subset_fonts(verbose=True)  # build subset fonts to reduce file size
doc.ez_save(__file__.replace(".py", ".pdf"))
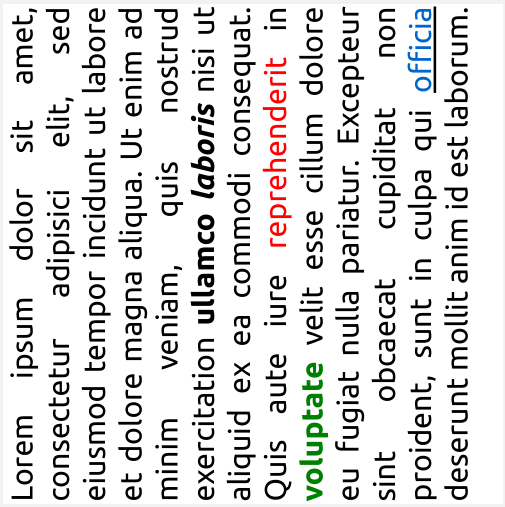
如何请求文本对齐#
此示例结合了多个要求:
将文本逆时针旋转90度。
使用来自包 pymupdf-fonts 的字体。你会发现相应的CSS定义在这种情况下简单得多。
使用“对齐”选项来对齐文本。
"""
How to use a pymupdf font with method Page.insert_htmlbox().
"""
import pymupdf

# Example text
text = """Lorem ipsum dolor sit amet, consectetur adipisici elit, sed
    eiusmod tempor incidunt ut labore et dolore magna aliqua. Ut enim ad
    minim veniam, quis nostrud exercitation <b>ullamco <i>laboris</i></b>
    nisi ut aliquid ex ea commodi consequat. Quis aute iure
    <span style="color: red;">reprehenderit</span>
    in <span style="color: green;font-weight:bold;">voluptate</span> velit
    esse cillum dolore eu fugiat nulla pariatur. Excepteur sint obcaecat
    cupiditat non proident, sunt in culpa qui
    <a href="https://www.artifex.com">officia</a> deserunt mollit anim id
    est laborum."""

"""
This is similar to font file support. However, we can use a convenience
function for creating required CSS definitions.
We still need an Archive for finding the font binaries.
"""
arch = pymupdf.Archive()

# We request to use "myfont" throughout the text.
css = pymupdf.css_for_pymupdf_font("ubuntu", archive=arch, name="myfont")
css += "* {font-family: myfont;text-align: justify;}"

doc = pymupdf.Document()

page = doc.new_page(width=150, height=150)

page.insert_htmlbox(page.rect, text, css=css, archive=arch, rotate=90)

doc.subset_fonts(verbose=True)
doc.ez_save(__file__.replace(".py", ".pdf"))
如何提取带颜色的文本#
遍历您的文本块,找到您需要的信息的文本范围。
for page in doc:
    text_blocks = page.get_text("dict", flags=pymupdf.TEXTFLAGS_TEXT)["blocks"]
    for block in text_blocks:
        for line in block["lines"]:
            for span in line["spans"]:
                text = span["text"]
                color = pymupdf.sRGB_to_rgb(span["color"])
                print(f"Text: {text}, Color: {color}")