
问答#
AdalFlow 在一个统一的框架内提供了高效且高性能的提示优化。
这将是我们关于使用AdalFlow进行端到端任务管道优化的第一个教程。
概述#
在本教程中,我们将构建并优化一个问答任务管道。 具体来说,任务是计算对象的总数。 以下是数据集中的一个示例:
question = "I have a flute, a piano, a trombone, four stoves, a violin, an accordion, a clarinet, a drum, two lamps, and a trumpet. How many musical instruments do I have?"
LLM 必须理解要计数的对象类型并提供正确的答案。
为了优化,我们将展示使用文本梯度的指令/提示优化[1]和少量样本上下文学习(ICL)[2]。
指令/提示优化
我们特别想看看优化器在良好和不良的起始提示下的表现如何。
使用一个表现不佳的初始提示,我们的零样本优化器可以在验证集和测试集上达到90%的准确率,分别提高了36%和25%。 它在5步内收敛,每批仅包含4个样本。
方法 |
训练 |
验证 |
测试 |
|---|---|---|---|
开始(手动提示) |
不适用(50个样本) |
0.54(50个样本) |
0.65(100个样本) |
优化的零样本 |
N/A |
0.9 (+36%) |
0.9 (+25%) |
方法 |
提示 |
|---|---|
手册 |
你将回答一个推理问题。你回应的最后一行应遵循以下格式:‘答案: $VALUE’,其中VALUE是一个数值。 |
优化(零样本)(验证集90%,测试集90%) |
你将通过详细和仔细地计数每个项目来回答一个推理问题。确保没有项目,特别是那些复数形式的项目,被错误计数。你回答的最后一行应格式化为:‘答案:$VALUE’,其中VALUE是一个数值。 |
我们还将展示如何优化一个已经表现良好的任务管道(约90%的准确率)以获得更好的结果——这一过程在手动提示优化中会非常具有挑战性。
方法 |
训练 |
验证 |
测试 |
|---|---|---|---|
开始(手动提示) |
0.88(50个样本) |
0.90(50个样本) |
0.87(100个样本) |
优化的零样本 |
N/A |
0.98 (+8%) |
0.91 (+4%) |
方法 |
提示 |
|---|---|
手册 |
你将回答一个推理问题。请逐步思考。你回答的最后一行应遵循以下格式:‘答案: $VALUE’,其中VALUE是一个数值。 |
优化(零样本)(验证集92%,测试集91%) |
你将回答一个推理问题。请逐步思考,并确保将任何用文字书写的数字转换为数字。仔细检查你的计算。你回答的最后一行应遵循以下格式:‘答案:$VALUE’,其中VALUE是一个数值。 |
优化(加上自己生成的示例)(验证集上98%,测试集上91%) |
你将回答一个推理问题。逐步思考并仔细检查你做的每一个计算。特别注意文本中的任何数字量,将书写的数字转换为它们的数值等价物。此外,在得出结论之前重新验证你的最终答案。你回答的最后一行应该是以下格式:‘答案:$VALUE’,其中VALUE是一个数值。以下是一些示例:1. 我有一个长笛、一架钢琴、一个长号、四个炉子、一把小提琴、一个手风琴、一个单簧管、一个鼓、两盏灯和一个喇叭。我有多少件乐器?答案:8 |
Bootstrap 少样本学习
我们仅使用一次引导样本,仅通过教师模型响应的演示,就在测试集上实现了94%的准确率,超越了所有现有库的性能。
以下是教师模型展示的一个推理示例:
"Example: 'Let''s count the fruits one by one:\n\n\n 1. Orange: 1\n\n 2. Strawberries: 3\n\n 3. Apple: 1\n\n 4. Bananas: 3\n\n 5. Raspberries: 3\n\n 6. Peach: 1\n\n 7. Blackberry: 1\n\n 8. Grape: 1\n\n 9. Plum: 1\n\n 10. Nectarines: 2\n\n\n Now, we sum them up:\n\n \\[ 1 + 3 + 1 + 3 + 3 + 1 + 1 + 1 + 1 + 2 = 17 \\]\n\n\n Answer: 17'",
总体
方法 |
测试 |
|---|---|
文本渐变(开始) |
0.72 |
文本梯度(优化) |
0.89 |
AdalFlow (开始) |
0.87 |
AdalFlow(文本梯度优化) |
0.91 |
AdalFlow(“学习推理”一次性) |
0.94 |
现在,让我们一起开始如何实现和达成上述结果。
构建任务管道#
正如我们可以利用优化器自动优化我们的任务管道,我们提供了一种快速构建它的方法。 我们将指示LLM以思维链的形式响应,并以格式Answer: $VALUE结束响应。我们将使用以下代码来处理它:
import adalflow as adal
import re

@adal.fun_to_component
def parse_integer_answer(answer: str):
    """A function that parses the last integer from a string using regular expressions."""
    try:
        # Use regular expression to find all sequences of digits
        numbers = re.findall(r"\d+", answer)
        if numbers:
            # Get the last number found
            answer = int(numbers[-1])
        else:
            answer = -1
    except ValueError:
        answer = -1

    return answer
adal.fun_to_component 是一个装饰器,它将函数转换为组件,以便我们可以将其作为输出处理器传递给生成器。
对于这个任务,我们将使用一个简单的模板,它接受三个参数:system_prompt、few_shot_demos 和 input_str。
few_shot_template = r"""<START_OF_SYSTEM_PROMPT>
{{system_prompt}}
{# Few shot demos #}
{% if few_shot_demos is not none %}
Here are some examples:
{{few_shot_demos}}
{% endif %}
<END_OF_SYSTEM_PROMPT>
<START_OF_USER>
{{input_str}}
<END_OF_USER>
"""
我们将创建两个参数来训练模型:system_prompt 和 few_shot_demos。
我们将使用 role_desc 和 requires_opt 初始化 Parameter,以通知 backward_engine(用于反馈/文本梯度)和优化器该参数的用途。
此外,我们需要将 param_type 设置为 ParameterType.PROMPT 和 ParameterType.DEMOS,以便我们的训练器可以配置适当的优化器来优化这些参数。
这是我们的任务流程:
from typing import Dict, Union
import adalflow as adal


class ObjectCountTaskPipeline(adal.Component):
    def __init__(self, model_client: adal.ModelClient, model_kwargs: Dict):
        super().__init__()

        system_prompt = adal.Parameter(
            data="You will answer a reasoning question. Think step by step. The last line of your response should be of the following format: 'Answer: $VALUE' where VALUE is a numerical value.",
            role_desc="To give task instruction to the language model in the system prompt",
            requires_opt=True,
            param_type=ParameterType.PROMPT,
        )
        few_shot_demos = adal.Parameter(
            data=None,
            role_desc="To provide few shot demos to the language model",
            requires_opt=True,
            param_type=ParameterType.DEMOS,
        )

        self.llm_counter = adal.Generator(
            model_client=model_client,
            model_kwargs=model_kwargs,
            template=few_shot_template,
            prompt_kwargs={
                "system_prompt": system_prompt,
                "few_shot_demos": few_shot_demos,
            },
            output_processors=parse_integer_answer,
            use_cache=True,
        )

    def call(
        self, question: str, id: str = None
    ) -> Union[adal.GeneratorOutput, adal.Parameter]:
        output = self.llm_counter(prompt_kwargs={"input_str": question}, id=id)
        return output
以下是需要记住的几点:
我们的任务管道在评估和训练模式下运行。默认情况下,它将在评估模式下运行,并输出一个
GeneratorOutput对象。 在训练模式下,它将输出一个Parameter对象,其中数据属性包含来自GeneratorOutput的原始输出。 整个GeneratorOutput对象将保存在full_response属性中,以便稍后用于评估。 为了指定应将哪个输入传递给评估函数,我们将其分配给eval_input属性。如果我们想使用少样本上下文学习进行训练,我们需要为我们的LLM调用分配一个
id。这个id将用于自动追踪少样本示例。
现在,让我们将gpt-3.5-turbo模型传递到我们的任务管道中,并测试训练和评估模式。
from adalflow.components.model_client.openai_client import OpenAIClient

adal.setup_env()

gpt_3_model = {
    "model_client": OpenAIClient(),
    "model_kwargs": {
        "model": "gpt-3.5-turbo",
        "max_tokens": 2000,
        "temperature": 0.0,
        "top_p": 0.99,
        "frequency_penalty": 0,
        "presence_penalty": 0,
        "stop": None,
    },
}
以下是测试任务管道的代码:
question = "I have a flute, a piano, a trombone, four stoves, a violin, an accordion, a clarinet, a drum, two lamps, and a trumpet. How many musical instruments do I have?"
task_pipeline = ObjectCountTaskPipeline(**gpt_3_model)
print(task_pipeline)

answer = task_pipeline(question)
print(answer)

# set it to train mode
task_pipeline.train()
answer = task_pipeline(question, id="1")
print(answer)
print(f"full_response: {answer.full_response}")
评估模式的答案:
GeneratorOutput(id="1", data=8, error=None, usage=CompletionUsage(completion_tokens=113, prompt_tokens=113, total_tokens=226), raw_response='To find the total number of musical instruments you have, you simply need to count the individual instruments you listed. \n\nCounting the instruments:\n1 flute\n1 piano\n1 trombone\n1 violin\n1 accordion\n1 clarinet\n1 drum\n1 trumpet\n\nAdding the number of stoves and lamps, which are not musical instruments:\n4 stoves\n2 lamps\n\nTotal number of musical instruments = 1 + 1 + 1 + 1 + 1 + 1 + 1 + 1 = 8\n\nAnswer: 8', metadata=None)
训练模式的答案:
Parameter(name=Generator_output, requires_opt=True, param_type=generator_output (The output of the generator.), role_desc=Output from (llm) Generator, data=To find the total number of musical instruments you have, you simply need to count the individual instruments you listed.

Counting the instruments:
1 flute
1 piano
1 trombone
1 violin
1 accordion
1 clarinet
1 drum
1 trumpet

Adding the number of stoves and lamps, which are not musical instruments:
4 stoves
2 lamps

Total number of musical instruments = 1 + 1 + 1 + 1 + 1 + 1 + 1 + 1 = 8

Answer: 8, predecessors={Parameter(name=To_give_ta, requires_opt=True, param_type=prompt (Instruction to the language model on task, data, and format.), role_desc=To give task instruction to the language model in the system prompt, data=You will answer a reasoning question. Think step by step. The last line of your response should be of the following format: 'Answer: $VALUE' where VALUE is a numerical value., predecessors=set(), gradients=set(),            raw_response=None, input_args=None, traces={}), Parameter(name=To_provide, requires_opt=True, param_type=demos (A few examples to guide the language model.), role_desc=To provide few shot demos to the language model, data=None, predecessors=set(), gradients=set(),            raw_response=None, input_args=None, traces={})}, gradients=set(),            raw_response=None, input_args={'prompt_kwargs': {'system_prompt': Parameter(name=To_give_ta, requires_opt=True, param_type=prompt (Instruction to the language model on task, data, and format.), role_desc=To give task instruction to the language model in the system prompt, data=You will answer a reasoning question. Think step by step. The last line of your response should be of the following format: 'Answer: $VALUE' where VALUE is a numerical value., predecessors=set(), gradients=set(),            raw_response=None, input_args=None, traces={}), 'few_shot_demos': Parameter(name=To_provide, requires_opt=True, param_type=demos (A few examples to guide the language model.), role_desc=To provide few shot demos to the language model, data=None, predecessors=set(), gradients=set(),            raw_response=None, input_args=None, traces={}), 'input_str': 'I have a flute, a piano, a trombone, four stoves, a violin, an accordion, a clarinet, a drum, two lamps, and a trumpet. How many musical instruments do I have?'}, 'model_kwargs': {'model': 'gpt-3.5-turbo', 'max_tokens': 2000, 'temperature': 0.0, 'top_p': 0.99, 'frequency_penalty': 0, 'presence_penalty': 0, 'stop': None}}, traces={})
可视化计算图
在训练模式下,我们可以通过以下代码轻松地可视化计算图:
answer.draw_graph()
这里是此任务管道的计算图
到目前为止,我们已经完成了任务管道,并确保它在评估和训练模式下都能正常工作。当然,如果性能已经完美,可能不需要进一步训练,但评估仍然是必不可少的。
我们的训练管道可以帮助进行训练和评估。
评估任务管道#
在我们开始训练之前,我们应该准备三个数据集:训练、验证和测试数据集。初步评估是必要的,以检查两件事:
每个数据分割的整体表现: 我们需要评估每个数据分割的表现。如果准确率不符合要求的标准,我们必须计划进一步的评估和调整。
跨数据集的性能一致性: 我们需要确保每个分割(训练、验证和测试)的表现相当。这种一致性至关重要,以便训练集和验证集可以作为测试性能的可靠指标。
数据集#
我们已经在adalflow.datasets.big_bench_hard准备了数据集。
我们可以用以下代码加载它:
from adalflow.datasets.big_bench_hard import BigBenchHard
from adalflow.utils.data import subset_dataset

def load_datasets(max_samples: int = None):
    """Load the dataset"""
    train_data = BigBenchHard(split="train")
    val_data = BigBenchHard(split="val")
    test_data = BigBenchHard(split="test")

    # Limit the number of samples
    if max_samples:
        train_data = subset_dataset(train_data, max_samples)
        val_data = subset_dataset(val_data, max_samples)
        test_data = subset_dataset(test_data, max_samples)

    return train_data, val_data, test_data
我们在训练、验证和测试数据集中分别有50、50、100个样本。以下是加载数据样本的一个示例:
Example(id='b0cffa3e-9dc8-4d8e-82e6-9dd7d34128df', question='I have a flute, a piano, a trombone, four stoves, a violin, an accordion, a clarinet, a drum, two lamps, and a trumpet. How many musical instruments do I have?', answer='8')
数据样本已经是DataClass类型,并且每个样本都被分配了一个id,一个question,以及一个answer。
需要注意的是,答案是以str格式呈现的。
诊断任务管道#
要使用我们的训练器提供的diagnose方法来评估任务管道,我们可以利用AdalComponent接口。这个接口类应该被子类化,允许我们利用其并行处理能力、回调配置、优化器配置以及对教师/反向引擎的内置支持。AdalComponent的工作方式类似于PyTorch Lightning的LightningModule与其Trainer的交互方式。
以下是开始评估任务管道所需的最少代码:
from adalflow.datasets.types import Example
from adalflow.eval.answer_match_acc import AnswerMatchAcc


class ObjectCountAdalComponent(adal.AdalComponent):
    def __init__(self, model_client: adal.ModelClient, model_kwargs: Dict):
        task = ObjectCountTaskPipeline(model_client, model_kwargs)
        eval_fn = AnswerMatchAcc(type="exact_match").compute_single_item
        super().__init__(task=task, eval_fn=eval_fn)

    def prepare_task(self, sample: Example):
        return self.task.call, {"question": sample.question, "id": sample.id}

    def prepare_eval(self, sample: Example, y_pred: adal.GeneratorOutput) -> float:
        y_label = -1
        if (y_pred is not None and y_pred.data is not None):  # if y_pred and y_pred.data: might introduce bug when the data is 0
            y_label = y_pred.data
        return self.eval_fn, {"y": y_label, "y_gt": sample.answer}
我们需要一个eval_fn,一个task,以及两个方法:prepare_task和prepare_eval,它们告诉Trainer如何调用任务以及如何调用评估函数。
现在,让我们使用训练器。
def diagnose(
    model_client: adal.ModelClient,
    model_kwargs: Dict,
) -> Dict:
    from use_cases.question_answering.bhh_object_count.data import load_datasets

    trainset, valset, testset = load_datasets()

    adal_component = ObjectCountAdalComponent(model_client, model_kwargs)
    trainer = adal.Trainer(adaltask=adal_component)
    trainer.diagnose(dataset=trainset, split="train")
    trainer.diagnose(dataset=valset, split="val")
    trainer.diagnose(dataset=testset, split="test")
文件结构:
.adalflow/
├── ckpt/
│   └── ObjectCountAdalComponent/
│       ├── diagnose_{train, val, test}/  # Directory for training data diagnostics
│       │   ├── llm_counter_call.jsonl    # Sorted by score from lowest to highest
│       │   ├── logger_metadata.jsonl
│       │   ├── llm_counter_diagnose.json # Contains samples with score < 0.5, sorted by score
│       │   └── stats.json
注意
由于我们将所有数据默认保存在~/.adalflow中,你可以在当前目录创建一个软链接,以便在代码编辑器中轻松访问数据。
llm_counter_call.jsonl 文件将包含6个键:
“prompt_kwargs”:在调用
llm_counter时使用的prompt_kwargs。“model_kwargs”:在调用
llm_counter时使用的model_kwargs。“input”:传递给 model_client (LLM) 的所有内容。
“output”: GeneratorOutput 对象。
“score”: 模型在数据集分割上的性能得分。
“time_stamp”: 调用的时间戳。
项目按从最低到最高分数排名。分数是模型在数据集分割上的性能分数。
如果你已经将id传递给调用,你将在output中找到它。
在{}_diagnose.json文件中,我们保存了可以用于手动诊断错误的内容:
- “id”:样本的ID。
- “score”:模型在数据集分割上的性能得分。
- “prompt_kwargs”:在调用llm_counter时使用的prompt_kwargs。
- “raw_response”:模型的原始响应。
- “answer”:样本的答案。
- “dataset_item”:可以找到样本进行比较的数据集项。
以下是统计信息:
分割 |
训练 |
验证 |
测试 |
|---|---|---|---|
分数 |
0.88 (50) |
0.90 (50) |
0.87 (100) |
模型在数据集上已经表现得相当不错了。 让我们看看是否可以通过少样本或零样本提示优化,甚至两者兼用,来进一步优化它。
训练设置#
准备AdalComponent进行训练#
为了能够进行训练,我们将在ObjectCountAdalComponent类中添加一些属性并定义一些方法。
首先,loss_fn,我们使用ada.EvalFnToTextLoss来计算损失(Parameter),它在初始化时接受eval_fn和eval_fn_desc。
这个损失函数会将用户在kwargs中设置的任何内容传递给eval_fn,并计算损失,同时处理损失函数的textual gradient。
如果你打算训练ParameterType.PROMPT,你需要配置backward_engine,它是Generator的一个子类,带有自己的template,以及一个text_optimizer_model_config,它将用作提出新提示的优化器。
如果你还想训练ParameterType.DEMOS,你需要配置teacher_generator,它的设置与你的llm_counter完全相同,但使用你配置的model_client和model_kwargs,这可能会成为一个强大的教师模型,指导你的目标模型学习。
class ObjectCountAdalComponent(adal.AdalComponent):
    def __init__(
        self,
        model_client: adal.ModelClient,
        model_kwargs: Dict,
        backward_engine_model_config: Dict,
        teacher_model_config: Dict,
        text_optimizer_model_config: Dict,
    ):
        task = ObjectCountTaskPipeline(model_client, model_kwargs)
        eval_fn = AnswerMatchAcc(type="exact_match").compute_single_item
        loss_fn = adal.EvalFnToTextLoss(
            eval_fn=eval_fn,
            eval_fn_desc="exact_match: 1 if str(y) == str(y_gt) else 0",
        )
        super().__init__(task=task, eval_fn=eval_fn, loss_fn=loss_fn)

        self.backward_engine_model_config = backward_engine_model_config
        self.teacher_model_config = teacher_model_config
        self.text_optimizer_model_config = text_optimizer_model_config
其次,prepare_loss(),在这里我们将返回损失函数和传递给损失函数的kwargs。
我们需要将真实值转换为Parameter,并设置eval_input,该值将在评估模型时用作eval_fn的值。
def prepare_loss(
    self, sample: Example, pred: adal.Parameter
) -> Tuple[Callable, Dict[str, Any]]:
    y_gt = adal.Parameter(
        name="y_gt",
        data=sample.answer,
        eval_input=sample.answer,
        requires_opt=False,
    )
    pred.eval_input = pred.full_response.data
    return self.loss_fn, {"kwargs": {"y": pred, "y_gt": y_gt}}
可选[内部机制]#
在底层,AdalComponent 已经有三种方法来配置反向引擎、教师生成器、文本优化器和演示优化器。
def configure_backward_engine(self):
    super().configure_backward_engine_helper(
        **self.backward_engine_model_config
    )
def configure_teacher_generator(self):
    super().configure_teacher_generator_helper(
        **self.teacher_generator_model_config
    )
def configure_optimizers(self):
    to = super().configure_text_optimizer_helper(**self.text_optimizer_model_config)
    do = super().configure_demo_optimizer_helper()
    return to  + do
使用训练器#
现在,我们可以使用训练器来训练模型。
def train(
    train_batch_size=4,  # larger batch size is not that effective, probably because of llm's lost in the middle
    raw_shots: int = 1,
    bootstrap_shots: int = 1,
    max_steps=1,
    num_workers=4,
    strategy="random",
    debug=False,
):
    adal_component = ObjectCountAdalComponent(
        **gpt_3_model,
        teacher_model_config=gpt_4o_model,
        text_optimizer_model_config=gpt_4o_model,
        backward_engine_model_config=gpt_4o_model
    )
    print(adal_component)
    trainer = Trainer(
        train_batch_size=train_batch_size,
        strategy=strategy,
        max_steps=max_steps,
        num_workers=num_workers,
        adaltask=adal_component,
        raw_shots=raw_shots,
        bootstrap_shots=bootstrap_shots,
        debug=debug,
        weighted_sampling=True,
    )
    print(trainer)

    train_dataset, val_dataset, test_dataset = load_datasets()
    trainer.fit(
        train_dataset=train_dataset,
        val_dataset=val_dataset,
        test_dataset=test_dataset,
        debug=debug,
    )
在调试模式下训练#
train(debug=True, max_steps=12, strategy="constrained")
使用debug将向我们展示两个样本:一个成功的样本和一个失败的样本。
它不仅会检查所有必要的步骤/方法,以尽力确保你在整个数据集上进行训练之前已经正确实现了所有部分,这可能会很昂贵。
同样重要的是,确保backward_engine提供正确的反馈,并且optimizer遵循指令以提出正确的建议。
当你需要更详细的日志记录时,你可以添加这个设置:
from adalflow.utils import get_logger

get_logger(level="DEBUG")
如果一切正常,您将看到以下调试报告:
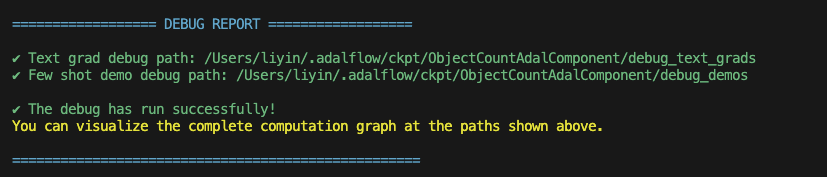
AdalFlow 调试报告#
学生图表
.adalflow/
├── ckpt/
│   └── ObjectCountAdalComponent/
│       ├── diagnose_{train, val, test}/  # Directory for training data diagnostics
│       │   ├── llm_counter_call.jsonl    # Sorted by score from lowest to highest
│       │   ├── logger_metadata.jsonl
│       │   ├── llm_counter_diagnose.json # Contains samples with score < 0.5, sorted by score
│       │   └── stats.json
│       ├── debug_text_grads                          # Directory for debug mode with text optimizer
│       │   ├── lib.log                    # Log file
│       │   ├── trace_graph_sum.png       # Trace graph with textual feedback and new proposed value
│       │   ├── trace_graph_sum_root.json # Json representation of the root loss node (sum of the success and fail loss)
│       |-- debug_demos                           # Directory for debug mode with demo optimizer
│       │   ├── student_graph
│       │   │   ├── trace_graph_EvalFnToTextLoss_output_id_6ea5da3c-d414-4aae-8462-75dd1e09abab.png # Trace graph with textual feedback and new proposed value
│       │   │   ├── trace_graph_EvalFnToTextLoss_output_id_6ea5da3c-d414-4aae-8462-75dd1e09abab_root.json # Json representation of the root loss node (sum of the success and fail loss)
这是我们带有文本渐变的trace_graph的样子:QA text-grad trace graph。 这是我们带有演示的trace_graph的样子:QA demos trace graph。
使用文本梯度下降进行训练#
要训练,我们只需将debug设置为False。
为了对我们的任务管道进行文本梯度下降训练,我们将返回到任务管道,将few_shot_demos参数的requires_opt设置为False,并将system_prompt参数的requires_opt设置为True。
system_prompt = adal.Parameter(
            data="You will answer a reasoning question. Think step by step. The last line of your response should be of the following format: 'Answer: $VALUE' where VALUE is a numerical value.",
            role_desc="To give task instruction to the language model in the system prompt",
            requires_opt=True,
            param_type=ParameterType.PROMPT,
        )
few_shot_demos = adal.Parameter(
    data=None,
    role_desc="To provide few shot demos to the language model",
    requires_opt=False,
    param_type=ParameterType.DEMOS,
)
对于文本优化器,我们有两种训练策略:random 和 constrained。
random 策略在每个步骤中运行一批损失和反向传播,然后在 validation 和 test 数据集上进行验证。
这是一种标准的训练策略,被 Dspy 和 Text-grad 等库使用。
您可以参考 optim.trainer.Trainer.fit() 了解更多详情。
constrained 策略是 AdalFlow 库独有的,它运行一个最大样本数为 20 的移动批次,并对正确和失败的样本进行子采样(每个最多 4 个)。
在它对完整的 validation 和 test 数据集运行验证之前,它会在移动采样子集和移动批次上运行验证。它会在移动批次上尝试 5 个提案,并且只有在能够击败当前子集和移动批次性能的提案才能在完整数据集上进行验证。
我们发现它通常比 random 策略更有效。
此外,我们估计每次验证可以获得的最大验证分数。一旦我们知道最大分数低于我们的最低要求(上一次的最高验证分数),我们就会停止评估以节省时间和成本。
训练结束后,我们将所有信息保存在 .adalflow/ckpt/ObjectCountAdalComponent/ 中。
文件名如下:
.adalflow/
├── ckpt/
│   └── ObjectCountAdalComponent/
│       random_max_steps_8_bb908_run_1.json # The last training run for random strategy
│       constrained_max_steps_8_a1754_run_1.json # The last training run for constrained strategy
以下是我们ckpt文件的一个示例:ckpt_file。
这个文件是TrainerResult的直接to_dict(json)表示。
使用少样本引导进行训练#
正如我们在ObjectCountAdalComponent中定义了ParameterType.DEMOS,我们可以用少量样本引导来训练模型。
我们将在train方法中设置raw_shots=0和bootstrap_shots=1。
默认情况下,我们的演示使用教师的直接原始响应,目的是教较弱模型如何推理答案。
我们称之为“学习推理”的少量样本引导。
注意:在我们开始训练之前,值得检查一下教师模型是否表现更好,以便学生可以从教师那里学习。 我们可以通过使用诊断方法来实现这一点,同时将model_client和model_kwargs设置为教师模型。 此外,确保将split设置为train_teacher等,以确保之前对学生模型的诊断不会被覆盖。 以下是教师模型在零样本提示下的表现:
方法 |
训练 |
验证 |
测试 |
|---|---|---|---|
开始(手动提示) |
0.98(50个样本) |
1.0(50个样本) |
0.98(100个样本) |
我们将展示一个单一的演示如何帮助将模型性能提升到验证集的92%和测试集的97%。
为了在我们的任务管道中进行少样本学习,我们将返回到任务管道,将few_shot_demos参数的requires_opt设置为True,并关闭system_prompt参数的requires_opt。
system_prompt = adal.Parameter(
            data="You will answer a reasoning question. Think step by step. The last line of your response should be of the following format: 'Answer: $VALUE' where VALUE is a numerical value.",
            role_desc="To give task instruction to the language model in the system prompt",
            requires_opt=False,
            param_type=ParameterType.PROMPT,
        )
few_shot_demos = adal.Parameter(
    data=None,
    role_desc="To provide few shot demos to the language model",
    requires_opt=True,
    param_type=ParameterType.DEMOS,
)
这是我们表现最好的少样本示例:
方法 |
提示 |
值 |
测试 |
|---|---|---|---|
开始 |
无 |
0.90 |
0.87 |
优化的一次性 |
“””示例:'要找到你拥有的物品总数,你需要逐个计算每个物品。在这种情况下,你有:nn 1 微波炉nn 1 灯nn 4 汽车nn 1 炉子nn 1 烤面包机nn 1 床nnn 将这些加在一起:nn 1 + 1 + 4 + 1 + 1 + 1 = 9nnn 因此,你总共有9个物品。nn 答案:9’”” |
0.96 (+6%, 4% < 老师) |
0.94 (+7%, 4% < 老师) |
基准测试#
我们将我们的性能与text-grad进行了比较。以下是我们的统计数据: 相同的提示,text-grad在验证集上得分为0.72,并将其优化至0.89。 但text-grad使用了更长的提示,其中在批量大小为4的情况下运行反向传播需要超过80秒。 而我们仅需12秒。 此外,AdalFlow通常具有更好的覆盖率。 我们还利用了单条消息提示,将整个模板发送到模型的系统消息中,使整个开发过程变得简单。
方法 |
测试 |
|---|---|
文本渐变(开始) |
0.72 |
文本梯度(优化) |
0.89 |
AdalFlow (开始) |
0.87 |
AdalFlow(文本梯度优化) |
0.91 |
AdalFlow(“学习推理”一次性) |
0.94 |
注意
在开始时,我们使用相同的提示,但我们使用了一个单一的模板,这比将系统提示发送到系统消息并将输入发送到用户消息的text-grad实现了更好的零样本性能。
参考文献