扩展教程#
JupyterLab 扩展为用户体验添加了功能。本页描述了如何创建一种扩展,即应用程序插件,它:
在命令面板侧边栏中添加了一个“随机天文图片”命令
激活时获取图像和元数据
在标签面板中显示图像和元数据
通过本教程的学习,您将了解:
如何在Linux或OSX机器上从头开始设置扩展开发环境。(如果您在Windows上,您需要稍微修改命令。)
如何从 jupyterlab/extension-template 开始一个扩展项目
如何在JupyterLab中迭代地编码、构建和加载您的扩展
如何使用git进行版本控制
如何发布您的扩展以供他人使用

完成的扩展,显示2015年7月24日的天文图片。#
听起来很有趣?太棒了。我们开始吧!
设置开发环境#
使用miniconda安装conda#
首先按照Conda的安装文档安装miniconda。
在conda环境中安装NodeJS、JupyterLab等#
接下来创建一个包含以下内容的conda环境:
JupyterLab 的最新版本
copier 和一些依赖项,这是你将用来引导你的扩展项目结构的工具(这是一个我们将使用conda安装的Python工具)。
NodeJS,您将使用的JavaScript运行时来编译扩展的Web资源(例如,TypeScript,CSS)
git,一个版本控制系统,您将在本教程中使用它来为您的作品拍摄快照
最佳实践是保持根conda环境(即由miniconda安装程序创建的环境)不变,并在一个命名的conda环境中安装项目特定的依赖项。运行此命令以创建一个名为jupyterlab-ext的新环境。
conda create -n jupyterlab-ext --override-channels --strict-channel-priority -c conda-forge -c nodefaults jupyterlab=4 nodejs=20 git copier=9 jinja2-time
现在激活新环境,以便您运行的所有后续命令都在该环境中工作。
conda activate jupyterlab-ext
注意:在您打开的每个新终端中,您需要先运行上述命令,然后才能使用您在jupyterlab-ext环境中安装的工具。
创建一个仓库#
为您的扩展创建一个新的存储库(例如,参见GitHub 说明)。这是一个可选步骤,但如果您想分享您的扩展,强烈推荐这样做。
创建一个扩展项目#
从模板初始化项目#
接下来使用copier为您的扩展创建一个新项目。 这将在当前目录中为您的扩展创建一个新文件夹。
mkdir my_first_extension
cd my_first_extension
copier copy --trust https://github.com/jupyterlab/extension-template .
当提示时,为所有模板提示输入类似以下的值(apod 代表“每日天文图片”,这是我们用来获取图片的NASA服务)。
What is your extension kind?
(Use arrow keys)
 frontend
Extension author name
 Your Name
Extension author email
 your@name.org
JavaScript package name
 jupyterlab_apod
Python package name
 jupyterlab_apod
Extension short description
 Show a random NASA Astronomy Picture of the Day in a JupyterLab panel
Does the extension have user settings?
 N
Do you want to set up Binder example?
 Y
Do you want to set up test for the extension?
 Y
Git remote repository URL
 https://github.com/github_username/jupyterlab_apod
注意
如果您没有使用仓库,请将仓库字段留空。您可以稍后返回并在
package.json文件中编辑仓库字段。如果您使用的是模板的最新版本,您会注意到测试已包含在模板中。如果您不想包含它们,只需在测试提示时回答
n。
列出文件。
ls -a
你应该看到如下列表。
.copier-answers.yml  .github          .gitignore      .prettierignore     .yarnrc.yml
babel.config.js      jest.config.js   pyproject.toml  src                 ui-tests
binder               jupyterlab_apod  README.md       style               yarn.lock
CHANGELOG.md         LICENSE          RELEASE.md      tsconfig.json
install.json         package.json     setup.py        tsconfig.test.json
将你的内容提交到git#
在您的jupyterlab_apod文件夹中运行以下命令,将其初始化为一个git仓库并提交当前代码。
git init
git add .
git commit -m 'Seed apod project from extension template'
注意
这一步在技术上不是必须的,但为了跟踪版本控制系统中的更改,以防需要回滚到早期版本或希望与他人协作,这是一个良好的实践。您可以在GitHub上的jupyterlab/jupyterlab_apod参考版本中,将您在本教程中的工作与提交进行比较。
构建并安装扩展以进行开发#
您的新扩展项目中有足够的代码,可以在您的JupyterLab中看到它的工作。运行以下命令以安装初始项目依赖项并将扩展安装到JupyterLab环境中。
pip install -ve .
上述命令将扩展的前端部分复制到JupyterLab中。
每次我们进行更改时,都可以再次运行这个pip install命令,
将更改复制到JupyterLab中。更棒的是,我们可以使用
develop命令创建一个从JupyterLab到我们
源代码目录的符号链接。这意味着我们的更改会自动在
JupyterLab中生效:
jupyter labextension develop --overwrite .
对Windows用户重要#
重要
在Windows上,对于Python 3.8或更高版本,需要在Windows 10或更高版本上通过激活“开发者模式”来激活符号链接。您的管理员可能不允许这样做。请参阅在Windows上激活开发者模式以获取说明。
查看初始扩展的实际效果#
安装完成后,打开第二个终端。运行这些命令以激活jupyterlab-ext环境并在您的默认网络浏览器中启动JupyterLab。
conda activate jupyterlab-ext
jupyter lab
在那个浏览器窗口中,按照您浏览器的指示打开JavaScript控制台:
当你重新加载页面并打开控制台时,你应该会在控制台中看到一条消息,内容是
JupyterLab extension jupyterlab_apod is activated!。
如果你看到了,恭喜你,你已经准备好开始修改扩展了!
如果没有,请返回并确保你没有遗漏任何步骤,如果你卡住了,请联系。
注意
保持终端运行jupyter lab命令打开并运行JupyterLab,以查看下面更改的效果。
添加一个每日天文图片小部件#
显示一个空面板#
命令面板是JupyterLab中所有可用命令的主要视图。对于您的第一个添加,您将向面板添加一个随机天文图片命令,并在调用时显示一个天文图片标签面板。
启动你最喜欢的文本编辑器,并在你的扩展项目中打开src/index.ts文件。更改文件顶部的导入以获取对命令面板界面和JupyterFrontEnd实例的引用。
import {
  JupyterFrontEnd,
  JupyterFrontEndPlugin
} from '@jupyterlab/application';

import { ICommandPalette } from '@jupyterlab/apputils';
定位类型为JupyterFrontEndPlugin的plugin对象。更改定义,使其如下所示:
/**
 * Initialization data for the jupyterlab_apod extension.
 */
const plugin: JupyterFrontEndPlugin<void> = {
  id: 'jupyterlab-apod',
  description: 'Show a random NASA Astronomy Picture of the Day in a JupyterLab panel.',
  autoStart: true,
  requires: [ICommandPalette],
  activate: (app: JupyterFrontEnd, palette: ICommandPalette) => {
    console.log('JupyterLab extension jupyterlab_apod is activated!');
    console.log('ICommandPalette:', palette);
  }
};
requires 属性声明了你的插件在启动时需要实现 ICommandPalette 接口的对象。JupyterLab 会将 ICommandPalette 的一个实例作为 activate 的第二个参数传递,以满足这一需求。定义 palette: ICommandPalette 使得该实例在该函数中可供你的代码使用。第二个 console.log 行仅用于让你可以立即检查你的更改是否有效。
现在你需要安装这些依赖项。在仓库的根文件夹中运行以下命令来安装依赖项并将它们保存到你的package.json中:
jlpm add @jupyterlab/apputils @jupyterlab/application
最后,运行以下命令以重新构建您的扩展。
jlpm run build
注意
本教程使用jlpm来安装Javascript包并运行构建命令,这是JupyterLab捆绑的yarn版本。如果你愿意,你可以使用其他Javascript包管理器,如npm或yarn本身。
扩展构建完成后,返回到启动JupyterLab时打开的浏览器标签。刷新它并查看控制台。你应该看到与之前相同的激活消息,以及关于你刚刚添加的ICommandPalette实例的新消息。如果没有看到,请检查构建命令的输出以查找错误并修正你的代码。
JupyterLab extension jupyterlab_apod is activated!
ICommandPalette: Palette {_palette: CommandPalette}
请注意,我们必须运行jlpm run build才能更新捆绑包。此命令执行两项操作:将src/`中的TypeScript文件编译为lib/中的JavaScript文件(jlpm run build),然后将lib/中的JavaScript文件捆绑到jupyterlab_apod/static中的JupyterLab扩展中(jlpm run build:extension)。如果您希望避免在每次更改后运行jlpm run build,您可以打开第三个终端,激活jupyterlab-ext环境,并从您的扩展目录运行jlpm run watch命令,该命令将在TypeScript文件更改并保存时自动编译它们。
现在回到你的编辑器。修改文件顶部的导入部分,添加一些更多的导入:
import { ICommandPalette, MainAreaWidget } from '@jupyterlab/apputils';

import { Widget } from '@lumino/widgets';
同时安装这个新的依赖项:
jlpm add @lumino/widgets
然后再次修改插件对象内的activate函数,使其包含以下代码(高亮行显示的是activate函数,你只需要修改该函数的内容,确保大括号匹配,并保持export default plugin部分不变):
const plugin: JupyterFrontEndPlugin<void> = {
  id: 'jupyterlab-apod',
  description: 'Show a random NASA Astronomy Picture of the Day in a JupyterLab panel.',
  autoStart: true,
  requires: [ICommandPalette],
  activate: (app: JupyterFrontEnd, palette: ICommandPalette) => {
    console.log('JupyterLab extension jupyterlab_apod is activated!');

    // Define a widget creator function,
    // then call it to make a new widget
    const newWidget = () => {
      // Create a blank content widget inside of a MainAreaWidget
      const content = new Widget();
      const widget = new MainAreaWidget({ content });
      widget.id = 'apod-jupyterlab';
      widget.title.label = 'Astronomy Picture';
      widget.title.closable = true;
      return widget;
    }
    let widget = newWidget();

    // Add an application command
    const command: string = 'apod:open';
    app.commands.addCommand(command, {
      label: 'Random Astronomy Picture',
      execute: () => {
        // Regenerate the widget if disposed
        if (widget.isDisposed) {
          widget = newWidget();
        }
        if (!widget.isAttached) {
          // Attach the widget to the main work area if it's not there
          app.shell.add(widget, 'main');
        }
        // Activate the widget
        app.shell.activateById(widget.id);
      }
    });

    // Add the command to the palette.
    palette.addItem({ command, category: 'Tutorial' });
  }
};

export default plugin;
第一段新代码定义(并调用)了一个可重用的部件创建函数。该函数返回一个MainAreaWidget实例,该实例有一个空的Widget作为其子内容。它还为主区域部件分配了一个唯一的ID,为其提供了一个将显示为标签标题的标签,并使该标签可由用户关闭。第二段代码向JupyterLab添加了一个新的命令,其ID为apod:open,标签为随机天文图片。当命令执行时,它会检查部件是否未被处理,如果部件尚未存在,则将其附加到主显示区域,然后使其成为活动标签。最后一行新代码使用命令ID将命令添加到名为教程部分的命令面板中。
再次使用jlpm run build(除非你已经在使用jlpm run watch)构建你的扩展,并刷新浏览器标签。通过点击视图菜单中的Commands或使用键盘快捷键Command/Ctrl Shift C打开命令面板,并在搜索框中输入Astronomy。你的Random Astronomy Picture命令应该会出现。点击它或用键盘选择并按下Enter。你应该会看到一个带有标签标题Astronomy Picture的新空白面板出现。点击标签上的x关闭它并再次激活命令。标签应该会重新出现。最后,点击其中一个启动器标签,使Astronomy Picture面板仍然打开但不再处于活动状态。现在再次运行Random Astronomy Picture命令。单一的Astronomy Picture标签应该会出现在前景。
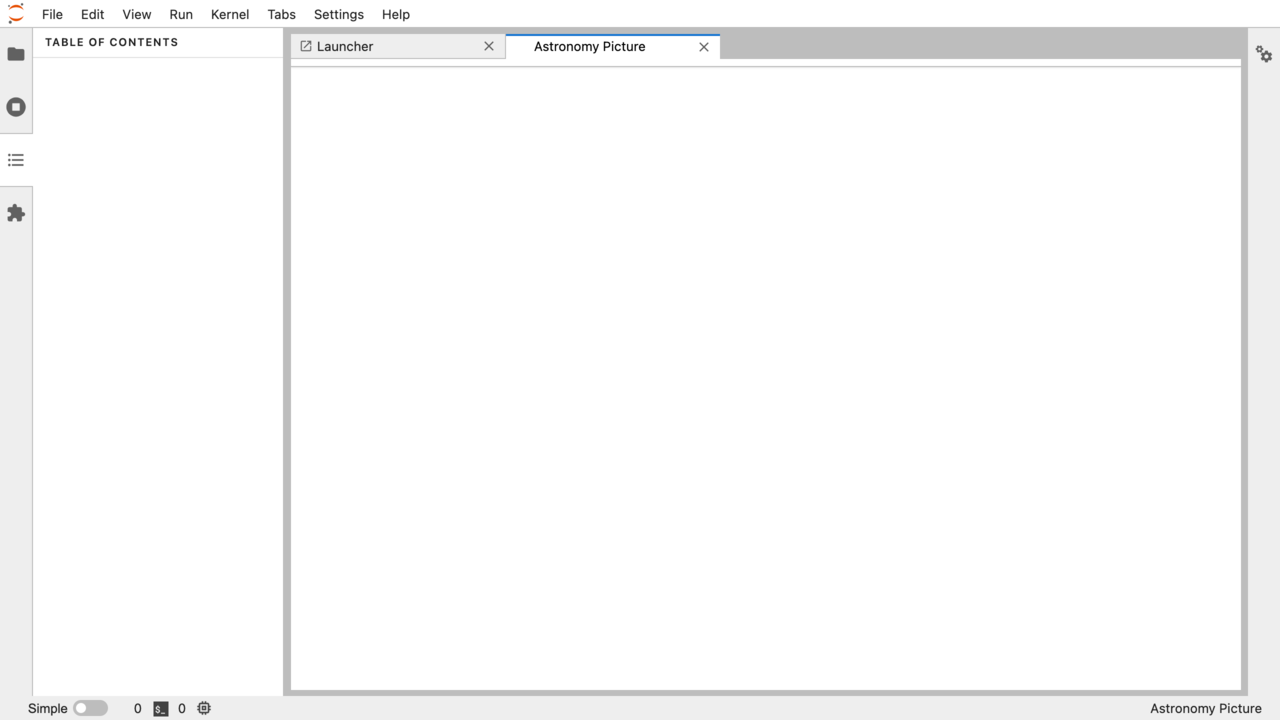
进行中的扩展,显示一个空白面板。#
如果您的部件没有按预期工作,请将您的代码与参考项目状态在01-show-a-panel标签处进行比较。一旦您确保一切正常,请使用git提交您的更改并继续。
git add package.json src/index.ts
git commit -m 'Show Astronomy Picture command in palette'
在面板中显示图片#
你现在有一个空的面板。是时候给它添加一张图片了。回到你的代码编辑器。在创建MainAreaWidget实例的代码行下方和返回新小部件的代码行上方,在小部件创建者函数中添加以下代码。
// Add an image element to the content
let img = document.createElement('img');
content.node.appendChild(img);

// Get a random date string in YYYY-MM-DD format
function randomDate() {
  const start = new Date(2010, 1, 1);
  const end = new Date();
  const randomDate = new Date(start.getTime() + Math.random()*(end.getTime() - start.getTime()));
  return randomDate.toISOString().slice(0, 10);
}

// Fetch info about a random picture
const response = await fetch(`https://api.nasa.gov/planetary/apod?api_key=DEMO_KEY&date=${randomDate()}`);
const data = await response.json() as APODResponse;

if (data.media_type === 'image') {
  // Populate the image
  img.src = data.url;
  img.title = data.title;
} else {
  console.log('Random APOD was not a picture.');
}
前两行创建了一个新的HTML YYYY-MM-DD,然后该函数用于使用HTML fetch API发出请求,该请求返回有关该日期的天文图片的信息。最后,我们根据响应设置了图像的源和标题属性。
现在定义上面代码中引入的APODResponse类型。将这个定义放在文件顶部的导入语句下面。
interface APODResponse {
  copyright: string;
  date: string;
  explanation: string;
  media_type: 'video' | 'image';
  title: string;
  url: string;
};
然后我们需要在代码的几个地方添加 async 和 await,因为我们在小部件创建函数中使用了 await。
首先,将activate方法更新为async:
activate: async (app: JupyterFrontEnd, palette: ICommandPalette) => {
接下来,将 newWidget 函数更新为 async:
const newWidget = async () => {
最后,在newWidget的两个函数调用前添加await,并在执行函数前添加async:
  let widget = await newWidget();

  // Add an application command
  const command: string = 'apod:open';
  app.commands.addCommand(command, {
    label: 'Random Astronomy Picture',
    execute: async () => {
      // Regenerate the widget if disposed
      if (widget.isDisposed) {
        widget = await newWidget();
      }
      if (!widget.isAttached) {
        // Attach the widget to the main work area if it's not there
        app.shell.add(widget, 'main');
      }
      // Activate the widget
      app.shell.activateById(widget.id);
    }
  });
注意
如果你对JavaScript / TypeScript不熟悉,并且想了解更多关于async、await和Promises的内容,你可以查看以下MDN上的教程
请务必参考 See Also 部分中的其他资源以获取更多材料。
如有必要,请重新构建您的扩展(jlpm run build),刷新浏览器标签,然后再次运行随机天文图片命令。您现在应该在面板打开时看到一张图片(如果该随机日期有图片而不是视频)。

正在进行的扩展,显示2014年1月19日的每日天文图片。#
请注意,图像未在面板中居中,如果图像大于面板区域,面板也不会滚动。您将在接下来的部分中解决这两个问题。
如果你根本看不到图像,请将你的代码与参考项目中的 02-show-an-image 标签 进行比较。当它正常工作时,再进行一次git提交。
git add src/index.ts
git commit -m 'Show a picture in the panel'
改进小部件行为#
居中图像,添加归属和错误消息#
在我们的扩展项目目录中打开style/base.css进行编辑。
向其中添加以下行。
.my-apodWidget {
  display: flex;
  flex-direction: column;
  align-items: center;
  overflow: auto;
}
此CSS在小部件面板内垂直堆叠内容,并在内容溢出时让面板滚动。此CSS文件由JupyterLab自动包含在页面上,因为package.json文件有一个style字段指向它。通常,您应该将所有样式导入一个CSS文件,例如这个index.css文件,并将该CSS文件的路径放在package.json文件的style字段中。
返回到index.ts文件。修改activate函数以应用CSS类、版权信息以及API响应的错误处理。
你将更新和替换/删除一些行,因此函数的开头应该如下所示:
activate: async (app: JupyterFrontEnd, palette: ICommandPalette) => {
  console.log('JupyterLab extension jupyterlab_apod is activated!');

  // Define a widget creator function,
  // then call it to make a new widget
  const newWidget = async () => {
    // Create a blank content widget inside of a MainAreaWidget
    const content = new Widget();
    content.addClass('my-apodWidget');
    const widget = new MainAreaWidget({ content });
    widget.id = 'apod-jupyterlab';
    widget.title.label = 'Astronomy Picture';
    widget.title.closable = true;

    // Add an image element to the content
    let img = document.createElement('img');
    content.node.appendChild(img);

    let summary = document.createElement('p');
    content.node.appendChild(summary);

    // Get a random date string in YYYY-MM-DD format
    function randomDate() {
      const start = new Date(2010, 1, 1);
      const end = new Date();
      const randomDate = new Date(start.getTime() + Math.random()*(end.getTime() - start.getTime()));
      return randomDate.toISOString().slice(0, 10);
    }

    // Fetch info about a random picture
    const response = await fetch(`https://api.nasa.gov/planetary/apod?api_key=DEMO_KEY&date=${randomDate()}`);
    if (!response.ok) {
      const data = await response.json();
      if (data.error) {
        summary.innerText = data.error.message;
      } else {
        summary.innerText = response.statusText;
      }
    } else {
      const data = await response.json() as APODResponse;

      if (data.media_type === 'image') {
        // Populate the image
        img.src = data.url;
        img.title = data.title;
        summary.innerText = data.title;
        if (data.copyright) {
          summary.innerText += ` (Copyright ${data.copyright})`;
        }
      } else {
        summary.innerText = 'Random APOD fetched was not an image.';
      }
    }

    return widget;
  }
  // Keep all the remaining lines below the newWidget function
  // definition the same as before from here down ...
注意
如果你的图像面板持续显示错误信息,你可能需要更新你的NASA API密钥(过多的图像请求可能会达到你的限制)
如果需要,构建你的扩展(jlpm run build)并刷新你的JupyterLab浏览器标签。调用随机天文图片命令并确认图片居中,下方有版权信息。调整浏览器窗口或面板的大小,使图片大于可用区域。确保你可以滚动面板以查看图片的整个区域。
如果任何功能无法正常工作,请将您的代码与参考项目 03-style-and-attribute tag进行比较。 当一切按预期工作时,再进行一次提交。
git add style/base.css src/index.ts
git commit -m 'Add styling, attribution, error handling'
根据需要显示新图像#
activate 函数已经变得相当长,而且还需要添加更多功能。让我们将代码重构为两个独立的部分:
一个
APODWidget,它封装了天文图片面板元素、配置以及即将添加的更新行为一个
activate函数,用于将小部件实例添加到用户界面,并决定何时刷新图片
首先将小部件代码重构到新的APODWidget类中。
在index.ts文件中,将类添加到APODResponse定义的正下方。
class APODWidget extends Widget {
  /**
  * Construct a new APOD widget.
  */
  constructor() {
    super();

    this.addClass('my-apodWidget');

    // Add an image element to the panel
    this.img = document.createElement('img');
    this.node.appendChild(this.img);

    // Add a summary element to the panel
    this.summary = document.createElement('p');
    this.node.appendChild(this.summary);
  }

  /**
  * The image element associated with the widget.
  */
  readonly img: HTMLImageElement;

  /**
  * The summary text element associated with the widget.
  */
  readonly summary: HTMLParagraphElement;

  /**
  * Handle update requests for the widget.
  */
  async updateAPODImage(): Promise<void> {

    const response = await fetch(`https://api.nasa.gov/planetary/apod?api_key=DEMO_KEY&date=${this.randomDate()}`);

    if (!response.ok) {
      const data = await response.json();
      if (data.error) {
        this.summary.innerText = data.error.message;
      } else {
        this.summary.innerText = response.statusText;
      }
      return;
    }

    const data = await response.json() as APODResponse;

    if (data.media_type === 'image') {
      // Populate the image
      this.img.src = data.url;
      this.img.title = data.title;
      this.summary.innerText = data.title;
      if (data.copyright) {
        this.summary.innerText += ` (Copyright ${data.copyright})`;
      }
    } else {
      this.summary.innerText = 'Random APOD fetched was not an image.';
    }
  }

  /**
  * Get a random date string in YYYY-MM-DD format.
  */
  randomDate(): string {
    const start = new Date(2010, 1, 1);
    const end = new Date();
    const randomDate = new Date(start.getTime() + Math.random()*(end.getTime() - start.getTime()));
    return randomDate.toISOString().slice(0, 10);
  }
}
你之前已经编写了所有的代码。你所做的只是重构它以使用实例变量,并将图像请求移动到它自己的函数中。
接下来将activate中的剩余逻辑移动到一个新的顶级函数中,该函数位于APODWidget类定义的下方。修改代码以在主JupyterLab区域中不存在小部件时创建一个小部件,或在命令再次运行时刷新现有小部件中的图像。更改后,activate函数的代码应如下所示:
/**
* Activate the APOD widget extension.
*/
function activate(app: JupyterFrontEnd, palette: ICommandPalette) {
  console.log('JupyterLab extension jupyterlab_apod is activated!');

  // Define a widget creator function
  const newWidget = () => {
    const content = new APODWidget();
    const widget = new MainAreaWidget({content});
    widget.id = 'apod-jupyterlab';
    widget.title.label = 'Astronomy Picture';
    widget.title.closable = true;
    return widget;
  }

  // Create a single widget
  let widget = newWidget();

  // Add an application command
  const command: string = 'apod:open';
  app.commands.addCommand(command, {
    label: 'Random Astronomy Picture',
    execute: () => {
      // Regenerate the widget if disposed
      if (widget.isDisposed) {
        widget = newWidget();
      }
      if (!widget.isAttached) {
        // Attach the widget to the main work area if it's not there
        app.shell.add(widget, 'main');
      }
      // Refresh the picture in the widget
      widget.content.updateAPODImage();
      // Activate the widget
      app.shell.activateById(widget.id);
    }
  });

  // Add the command to the palette.
  palette.addItem({ command, category: 'Tutorial' });
}
从JupyterFrontEndPlugin对象中移除activate函数定义,并改为引用顶级函数,如下所示:
const plugin: JupyterFrontEndPlugin<void> = {
  id: 'jupyterlab_apod',
  autoStart: true,
  requires: [ICommandPalette],
  activate: activate
};
确保你在文件中保留了export default plugin;这一行。
现在再次构建扩展并刷新JupyterLab浏览器标签。
多次运行Random Astronomy Picture命令而不关闭面板。每次执行命令时,图片应该会更新。关闭面板,运行命令,它应该会重新出现并显示一张新图片。
如果任何部分没有正常工作,请将你的代码与 04-refactor-and-refresh 标签 进行比较以进行调试。一旦它正常工作,请提交它。
git add src/index.ts
git commit -m 'Refactor, refresh image'
当浏览器刷新时恢复面板状态#
你可能会注意到,每次刷新浏览器标签时,天文图片面板都会消失,即使在你刷新之前它是打开的。其他打开的面板,如笔记本、终端和文本编辑器,都会重新出现并返回到你在面板布局中离开它们的位置。你也可以让你的扩展程序以这种方式运行。
更新你的index.ts文件顶部的导入,使整个导入语句列表看起来像下面这样(添加ILayoutRestorer和WidgetTracker):
import {
  ILayoutRestorer,
  JupyterFrontEnd,
  JupyterFrontEndPlugin
} from '@jupyterlab/application';

import {
  ICommandPalette,
  MainAreaWidget,
  WidgetTracker
} from '@jupyterlab/apputils';

import { Widget } from '@lumino/widgets';
然后将ILayoutRestorer接口添加到JupyterFrontEndPlugin定义中作为optional。这一添加将全局的LayoutRestorer作为activate函数的第三个参数传递。
const plugin: JupyterFrontEndPlugin<void> = {
  id: 'jupyterlab-apod',
  description: 'Show a random NASA Astronomy Picture of the Day in a JupyterLab panel.',
  autoStart: true,
  requires: [ICommandPalette],
  optional: [ILayoutRestorer],
  activate: activate
};
在这里,ILayoutRestorer被指定为一个可选的令牌,因为在某些定制的JupyterLab发行版中,可能不提供布局恢复功能,因此相应的服务可能不可用。将其设为可选使其成为一个可有可无的功能,并使您的扩展能够在更多基于JupyterLab的应用程序中加载。
注意
你可以在扩展开发者指南的令牌部分了解更多关于requires和optional的信息。
最后,重写activate函数,使其:
声明一个widget变量,但不立即创建实例。
将全局的
LayoutRestorer添加为activate函数的第三个参数。 由于该令牌被指定为optional,因此该参数被声明为ILayoutRestorer | null。构建一个
WidgetTracker并告诉ILayoutRestorer使用它来保存/恢复面板状态。适当地创建、跟踪、显示和刷新小部件面板。
function activate(app: JupyterFrontEnd, palette: ICommandPalette, restorer: ILayoutRestorer | null) {
  console.log('JupyterLab extension jupyterlab_apod is activated!');

  // Declare a widget variable
  let widget: MainAreaWidget<APODWidget>;

  // Add an application command
  const command: string = 'apod:open';
  app.commands.addCommand(command, {
    label: 'Random Astronomy Picture',
    execute: () => {
      if (!widget || widget.isDisposed) {
        const content = new APODWidget();
        widget = new MainAreaWidget({content});
        widget.id = 'apod-jupyterlab';
        widget.title.label = 'Astronomy Picture';
        widget.title.closable = true;
      }
      if (!tracker.has(widget)) {
        // Track the state of the widget for later restoration
        tracker.add(widget);
      }
      if (!widget.isAttached) {
        // Attach the widget to the main work area if it's not there
        app.shell.add(widget, 'main');
      }
      widget.content.updateAPODImage();

      // Activate the widget
      app.shell.activateById(widget.id);
    }
  });

  // Add the command to the palette.
  palette.addItem({ command, category: 'Tutorial' });

  // Track and restore the widget state
  let tracker = new WidgetTracker<MainAreaWidget<APODWidget>>({
    namespace: 'apod'
  });
  if (restorer) {
    restorer.restore(tracker, {
      command,
      name: () => 'apod'
    });
  }
}
最后一次重新构建您的扩展程序并刷新浏览器标签页。 执行Random Astronomy Picture命令并验证面板是否出现并包含图像。再次刷新浏览器标签页。您应该会看到天文学图片面板立即重新出现,而无需再次运行命令。关闭面板并刷新浏览器标签页。刷新后,您应该不会再看到天文学图片标签页。
完成的扩展,显示2015年7月24日的天文图片。#
如果您的扩展程序无法正常工作,请参考05-restore-panel-state 标签。当您的扩展程序状态正确持久化时,请进行提交。
git add src/index.ts
git commit -m 'Restore panel state'
恭喜!您已经实现了本教程开始时列出的所有行为。
打包你的扩展#
适用于 JupyterLab 3.0 及以上版本的 JupyterLab 扩展可以作为 Python 包分发。我们使用的扩展模板包含了所有 Python 打包指令,这些指令位于 pyproject.toml 文件中,用于将您的扩展打包成 Python 包。在生成包之前,我们首先需要安装 build。
pip install build
要在dist/目录中创建一个Python源包(.tar.gz),请执行以下操作:
python -m build -s
要在dist/目录中创建一个Python轮子包(.whl),请执行以下操作:
python -m build
这两个命令都会将JavaScript构建成一个包,放在jupyterlab_apod/labextension/static目录中,然后与Python包一起分发。这个包还将包括任何必要的JavaScript依赖项。您可能希望检查jupyterlab_apod/labextension/static目录,以保留您的包中分发的JavaScript记录,或者您可能希望将这个“构建产物”排除在您的源代码仓库历史之外。
您现在可以尝试像用户一样安装您的扩展。打开一个新的终端并运行以下命令来创建一个新环境并安装您的扩展。
conda create -n jupyterlab-apod jupyterlab
conda activate jupyterlab-apod
pip install jupyterlab_apod/dist/jupyterlab_apod-0.1.0-py3-none-any.whl
jupyter lab
你应该会看到一个新的JupyterLab浏览器标签页出现。当它出现时,执行Random Astronomy Picture命令以检查你的扩展是否正常工作。
发布您的扩展#
你可以将你的Python包发布到PyPI或conda-forge仓库中,这样用户就可以轻松地使用pip或conda来安装扩展。
您可能还想将您的扩展作为JavaScript包发布到 npm 包仓库,原因如下:
将扩展作为 npm 包分发允许用户显式地将扩展编译到 JupyterLab 中(类似于在 JupyterLab 版本 1 和 2 中的做法),从而生成更优化的 JupyterLab 包。
正如我们上面所看到的,JupyterLab 允许扩展使用其他扩展提供的服务。例如,我们上面的扩展使用了 JupyterLab 核心扩展提供的
ICommandPalette和ILayoutRestorer服务。我们能够通过从@jupyterlab/apputils和@jupyterlab/applicationnpm 包中导入它们的令牌并在我们的插件定义中列出它们来告诉 JupyterLab 我们需要这些服务。如果你想向 JupyterLab 系统提供服务以供其他扩展使用,你需要将你的 JavaScript 包发布到 npm,以便其他扩展可以依赖它并导入和需要你的令牌。
自动化发布#
如果您使用了模板来引导您的扩展,那么该仓库应该已经与Jupyter Releaser兼容。
Jupyter Releaser 提供了一套 GitHub Actions 工作流,用于:
在变更日志中生成一个新条目
起草新版本
发布版本到
PyPI和npm
有关如何运行发布工作流程的更多信息, 请查看文档:jupyter-server/jupyter_releaser
了解更多#
你已经完成了教程。干得好!如果你想继续学习,这里有一些关于接下来可以尝试的建议: