QML、SQL和PySide集成教程
本教程与Qt聊天教程非常相似,但它重点解释了如何将SQL数据库集成到使用QML作为其用户界面的PySide6应用程序中。
sqlDialog.py
我们将相关的库导入到我们的程序中,定义一个全局变量来保存我们表的名称,并定义全局函数createTable(),如果表不存在,则创建一个新表。
数据库包含一行数据来模拟对话的开始。
 1import datetime
 2import logging
 3
 4from PySide6.QtCore import Qt, Slot
 5from PySide6.QtSql import QSqlDatabase, QSqlQuery, QSqlRecord, QSqlTableModel
 6from PySide6.QtQml import QmlElement
 7
 8table_name = "Conversations"
 9QML_IMPORT_NAME = "ChatModel"
10QML_IMPORT_MAJOR_VERSION = 1
11
12
13def createTable():
14    if table_name in QSqlDatabase.database().tables():
15        return
16
17    query = QSqlQuery()
18    if not query.exec_(
19        """
20        CREATE TABLE IF NOT EXISTS 'Conversations' (
21            'author' TEXT NOT NULL,
22            'recipient' TEXT NOT NULL,
23            'timestamp' TEXT NOT NULL,
24            'message' TEXT NOT NULL,
25        FOREIGN KEY('author') REFERENCES Contacts ( name ),
26        FOREIGN KEY('recipient') REFERENCES Contacts ( name )
27        )
28        """
29    ):
30        logging.error("Failed to query database")
31
32    # This adds the first message from the Bot
33    # and further development is required to make it interactive.
34    query.exec_(
35        """
36        INSERT INTO Conversations VALUES(
37            'machine', 'Me', '2019-01-07T14:36:06', 'Hello!'
38        )
39        """
40    )
SqlConversationModel 类提供了非可编辑联系人列表所需的只读数据模型。它继承自 QSqlQueryModel 类,这是此用例的逻辑选择。
然后,我们继续创建表,使用 setTable() 方法将其名称设置为先前定义的名称。
我们向表中添加必要的属性,以拥有一个反映聊天应用程序理念的程序。
 1@QmlElement
 2class SqlConversationModel(QSqlTableModel):
 3    def __init__(self, parent=None):
 4        super(SqlConversationModel, self).__init__(parent)
 5
 6        createTable()
 7        self.setTable(table_name)
 8        self.setSort(2, Qt.DescendingOrder)
 9        self.setEditStrategy(QSqlTableModel.OnManualSubmit)
10        self.recipient = ""
11
12        self.select()
13        logging.debug("Table was loaded successfully.")
如果角色不是自定义用户角色,data() 函数将回退到 QSqlTableModel 的实现。
如果你得到一个用户角色,我们可以从中减去 UserRole() 来获取该字段的索引,然后使用该索引来查找要返回的值。
1    def data(self, index, role):
2        if role < Qt.UserRole:
3            return QSqlTableModel.data(self, index, role)
4
5        sql_record = QSqlRecord()
6        sql_record = self.record(index.row())
7
8        return sql_record.value(role - Qt.UserRole)
在roleNames()中,我们返回一个Python字典,其中包含我们的自定义角色和角色名称作为键值对,这样我们就可以在QML中使用这些角色。
另外,声明一个枚举来保存所有角色值也很有用。
1    def roleNames(self):
2        """Converts dict to hash because that's the result expected
3        by QSqlTableModel"""
4
5        return {int(Qt.UserRole): b"author",
6                Qt.UserRole + 1: b"recipient",
7                Qt.UserRole + 2: b"timestamp",
8                Qt.UserRole + 3: b"message"}
send_message() 函数使用给定的接收者和消息将新记录插入数据库。
使用 OnManualSubmit() 需要你同时调用 submitAll(),
因为所有的更改都会缓存在模型中,直到你这样做。
 1    # This is a workaround because PySide doesn't provide Q_INVOKABLE
 2    # So we declare this as a Slot to be able to call it  from QML
 3    @Slot(str, str, str)
 4    def send_message(self, recipient, message, author):
 5        timestamp = datetime.datetime.now()
 6
 7        new_record = self.record()
 8        new_record.setValue("author", author)
 9        new_record.setValue("recipient", recipient)
10        new_record.setValue("timestamp", str(timestamp))
11        new_record.setValue("message", message)
12
13        logging.debug(f'Message: "{message}" \n Received by: "{recipient}"')
14
15        if not self.insertRecord(self.rowCount(), new_record):
16            logging.error("Failed to send message: {self.lastError().text()}")
17            return
18
19        self.submitAll()
20        self.select()
Main.qml
让我们看看Main.qml文件。
1import QtQuick
2import QtQuick.Layouts
3import QtQuick.Controls
首先,导入Qt Quick模块。 这使我们能够访问图形原语,如Item、Rectangle、Text等。 有关类型的完整列表,请参阅Qt Quick QML Types文档。 然后我们添加QtQuick.Layouts导入,我们稍后会介绍。
接下来,导入Qt Quick Controls模块。
除此之外,这还提供了对ApplicationWindow的访问,它取代了现有的根类型Window:
让我们逐步浏览 App/Main.qml 文件。
1ApplicationWindow {
2    id: window
3    title: qsTr("Chat")
4    width: 640
5    height: 960
6    visible: true
ApplicationWindow 是一个带有一些额外便利功能的窗口,用于创建页眉和页脚。
它还提供了弹出窗口的基础,并支持一些基本样式,例如背景颜色。
使用ApplicationWindow时,几乎总是设置三个属性:width、
height和visible。
一旦我们设置了这些,我们就有了一个大小合适、空的窗口,准备填充内容。
因为我们正在将SqlConversationModel类暴露给QML,我们将声明一个组件来访问它:
1    SqlConversationModel {
2        id: chat_model
3    }
在QML中有两种布局项目的方式:Item Positioners 和 Qt Quick Layouts。
Qt Quick Layouts 中的布局可以定位和调整项目的大小,使其非常适合可调整大小的用户界面。 下面,我们使用 ColumnLayout 垂直布局一个 ListView 和一个 Pane。
1    ColumnLayout {
2        anchors.fill: parent
3
4        ListView {
1        Pane {
2            id: pane
3            Layout.fillWidth: true
Pane 基本上是一个矩形,其颜色来自应用程序的样式。 它类似于 Frame,但其边框没有描边。
布局的直接子项有各种附加属性可供使用。 我们在ListView上使用Layout.fillWidth和Layout.fillHeight,以确保它在ColumnLayout内尽可能多地占用空间,对Pane也是如此。 由于ColumnLayout是一个垂直布局,每个子项的左侧或右侧没有任何项目,因此这导致每个项目都占用布局的整个宽度。
另一方面,ListView中的Layout.fillHeight语句使其能够占据在容纳Pane后剩余的可用空间。
让我们详细看看Listview:
 1        ListView {
 2            id: listView
 3            Layout.fillWidth: true
 4            Layout.fillHeight: true
 5            Layout.margins: pane.leftPadding + messageField.leftPadding
 6            displayMarginBeginning: 40
 7            displayMarginEnd: 40
 8            verticalLayoutDirection: ListView.BottomToTop
 9            spacing: 12
10            model: chat_model
11            delegate: Column {
12                anchors.right: sentByMe ? listView.contentItem.right : undefined
13                spacing: 6
14
15                readonly property bool sentByMe: model.recipient !== "Me"
16                Row {
17                    id: messageRow
18                    spacing: 6
19                    anchors.right: sentByMe ? parent.right : undefined
20
21                    Rectangle {
22                        width: Math.min(messageText.implicitWidth + 24,
23                            listView.width - (!sentByMe ? messageRow.spacing : 0))
24                        height: messageText.implicitHeight + 24
25                        radius: 15
26                        color: sentByMe ? "lightgrey" : "steelblue"
27
28                        Label {
29                            id: messageText
30                            text: model.message
31                            color: sentByMe ? "black" : "white"
32                            anchors.fill: parent
33                            anchors.margins: 12
34                            wrapMode: Label.Wrap
35                        }
36                    }
37                }
38
39                Label {
40                    id: timestampText
41                    text: Qt.formatDateTime(model.timestamp, "d MMM hh:mm")
42                    color: "lightgrey"
43                    anchors.right: sentByMe ? parent.right : undefined
44                }
45            }
46
47            ScrollBar.vertical: ScrollBar {}
48        }
在填充其父级的width和height之后,我们还在视图上设置了一些边距。
接下来,我们设置displayMarginBeginning和displayMarginEnd。 这些属性确保当你在视图边缘滚动时,视图外的委托不会消失。 为了更好地理解,可以考虑注释掉这些属性,然后重新运行你的代码。 现在观察当你滚动视图时会发生什么。
然后我们翻转视图的垂直方向,以便第一个项目位于底部。
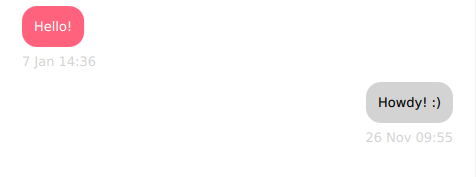
此外,联系人发送的消息应与联系人发送的消息区分开来。
目前,当消息由您发送时,我们设置了一个sentByMe属性,以便在不同的联系人之间切换。
使用此属性,我们通过两种方式区分不同的联系人:
联系人发送的消息通过将
anchors.right设置为parent.right来对齐到屏幕的右侧。我们根据联系人更改矩形的颜色。 由于我们不希望在深色背景上显示深色文本,反之亦然,我们还根据联系人设置文本颜色。
在屏幕底部,我们放置了一个TextArea项目以允许多行文本输入,以及一个按钮来发送消息。 我们使用Pane来覆盖这两个项目下方的区域:
 1        Pane {
 2            id: pane
 3            Layout.fillWidth: true
 4
 5            RowLayout {
 6                width: parent.width
 7
 8                TextArea {
 9                    id: messageField
10                    Layout.fillWidth: true
11                    placeholderText: qsTr("Compose message")
12                    wrapMode: TextArea.Wrap
13                }
14
15                Button {
16                    id: sendButton
17                    text: qsTr("Send")
18                    enabled: messageField.length > 0
19                    onClicked: {
20                        listView.model.send_message("machine", messageField.text, "Me");
21                        messageField.text = "";
22                    }
23                }
24            }
25        }
TextArea 应填满屏幕的可用宽度。 我们分配一些占位符文本,以向联系人提供视觉提示,告诉他们应该在哪里开始输入。 输入区域内的文本会自动换行,以确保它不会超出屏幕范围。
最后,我们有一个按钮,允许我们调用我们在sqlDialog.py上定义的send_message方法,因为我们这里只是一个模拟示例,并且对于这个对话只有一个可能的接收者和一个可能的发送者,所以我们在这里只使用字符串。
Main.qml 需要放入一个名为 App 的目录中,同时还需要一个名为 qmldir 的文件来描述一个基本的 QML 模块:
module App
Main 254.0 Main.qml
main.py
我们使用logging而不是Python的print(),因为它提供了一种更好的方式来控制我们的应用程序将生成的消息级别(错误、警告和信息消息)。
 1import sys
 2import logging
 3
 4from PySide6.QtCore import QCoreApplication, QDir, QFile, QStandardPaths
 5from PySide6.QtGui import QGuiApplication
 6from PySide6.QtQml import QQmlApplicationEngine
 7from PySide6.QtSql import QSqlDatabase
 8
 9# We import the file just to trigger the QmlElement type registration.
10import sqlDialog  # noqa E703
11
12logging.basicConfig(filename="chat.log", level=logging.DEBUG)
13logger = logging.getLogger("logger")
connectToDatabase() 创建与SQLite数据库的连接,如果文件不存在则创建实际文件。
 1def connectToDatabase():
 2    database = QSqlDatabase.database()
 3    if not database.isValid():
 4        database = QSqlDatabase.addDatabase("QSQLITE")
 5        if not database.isValid():
 6            logger.error("Cannot add database")
 7
 8    app_data = QStandardPaths.writableLocation(QStandardPaths.StandardLocation.AppDataLocation)
 9    write_dir = QDir(app_data)
10    if not write_dir.mkpath("."):
11        logger.error(f"Failed to create writable directory {app_data}")
12
13    # Ensure that we have a writable location on all devices.
14    abs_path = write_dir.absolutePath()
15    filename = f"{abs_path}/chat-database.sqlite3"
16
17    # When using the SQLite driver, open() will create the SQLite
18    # database if it doesn't exist.
19    database.setDatabaseName(filename)
20    if not database.open():
21        logger.error("Cannot open database")
22        QFile.remove(filename)
在main函数中发生了一些有趣的事情:
声明一个QGuiApplication。 你应该使用QGuiApplication而不是QApplication,因为我们没有使用QtWidgets模块。
连接到数据库,
声明一个QQmlApplicationEngine。 这允许您访问QML元素,以便从我们在
sqlDialog.py上构建的对话模型中连接Python和QML。加载定义用户界面的
.qml文件。
最后,Qt 应用程序运行,你的程序开始。
 1    app = QGuiApplication()
 2    QCoreApplication.setOrganizationName("QtProject")
 3    QCoreApplication.setApplicationName("Chat Tutorial")
 4
 5    connectToDatabase()
 6
 7    engine = QQmlApplicationEngine()
 8    engine.addImportPath(sys.path[0])
 9    engine.loadFromModule("App", "Main")
10
11    if not engine.rootObjects():
12        sys.exit(-1)
13
14    exit_code = app.exec()
15    del engine