在本教程中,我们将构建一个简单的MCP天气服务器并将其连接到主机,Claude for Desktop。

我们将构建什么

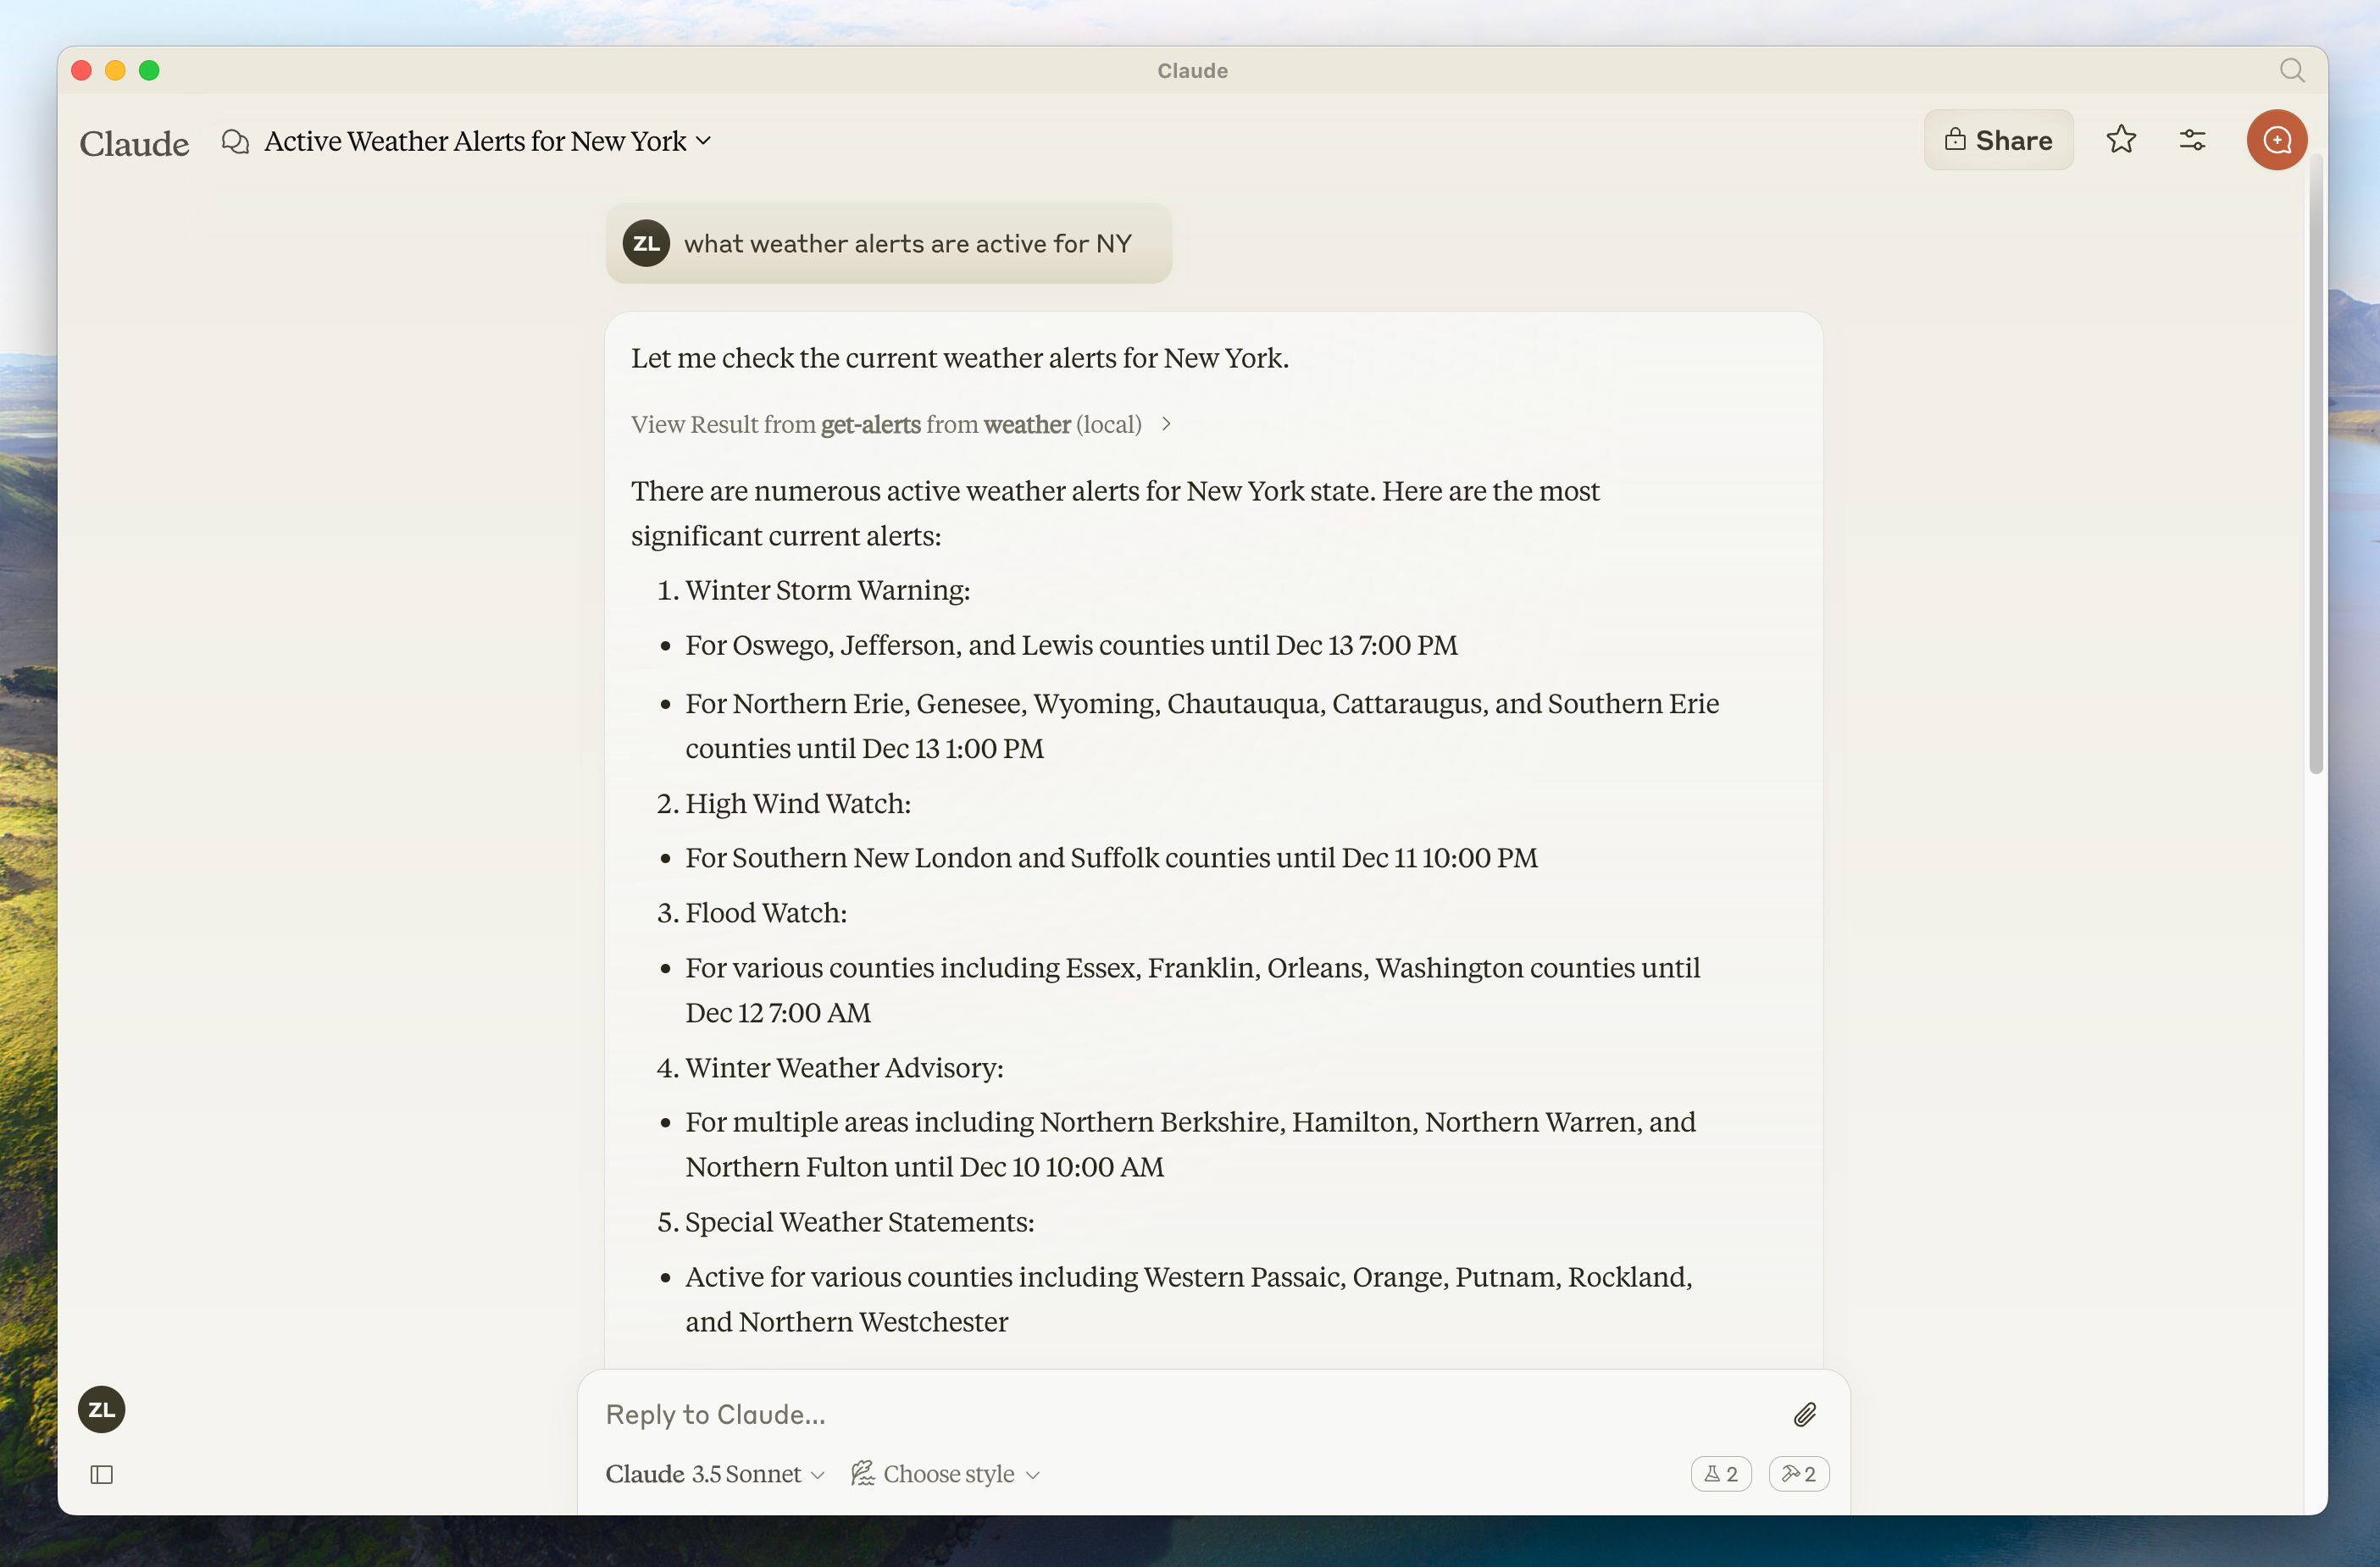
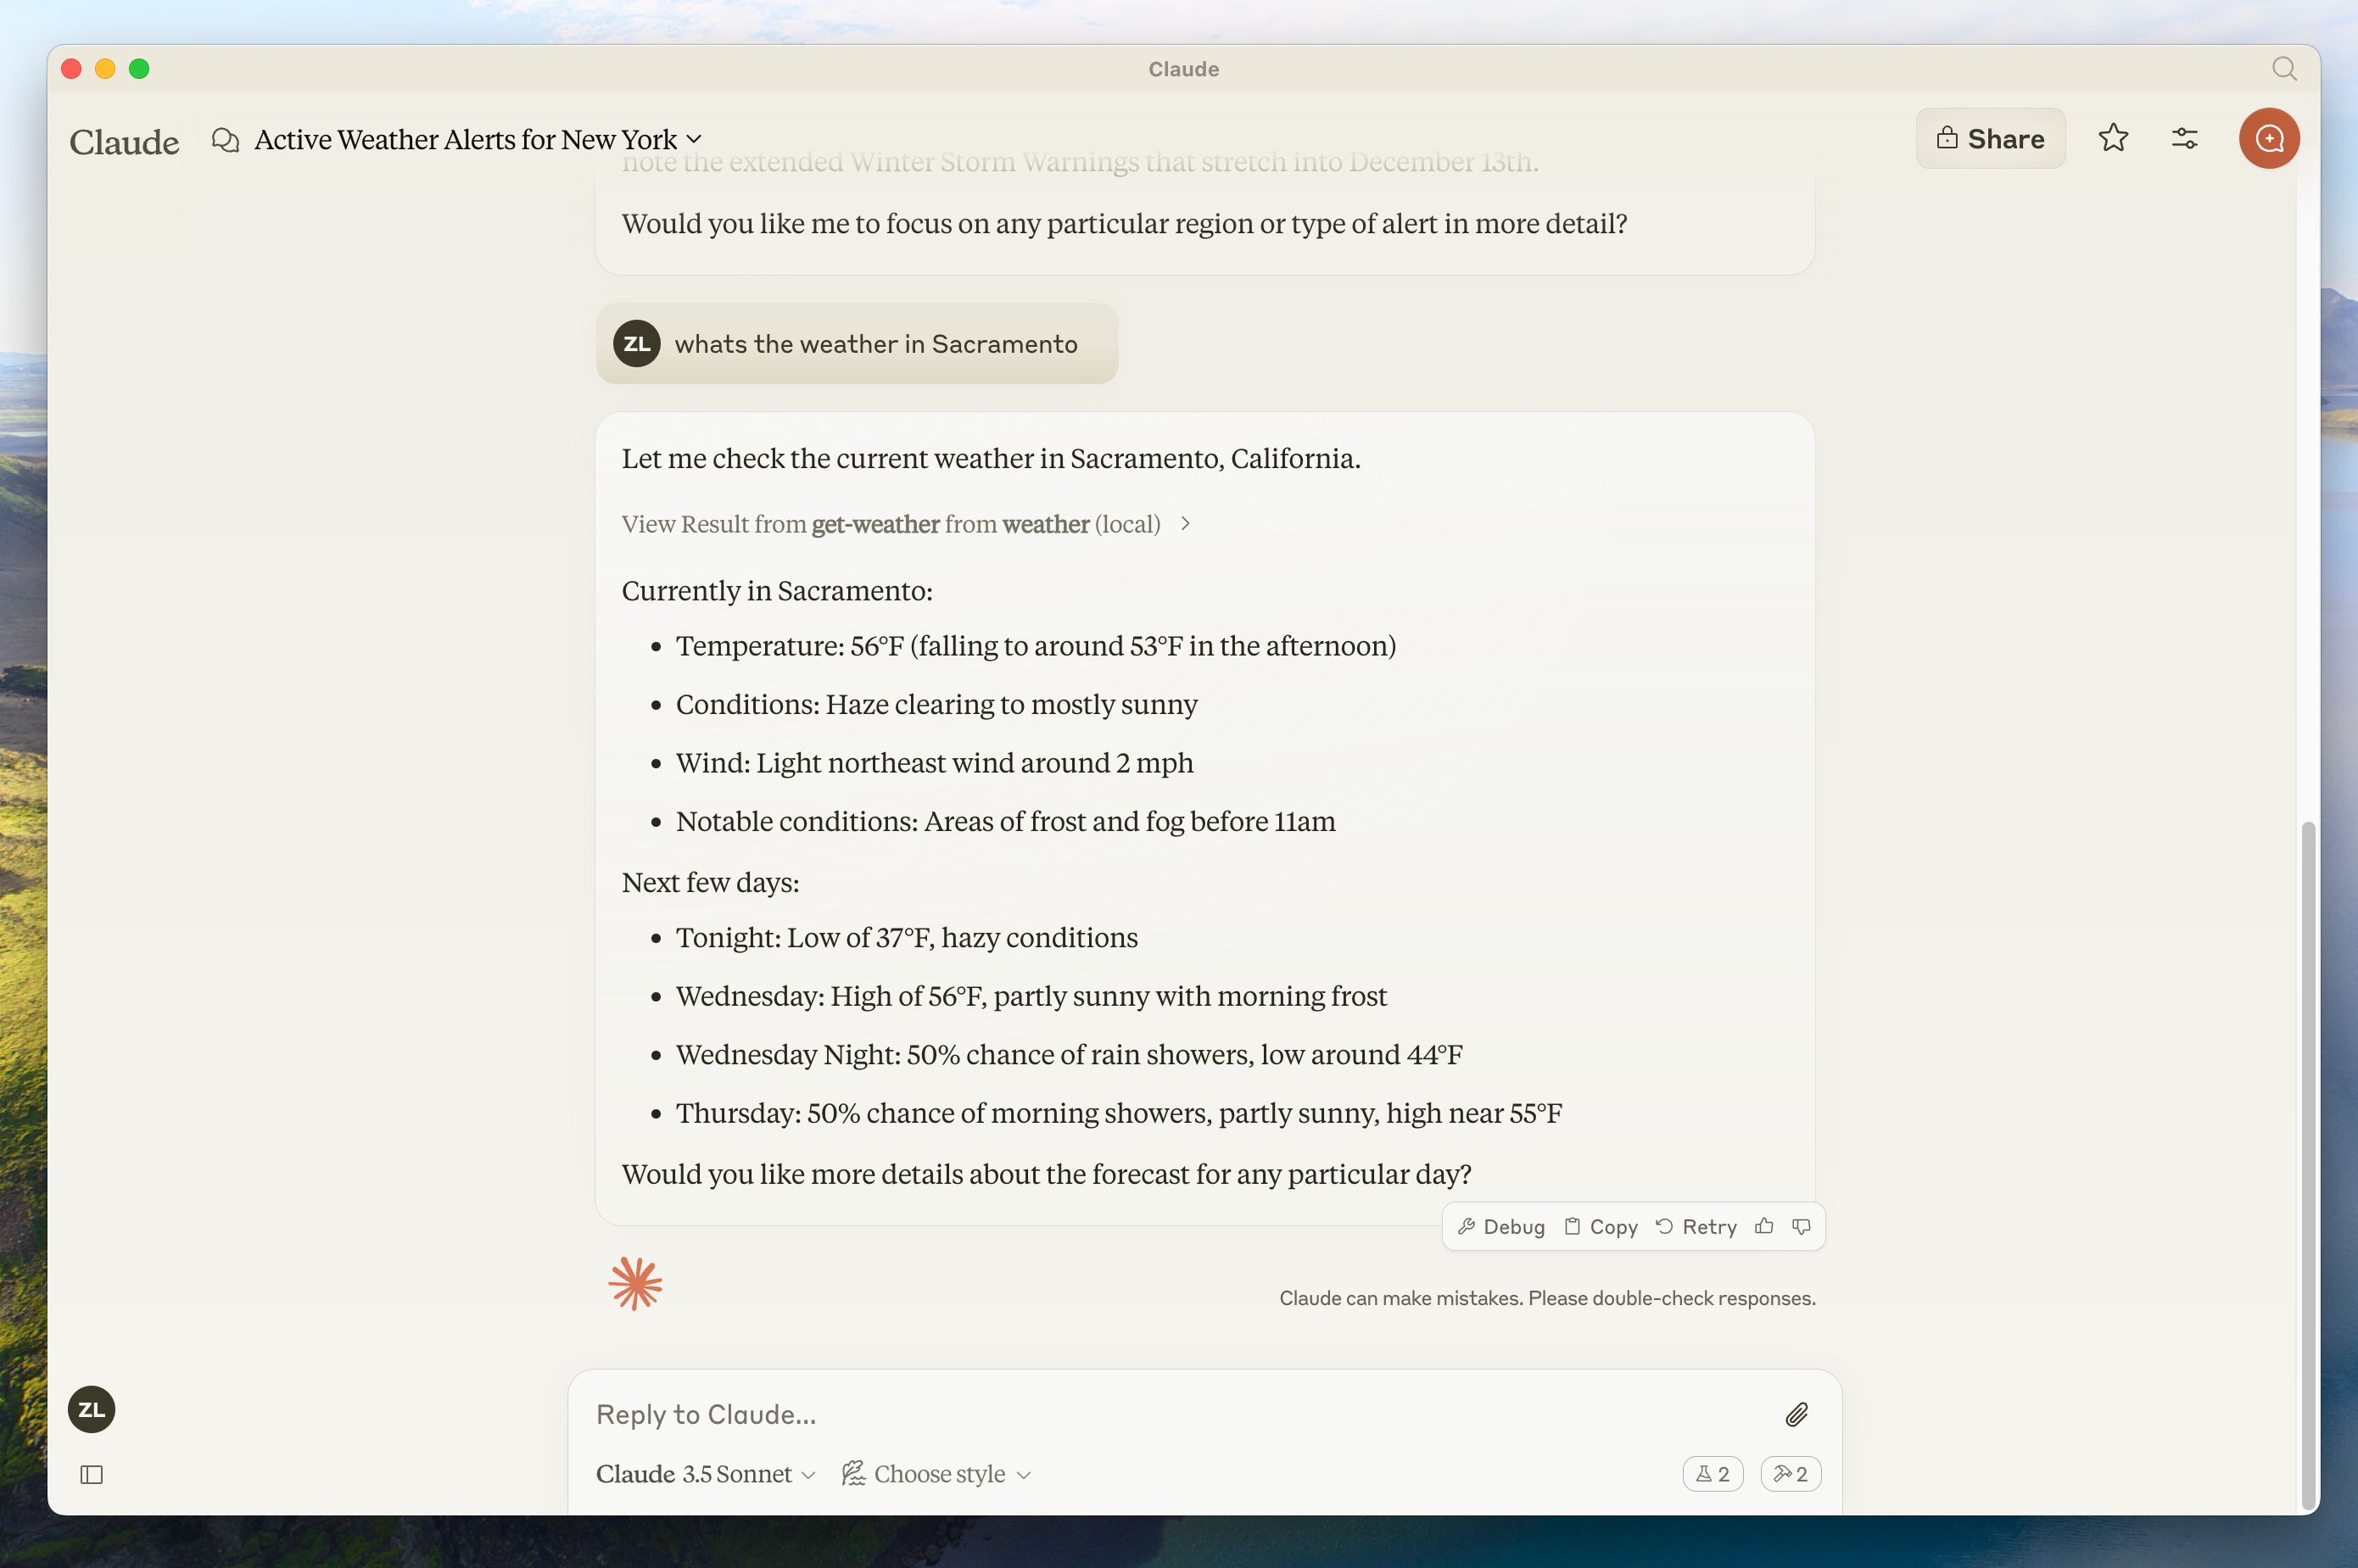
我们将构建一个对外提供两个工具的服务端:get_alertsget_forecast。之后我们将该服务端连接到MCP主机(本例中为桌面版Claude):
服务器可以连接到任何客户端。我们在这里选择Claude for Desktop是为了简化操作,但我们还提供了构建您自己的客户端的指南以及此处列出的其他客户端

核心 MCP 概念

MCP 服务器可提供三种主要能力类型:
  1. Resources: 可被客户端读取的类文件数据(例如API响应或文件内容)
  2. Tools: 可供大语言模型调用的函数(需经用户批准)
  3. Prompts: 预先编写的模板,帮助用户完成特定任务
本教程将主要关注工具。
让我们开始构建我们的天气服务器!你可以在这里找到我们将要构建的完整代码。

预备知识

本快速入门指南假设您熟悉以下内容:
  • Python
  • 如Claude这类的大语言模型

MCP 服务器中的日志记录

在实现MCP服务器时,请注意处理日志的方式:对于基于STDIO的服务器: 永远不要写入标准输出(stdout)。这包括:
  • print() Python 中的输出语句
  • console.log() 在 JavaScript 中
  • fmt.Println() 在 Go 语言中
  • 其他语言的类似标准输出功能
将内容写入stdout会损坏JSON-RPC消息并破坏您的服务器。对于基于HTTP的服务器: 标准输出日志就足够了,因为它不会干扰HTTP响应。

最佳实践

  1. 使用记录日志的库将日志写入stderr或文件。

快速示例

# ❌ Bad (STDIO)
print("Processing request")

# ✅ Good (STDIO)
import logging
logging.info("Processing request")

系统需求

  • 已安装 Python 3.10 或更高版本。
  • 你必须使用 Python MCP SDK 1.2.0 或更高版本。

设置您的环境

首先,让我们安装 uv 并设置我们的 Python 项目和环境:
curl -LsSf https://astral.sh/uv/install.sh | sh
请确保随后重启终端,以保证能够识别uv命令。现在,让我们创建并设置我们的项目:
# Create a new directory for our project
uv init weather
cd weather

# Create virtual environment and activate it
uv venv
source .venv/bin/activate

# Install dependencies
uv add "mcp[cli]" httpx

# Create our server file
touch weather.py
接下来让我们深入搭建你的服务器。

构建您的服务器

导入包并设置实例

将这些添加到你的 weather.py 文件顶部:
from typing import Any
import httpx
from mcp.server.fastmcp import FastMCP

# Initialize FastMCP server
mcp = FastMCP("weather")

# Constants
NWS_API_BASE = "https://api.weather.gov"
USER_AGENT = "weather-app/1.0"
FastMCP类利用Python类型提示和文档字符串自动生成工具定义,使得创建和维护MCP工具变得简单。

辅助函数

接下来,我们需要为查询和格式化国家气象服务API的数据添加辅助函数:
async def make_nws_request(url: str) -> dict[str, Any] | None:
    """Make a request to the NWS API with proper error handling."""
    headers = {
        "User-Agent": USER_AGENT,
        "Accept": "application/geo+json"
    }
    async with httpx.AsyncClient() as client:
        try:
            response = await client.get(url, headers=headers, timeout=30.0)
            response.raise_for_status()
            return response.json()
        except Exception:
            return None

def format_alert(feature: dict) -> str:
    """Format an alert feature into a readable string."""
    props = feature["properties"]
    return f"""
Event: {props.get('event', 'Unknown')}
Area: {props.get('areaDesc', 'Unknown')}
Severity: {props.get('severity', 'Unknown')}
Description: {props.get('description', 'No description available')}
Instructions: {props.get('instruction', 'No specific instructions provided')}
"""

实现工具执行

工具执行处理器负责实际执行每个工具的逻辑。让我们添加它:
@mcp.tool()
async def get_alerts(state: str) -> str:
    """Get weather alerts for a US state.

    Args:
        state: Two-letter US state code (e.g. CA, NY)
    """
    url = f"{NWS_API_BASE}/alerts/active/area/{state}"
    data = await make_nws_request(url)

    if not data or "features" not in data:
        return "Unable to fetch alerts or no alerts found."

    if not data["features"]:
        return "No active alerts for this state."

    alerts = [format_alert(feature) for feature in data["features"]]
    return "\n---\n".join(alerts)

@mcp.tool()
async def get_forecast(latitude: float, longitude: float) -> str:
    """Get weather forecast for a location.

    Args:
        latitude: Latitude of the location
        longitude: Longitude of the location
    """
    # First get the forecast grid endpoint
    points_url = f"{NWS_API_BASE}/points/{latitude},{longitude}"
    points_data = await make_nws_request(points_url)

    if not points_data:
        return "Unable to fetch forecast data for this location."

    # Get the forecast URL from the points response
    forecast_url = points_data["properties"]["forecast"]
    forecast_data = await make_nws_request(forecast_url)

    if not forecast_data:
        return "Unable to fetch detailed forecast."

    # Format the periods into a readable forecast
    periods = forecast_data["properties"]["periods"]
    forecasts = []
    for period in periods[:5]:  # Only show next 5 periods
        forecast = f"""
{period['name']}:
Temperature: {period['temperature']}°{period['temperatureUnit']}
Wind: {period['windSpeed']} {period['windDirection']}
Forecast: {period['detailedForecast']}
"""
        forecasts.append(forecast)

    return "\n---\n".join(forecasts)

运行服务器

最后,让我们初始化并运行服务器:
if __name__ == "__main__":
    # Initialize and run the server
    mcp.run(transport='stdio')
您的服务器已准备就绪!运行 uv run weather.py 来启动 MCP 服务器,该服务器将监听来自 MCP 主机的消息。现在让我们从一个现有的MCP主机,即Claude for Desktop,来测试你的服务器。

使用桌面版Claude测试您的服务器

Claude for Desktop 目前尚未在 Linux 上提供。Linux 用户可以继续学习构建客户端教程,以构建一个 MCP 客户端来连接到我们刚刚构建的服务端。
首先,请确保您已安装Claude for Desktop。您可在此处安装最新版本。 若您已安装Claude for Desktop,请确保它已更新至最新版本。我们需要为你想要使用的任何MCP服务器配置Claude桌面版。为此,请在文本编辑器中打开你的Claude桌面应用配置文件:~/Library/Application Support/Claude/claude_desktop_config.json。如果文件不存在,请确保创建该文件。例如,如果您安装了 VS Code
code ~/Library/Application\ Support/Claude/claude_desktop_config.json
然后,您需要在 mcpServers 键中添加您的服务器。只有在至少配置正确一个服务器的情况下,MCP UI元素才会出现在Claude桌面版中。在此案例中,我们将按如下方式添加单一天气服务器:
{
  "mcpServers": {
    "weather": {
      "command": "uv",
      "args": [
        "--directory",
        "/ABSOLUTE/PATH/TO/PARENT/FOLDER/weather",
        "run",
        "weather.py"
      ]
    }
  }
}
您可能需要在command字段中填写uv可执行文件的完整路径。在macOS/Linux上可以通过运行which uv,或在Windows上运行where uv来获取此路径。
确保传入服务器的绝对路径。您可以通过在macOS/Linux上运行pwd或在Windows命令提示符中运行cd来获取此路径。在Windows上,请记住在JSON路径中使用双反斜杠(\\)或正斜杠(/)。
这意味着Claude for Desktop:
  1. 有一个名为“weather”的MCP服务器
  2. 通过运行 uv --directory /ABSOLUTE/PATH/TO/PARENT/FOLDER/weather run weather.py 来启动它
保存文件,并重新启动 Claude for Desktop

测试命令

让我们确认桌面版Claude是否识别了我们weather服务器中公开的这两个工具。您可以通过查找"搜索与工具"图标来进行确认:
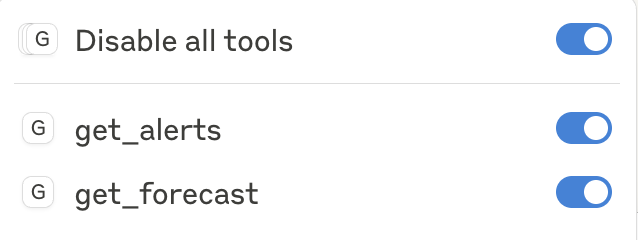
点击滑动图标后,你应该能看到列出两个工具:
如果您的服务器未被 Claude for Desktop 拾取,请跳转到Troubleshooting部分以获取调试技巧。 如果工具设置图标已经显示,您现在可以在桌面版Claude中运行以下命令来测试服务器:
  • 萨克拉门托的天气怎么样?
  • 德克萨斯州有哪些活跃的天气警报?
由于这是美国国家气象局,查询功能仅适用于美国地点。

幕后发生了什么

当你提出一个问题时:
  1. 客户端将您的问题发送到克劳德
  2. Claude分析可用的工具并决定使用哪一个
  3. 客户端通过MCP服务器执行选定的工具
  4. 结果被发送回Claude
  5. Claude 构思了一个自然语言回应
  6. 响应已显示给您!

故障排除

如需更高级的故障排除,请查看我们的指南 Debugging MCP

后续步骤