与MLflow集成
在这篇文章中,我们将解释如何设置sklearn-genetic-opt与MLflow的内置集成功能。
要使用此功能,我们需要配置相关参数,包括跟踪服务器地址、实验名称、运行名称、标签等,
完整实现请参见:MLflowConfig
配置
配置非常简单,我们只需要导入主类并定义一些参数,以下是各参数的含义:
tracking_uri: 本地或远程追踪服务器的地址。
experiment: 要激活的实验名称(区分大小写)。
run_name: 新运行的名称(存储为mlflow.runName标签)。
save_models: 如果设为
True,将会把评估器记录到mlflow工件中。registry_uri: 本地或远程模型注册服务器的地址。
tags: 要应用的标签字典。
示例
在本示例中,我们将把训练信息记录到运行在本地5000端口的mlflow服务器中,并希望保存每个训练好的模型。
from sklearn_genetic.mlflow_log import MLflowConfig

mlflow_config = MLflowConfig(
    tracking_uri="http://localhost:5000",
    experiment="Digits-sklearn-genetic-opt",
    run_name="Decision Tree",
    save_models=True,
    tags={"team": "sklearn-genetic-opt", "version": "0.5.0"})
现在,这个配置被传递给GASearchCV类
在名为log_config的参数中,例如:
from sklearn_genetic import GASearchCV
from sklearn_genetic.space import Categorical, Integer, Continuous
from sklearn.model_selection import train_test_split, StratifiedKFold
from sklearn.tree import DecisionTreeClassifier
from sklearn.datasets import load_digits
from sklearn.metrics import accuracy_score
from sklearn_genetic.mlflow import MLflowConfig


data = load_digits()
label_names = data["target_names"]
y = data["target"]
X = data["data"]

X_train, X_test, y_train, y_test = train_test_split(
    X, y, test_size=0.33, random_state=42)

clf = DecisionTreeClassifier()

params_grid = {
    "min_weight_fraction_leaf": Continuous(0, 0.5),
    "criterion": Categorical(["gini", "entropy"]),
    "max_depth": Integer(2, 20),
    "max_leaf_nodes": Integer(2, 30)}

cv = StratifiedKFold(n_splits=3, shuffle=True)

evolved_estimator = GASearchCV(
    clf,
    cv=cv,
    scoring="accuracy",
    population_size=3,
    generations=5,
    tournament_size=3,
    elitism=True,
    crossover_probability=0.9,
    mutation_probability=0.05,
    param_grid=params_grid,
    algorithm="eaMuPlusLambda",
    n_jobs=-1,
    verbose=True,
    log_config=mlflow_config)

evolved_estimator.fit(X_train, y_train)
y_predict_ga = evolved_estimator.predict(X_test)
accuracy = accuracy_score(y_test, y_predict_ga)

print(evolved_estimator.best_params_)
请注意,我们选择了较小的世代数和种群规模,只是为了能够在不产生过多冗长信息的情况下查看结果。
如果您进入mlflow用户界面并点击名为"Digits-sklearn-genetic-opt"的实验,应该会看到类似这样的内容(我已隐藏部分列以便更清晰地展示):
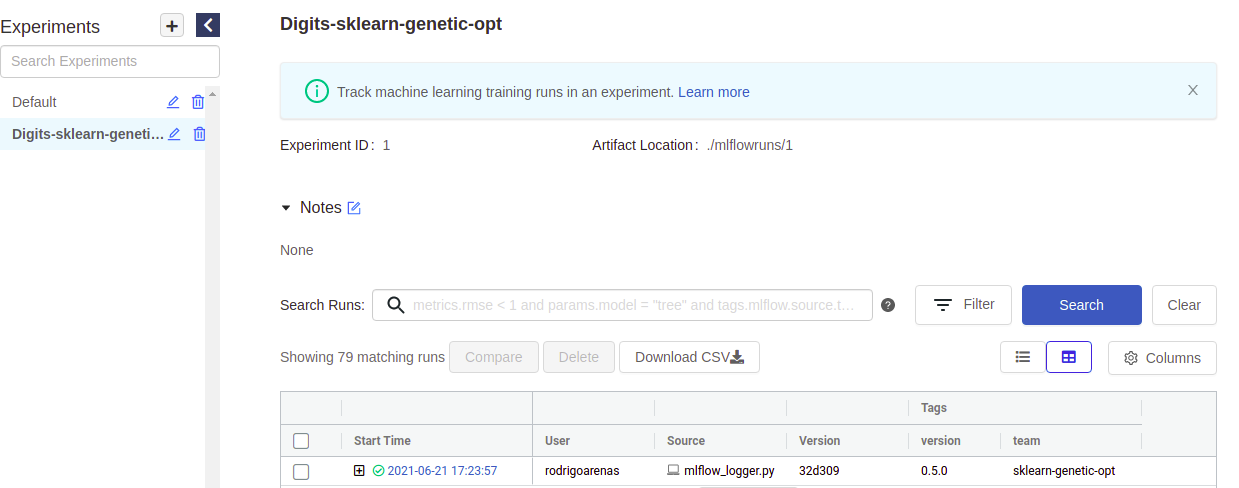
在这里我们可以看到运行实验的用户、包含源代码的文件名称、我们的标签以及其他元数据。请注意有一个"加号"符号会显示我们的每次迭代,这是因为sklearn-genetic-opt会以嵌套方式记录每次GASearchCV.fit()调用,可以将其视为父级运行,而每个子级则是测试过的超参数之一。例如,如果我们再次运行相同的代码,现在会看到两个父级运行:

现在点击任意“加号”符号即可查看所有子节点,它们现在看起来是这样的(再次编辑了显示的列):
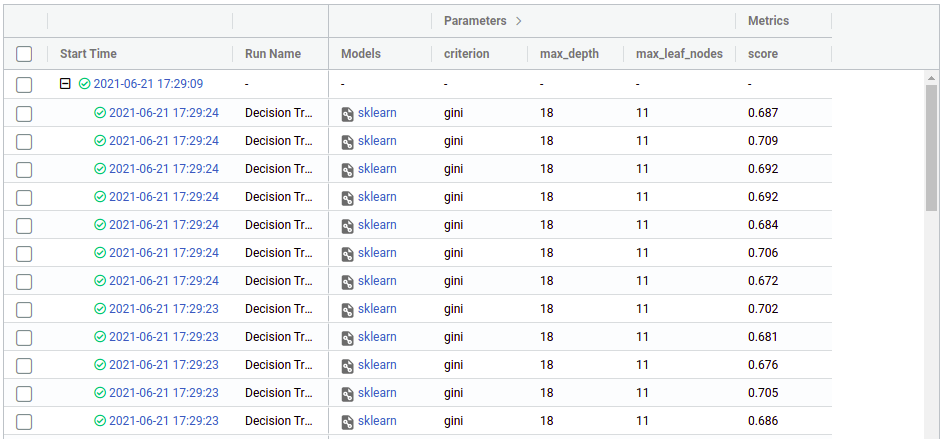
From there we can see the hyperparameters and the score (cross-validation) that we got in each run, from there we can use the regular mlflow functionalities like comparing runs, download the CSV, register a model, etc. You can see more on https://mlflow.org/docs/latest/index.html
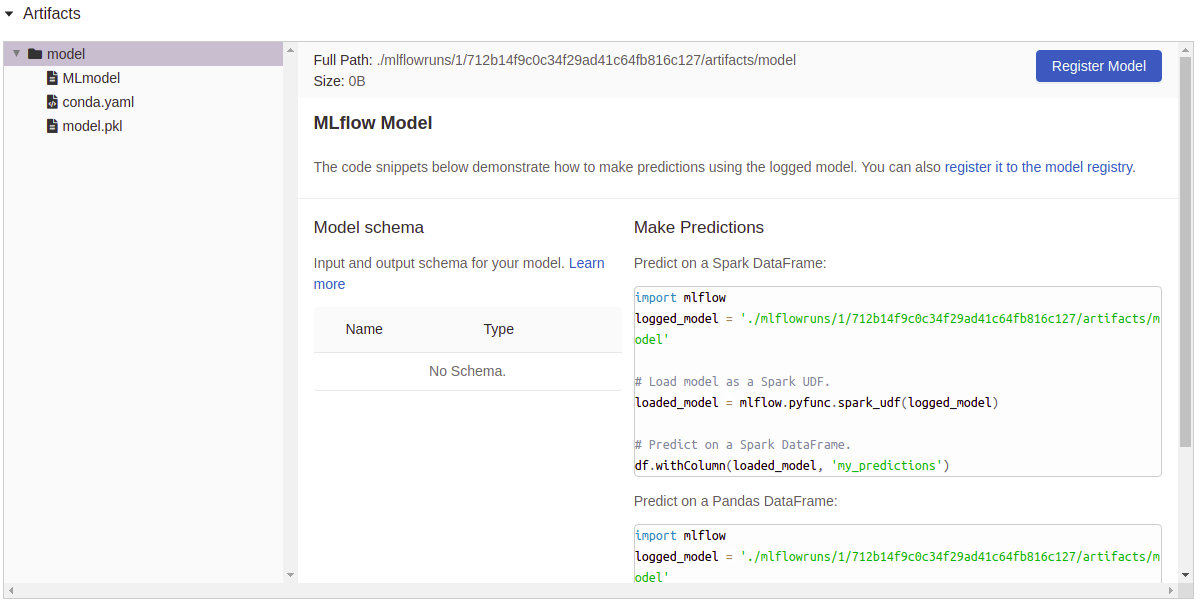
现在,当我们设置save_model=True时,可以看到"Model"列附带了一个文件作为工件。如果我们点击其中任何一个,就能看到该特定执行的摘要以及一些可以直接使用模型的实用工具: