使用Label Studio监控与评估生产环境中的模型

先决条件
本指南有几项您应该具备并熟悉的内容!它们是:
- Label Studio 用户,熟悉标注工作流程
- 访问Label Studio的运行实例,无论是本地部署还是我们的云端SaaS服务
- 访问(至少是只读权限)生产数据,通常位于云存储桶或数据存储中
- 能够熟练使用Python(或类似语言)编写基础逻辑代码,将记录转换为Label Studio格式
- 熟悉作业调度器(如cron)
为什么在生产环境中监控模型如此具有挑战性
理解生产模型的性能表现是机器学习流程中最关键但也最具挑战性的环节。您已经完成了模型训练并评估了其质量,但在实际生产环境中可能发生各种情况——从异常的模型行为到出乎意料的人工输入,更不用说瞬息万变的世界对模型上下文产生的影响。
传统的黄金标准数据集——那些手动创建作为未来评估基准的数据集,是开始生产级评估流程的理想起点。然而,正如许多从业者所共鸣的,这些数据集构建和维护既困难又昂贵,且往往无法反映生产环境中模型的真实情况。市场上有许多工具可以帮助监控数据漂移(当输入模型的数据发生变化时经常发生的情况),但一旦模型投入生产,没有什么能替代人类对实际情况的理解。
我们知道这项任务具有挑战性——这正是我们为Label Studio开发模型监控包的原因。这个完全可根据需求配置的包,能帮助您抓取生产日志并将实际模型预测作为预标注上传至Label Studio,让您轻松掌握生产环境的真实情况。通过这种方式,您可以确保关键任务AI系统长期保持高质量,同时还能收集生产环境中的真实数据,用于未来模型重新训练。

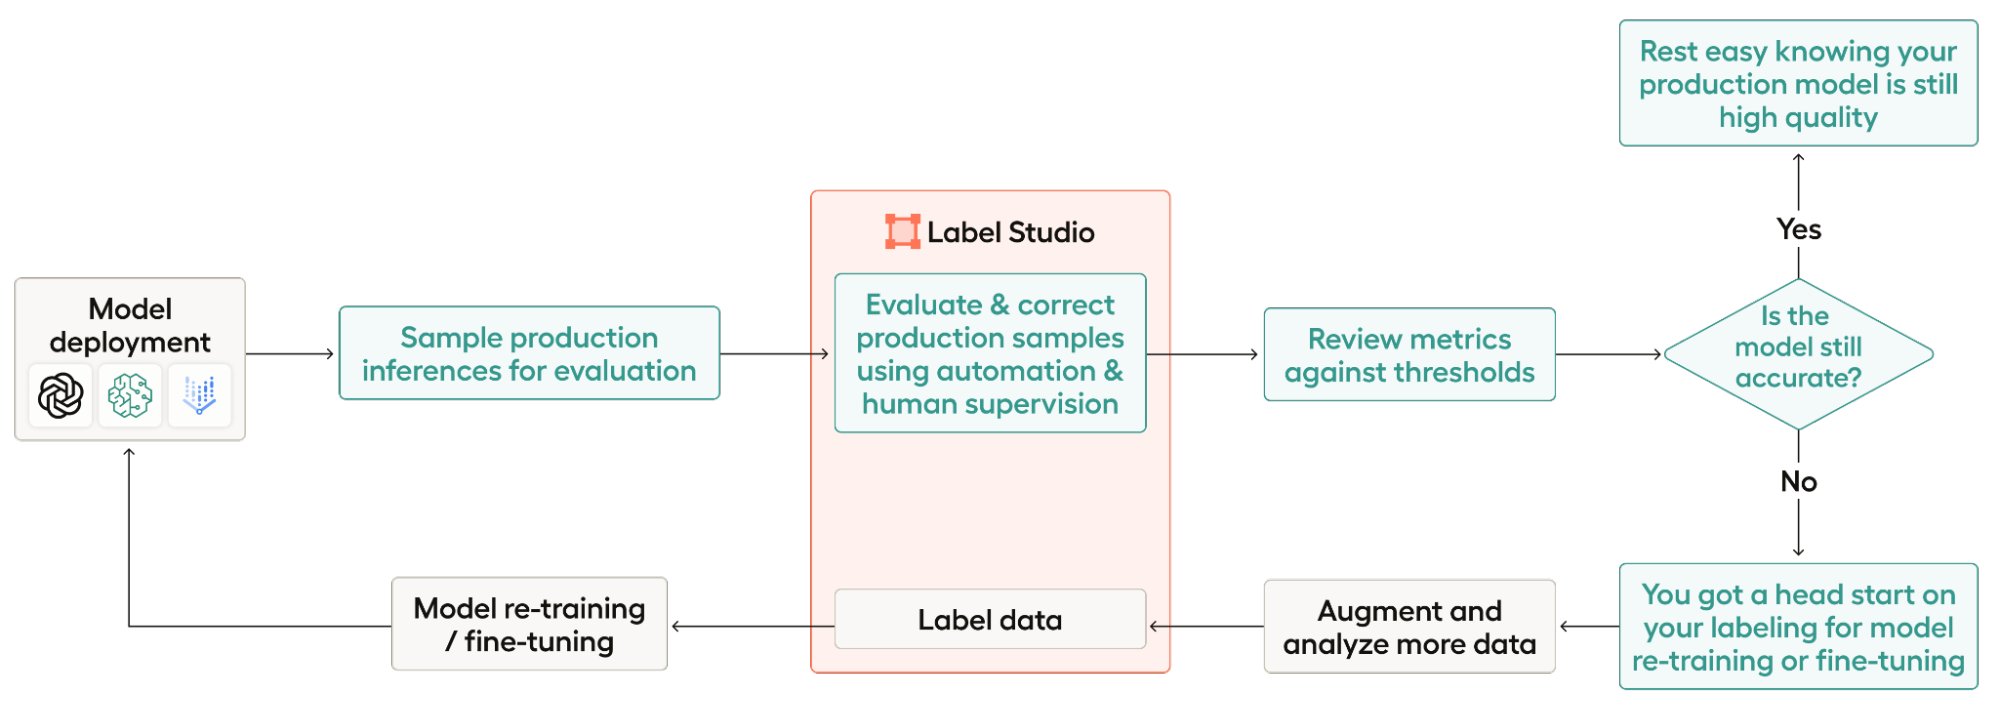
作为概述,以下是工作流程的步骤:
- 模型部署: 对于此工作流程,您需要已经部署好一个模型。
- 用于评估的生产环境推理样本: 这包括从托管生产日志的任何地方抓取日志,并从这些日志中进行采样。
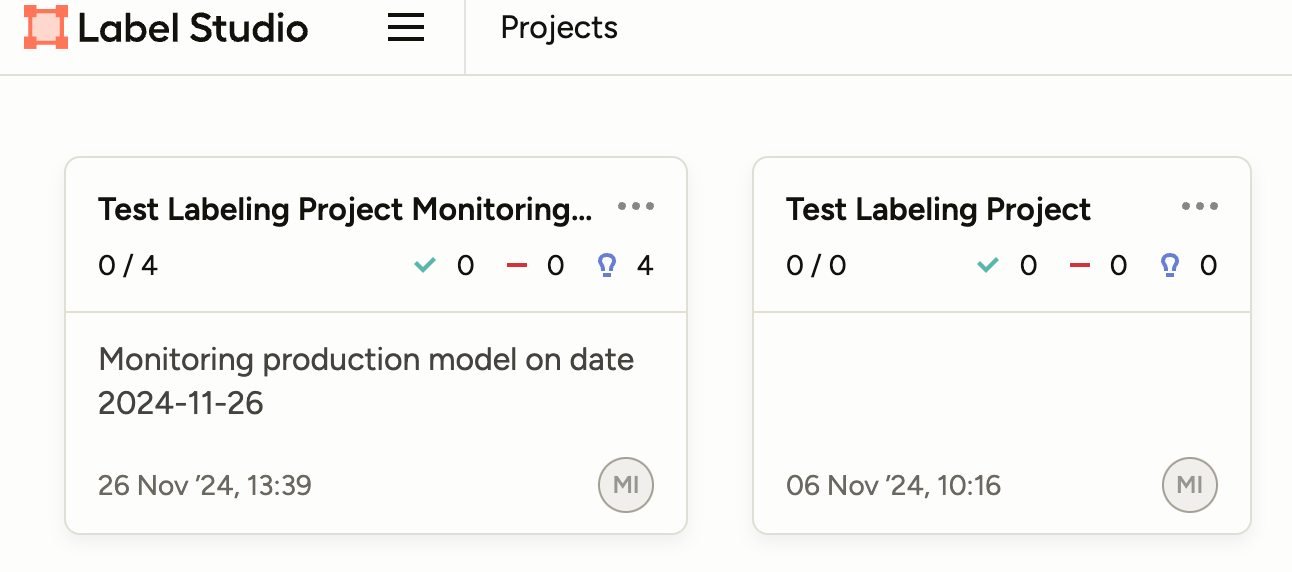
- 使用自动化和人工监督评估并修正生产样本: Label Studio 将自动为您创建一个项目,使用实际生产输出作为每个任务的预测结果。接下来,您需要采取适当步骤评估模型表现,并修正错误之处。
- 根据阈值审查指标: 导出您的标注数据并查看模型表现。我们为此提供了一个基础脚本,但您随时可以添加自己的脚本!
- 模型是否仍然准确? 如果您的模型表现良好,可以暂时不做调整并持续监控。如果模型需要改进,您已经准备好了一些标注数据可用于重新训练或微调!
- 增强和分析更多数据: 第3步的输出是重新训练或微调的绝佳起点,但您可能需要更多数据。在此步骤中,您将为重新训练或微调集收集更多数据。
- 标注数据: 为重新训练或微调标注您的新数据集——您可以直接在Label Studio中完成!
- 模型重新训练/微调: 一旦您收集并标注了足够的数据,就可以重新训练或微调您的模型了。
- 模型部署: 既然你已经重新训练或微调了模型,现在可以部署新模型并重新开始流程了!
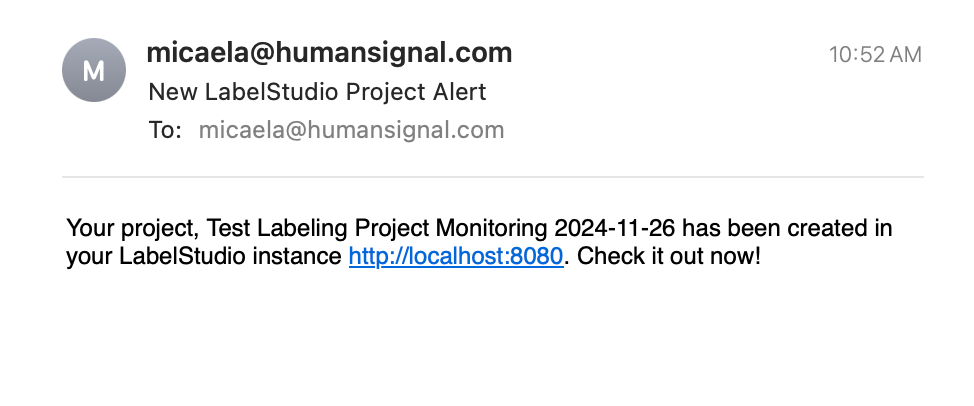
该软件包的设计理念是"设置后即可无忧"。我们建议将`monitor_project_with_labelstudio.py`中的主函数设置为定时任务运行,这样您就少了一件需要记住去做的事情。默认情况下,程序配置为查看最近7天的生产日志,假设您希望每周运行一次,但整个系统可以根据您的需求进行配置。当代码运行完成且项目准备就绪可供审查时,您或相关人员还会收到电子邮件通知。虽然您需要为生产环境中的每个模型设置不同的任务,但所有配置只需设置一次即可。一旦开始运行,您就可以高枕无忧了!

由模型监控包生成并发送的电子邮件。
该软件包确实需要用户提供一些输入和编码,这是有意为之。人们喜爱Label Studio的最大原因之一在于其灵活性和自定义选项。我们不想规定您的日志可能存放在何处或采用何种形式。我们也不希望对您的项目可能是什么或哪些评估或抽样指标对您的项目有意义做出过于严格的规定。更新此逻辑非常简单,只需几分钟,但您应将我们的设置视为模板和指南,而不是所有可能性的终极方案。
准备好构建您自己的工作流程了吗?让我们开始吧!
设置您的项目
首先,您需要拉取示例代码库以获取我们的代码。然后,您需要先填写`config.ini`文件。这里将存放您的所有凭证信息以及一些其他自定义变量。另外请注意,我们提供了两种方式来为新创建的项目提供标注配置 - 您可以手动输入配置字符串,或者提供一个现有label studio项目的ID(比如您用来创建模型训练数据的项目),我们将使用相同的配置。
[labelstudio]
# Your Label Studio instance url
LabelStudioURL =
# Your Label Studio API key
LabelStudioAPI =
# OPTIONAL The ID of the Label Studio project that you want to use the config from.
LabelStudioProjectID =
# OPTIONAL Your Label Studio Config. Note that you need a space at the beginning of every line!
LabelingConfig =

[data]
# Total number of samples to upload to LabelStudio for review.
total_to_extract =
# BOOLEAN whether or not to sample your data by date
# If true, take an even sample across all 6 days sampled, getting as close as we can to the total_to_extract number without going over.
sample_by_date = True

[logs]
username =
api_key =
bucket =

[notifications]
# Email from which to send the notification
email_sender =
#email or emails, comma separated with no spaces, to receive notification emails
email_recipient =
# SMTP server -- provided by your email client
smtp_server = smtp.gmail.com
smtp_port = 465
# the password or app key for your email. If using gmail, generate an app key here: https://myaccount.google.com/apppasswords
email_password =建立您的ETL数据管道
在您的`config.ini`文件准备就绪后,需要前往`scrape_logs.py`并更新系统逻辑。关键是要确保`scrape()`返回一个字典列表,其中每个字典对应一个Label Studio任务。字典的键将用于根据label_config上传您的数据,因此需要确保正确标记这些字段。
更新 `scrape_logs.py` 涉及以下几个步骤:
1. 更新连接逻辑。我们的示例是针对S3存储桶的——如果您使用的是其他系统,则需要更改连接方式。
# Connect to your server here.
# In this example, we use an S3 bucket
session = Session(aws_access_key_id=logs_username, aws_secret_access_key=logs_password)
s3 = session.resource('s3')
bucket = s3.Bucket(logs_bucket)

# for our test, we assume that files have the name "qalogs_MM:DD:YY.txt"
for s3_file in bucket.objects.all():
    key = s3_file.key
    if "qalogs" in key:
        key_date = key.split(".")[0]
        key_date = key_date.split("_")[1]
        key_date = datetime.strptime(key_date, '%m:%d:%y').date()
        print(key_date, end, start)
        if key_date <= end and key_date >= start:
            body = s3_file.get()['Body'].read().decode("utf-8")
   #         # the scrape file method does the file processing.
all_data.extend(scrape_file(body))2. 在 `scrape_file()` 中更新文件处理逻辑。我们的示例使用了代码库中的 `qalogs_11:12:2024.txt` 文件,非常欢迎您进行尝试!我们知道您的生产日志可能会有所不同。
def scrape_file(body):
   # basic file processing template
   # ALL logic will need to be customized based on the format of your logs.
   all_data = []
   if body:
       curr_data = {}
       for line in body.split('\n'):
           if "Timestamp" in line:
               if curr_data:
                   print(curr_data)
                   all_data.append(curr_data)
                   curr_data = {}
               line = line.split(' ')
               date = line[1]
               print(f'date {date}')
               curr_data["date"] = date
           if "User Input" in line:
               line = line.split('User Input: ')
               question = line[1]
               curr_data["question"] = question.strip("\"")
           if "Model Response" in line:
               line = line.split('Model Response: ')
               answer = line[1]
               curr_data["answer"] = answer.strip("\"")
           if "Version" in line:
               line = line.split("Version: ")
               model_version = line[1]
               curr_data["model_version"] = model_version
       if curr_data:
           all_data.append(curr_data)
       return all_data
3. 可选 更新子集逻辑。我们已包含按日期随机抽样数据的逻辑,但如果您想按类别或其他条件筛选子集,建议您将其写入文件!
def get_data_subset(all_data, total_to_extract, sample_by_date):
   """
   Get a sample of all your data. If the total len of data is less than the sample size, return all.
   Else, if sample_by_date, take an even sample across all date ranges as for a total as close as we can get
   to the intended sample number while keeping an even sample across all dates.
   :param all_data: a list of dictionaries containing all the data scraped from the logs
   :param total_to_extract: the goal number of samples to have in total
   :param sample_by_date: boolean, if true, sample the subset by date.
   :return:
   """
   if len(all_data) <= total_to_extract:
       return all_data

   if sample_by_date:
       by_date = {}
       for t in all_data:
           if t["date"] not in by_date.keys():
               by_date[t["date"]] = [t]
           else:
               by_date[t["date"]].append(t)

       per_date = floor(total_to_extract / len(by_date.keys()))
       new_data = []
       for date, data in by_date.items():
           random_sample = sample(data, per_date)
           new_data.extend(random_sample)
       return new_data

   #ToDo: Sample by class?

   else:
       random_sample = sample(all_data, total_to_extract)
return random_sample将生产数据作为预测上传
设置项目的最后一步是更新数据上传到LabelStudio系统的方式。
假设您正在使用以下标注配置。在这个示例项目中,我们正在监控一个由LLM驱动的问答系统,因此我们需要将用户的问题作为输入上传,而我们的答案原本是由人工撰写的,但在模型监控包中将是LLM的输出。
<View>
  <Header value="Question:"/>
  <Text name="question" value="$question"/>
  <TextArea name="answer" toName="question" editable="true" smart="false" maxSubmissions="1"/>
</View>以下是您需要遵循的步骤来更新`model_monitoring_with_labelstudio.py`中的代码:
1. 在`monitor_model_with_labelstudio.py`文件的`monitor`函数中更新task_data字典。下方可以看到我们的示例task_data字典。字典顶层的"data"键是Label Studio要求的。您只需编辑作为"data"键值的字典,使其包含设置任务所需的所有数据。在您的标注配置中,这将对应任何具有与某个变量关联的"value"键的字段。在我们的示例中,这仅是一个名为"question"的文本字段,因此这里我们提供键"question"(对应value字段中的变量名),而字典中的值则是我们在爬取部分创建的task字典中对应问题的键。
task_data = {
   "data":
       {"question": task["question"]}
}2. 更新在`monitor_model_with_labelstudio.py`的`monitor`方法中创建的PredictionValue对象的结果,以反映您的模型预测的字段。生成此结果的最简单方法是使用`utils.py`中的代码,该代码将读取您的config.ini文件,并使用提供的标注配置(或您指定的ProjectID中的标注配置),返回此预测值应有的示例。请注意,我们用一些虚拟信息填充了这个字典,因此您需要用与您的特定数据样本(从scrape_logs.py获取)相关的信息更新某些字段。对于我们上面的示例,`utils.py`代码提供了以下json供我们使用。
{
    "model_version": "sample model version",
    "score": 0.0,
    "result": [
        {
            "id": "ab417d1e-b4ee-4f8f-b4e9-930d35da5e60",
            "from_name": "answer",
            "to_name": "question",
            "type": "textarea",
            "value": {
                "text": [
                    "Lorem Ipsum
                ]
            }
        }
    ]
}让我们看看这个json如何对应你需要编写的PredictionValue。PredictionValue对象的第一个参数是`model_version`——这是Label Studio要求的。我们在抓取日志时提取模型版本,并将其作为任务字典中的一个键提供,因此在这里使用它。请注意,在`utils.py`的JSON示例中,我们只写了"sample model version"。这里我们还包含了一个score值——这是可选的。然后,我们有result参数。它接收需要填充的所有字段列表。在我们的示例中,我们唯一要预测的是名为"answer"的TextArea,因此我们在列表中提供了一个字典来包含这些信息。from_name对应字段的名称,to_name对应字段的toName,type是字段的类型(本例中是textarea),value则是创建注释时需要提供的任何内容。有关此部分的更多信息,请参阅我们的文档。
from label_studio_sdk.label_interface.objects import PredictionValue
prediction = PredictionValue(
   model_version=task["model_version"],
   result=[
       {
           "from_name": "answer",
           "to_name": "question",
           "type": "textarea",
           "value": {
               "text": [task["answer"]]
           }
       }
   ]
)完成这些步骤后,您应该已经准备好可以抓取日志并将其上传到Label Studio的代码。
评估您的模型

运行脚本或定时任务后,Label Studio中将准备好一个新项目供您标注。由于我们上传了真实的模型预测作为预标注,可以轻松查看实际发生的情况,并在结果优于实际情况时进行修改。完成后,您可以将标注数据导出为完整的json文件(开源版本中的第一个导出选项)。保存该文件后,您可以在`evaluate.py`中指定文件路径并运行脚本,该脚本将提供有关模型预测需要修改次数的指标。

通过了解您修改模型预测的频率,您将更清楚地了解生产系统中实际发生的情况,并能在问题出现或用户反馈之前更新模型。此外,标注生产数据还能为您提供可直接用于微调或重新训练模型的数据。
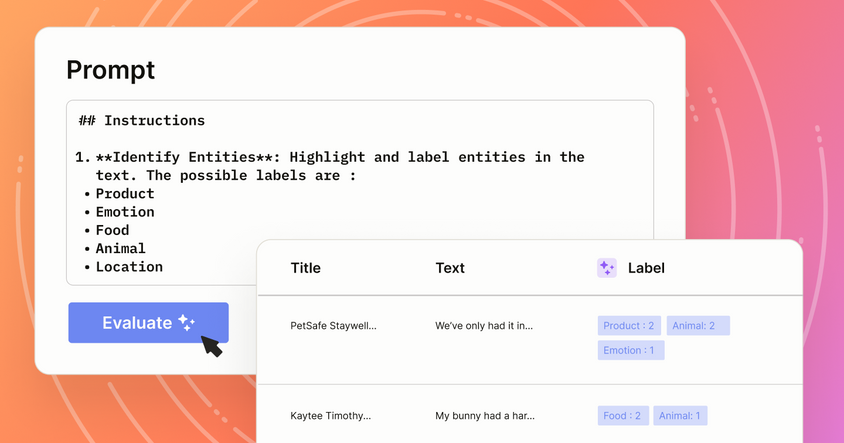
如果想深入了解评估工作流程,请查阅我们的Label Studio中比较模型输出的指南
标注愉快!


