
快速入门 — 从零开始实现可观测性与微调
本快速入门指南展示了如何在短短5分钟内,将一个OpenAI封装器升级为具备内置可观测性和微调功能的最小化TensorZero部署。 从此处出发,您可以利用数十种功能来构建一流的LLM应用程序。
现状:OpenAI封装器
假设我们正在构建一个能写俳句的LLM应用。
今天,我们与OpenAI的集成可能看起来是这样的:
from openai import OpenAI
with OpenAI() as client:    response = client.chat.completions.create(        model="gpt-4o-mini",        messages=[            {                "role": "user",                "content": "Write a haiku about artificial intelligence.",            }        ],    )
print(response)
Sample Output
ChatCompletion( id='chatcmpl-A5wr5WennQNF6nzF8gDo3SPIVABse', choices=[ Choice( finish_reason='stop', index=0, logprobs=None, message=ChatCompletionMessage( content='Silent minds awaken, \nPatterns dance in code and wire, \nDreams of thought unfold.', role='assistant', function_call=None, tool_calls=None, refusal=None ) ) ], created=1725981243, model='gpt-4o-mini', object='chat.completion', system_fingerprint='fp_483d39d857', usage=CompletionUsage( completion_tokens=19, prompt_tokens=22, total_tokens=41 ))迁移至TensorZero
TensorZero提供数十种功能,涵盖推理、可观测性、优化、评估和实验。
但最基本的配置仅需一个简单的配置文件:tensorzero.toml。
# A function defines the task we're tackling (e.g. generating a haiku)...[functions.generate_haiku]type = "chat"
# ... and a variant is one of many implementations we can use to tackle it (a choice of prompt, model, etc.).# Since we only have one variant for this function, the gateway will always use it.[functions.generate_haiku.variants.gpt_4o_mini]type = "chat_completion"model = "openai::gpt-4o-mini"
这个最小配置文件告诉TensorZero网关复制原始OpenAI调用所需的一切信息。
部署TensorZero
我们即将开始进行API调用。 让我们启动TensorZero。
- 设置环境变量
OPENAI_API_KEY。 - 将我们的
tensorzero.toml文件放入./config目录中。 - 下载以下示例
docker-compose.yml文件。 该Docker Compose配置会搭建一个开发用的ClickHouse数据库(TensorZero存储数据的位置)、TensorZero网关以及TensorZero用户界面。
curl -LO "https://raw.githubusercontent.com/tensorzero/tensorzero/refs/heads/main/examples/quickstart/docker-compose.yml"docker-compose.yml
# This is a simplified example for learning purposes. Do not use this in production.# For production-ready deployments, see: https://www.tensorzero.com/docs/gateway/deployment
services:  clickhouse:    image: clickhouse/clickhouse-server:24.12-alpine    environment:      - CLICKHOUSE_USER=chuser      - CLICKHOUSE_DEFAULT_ACCESS_MANAGEMENT=1      - CLICKHOUSE_PASSWORD=chpassword    ports:      - "8123:8123"    healthcheck:      test: wget --spider --tries 1 http://chuser:chpassword@clickhouse:8123/ping      start_period: 30s      start_interval: 1s      timeout: 1s
  # The TensorZero Python client *doesn't* require a separate gateway service.  #  # The gateway is only needed if you want to use the OpenAI Python client  # or interact with TensorZero via its HTTP API (for other programming languages).  #  # The TensorZero UI also requires the gateway service.  gateway:    image: tensorzero/gateway    volumes:      # Mount our tensorzero.toml file into the container      - ./config:/app/config:ro    command: --config-file /app/config/tensorzero.toml    environment:      - TENSORZERO_CLICKHOUSE_URL=http://chuser:chpassword@clickhouse:8123/tensorzero      - OPENAI_API_KEY=${OPENAI_API_KEY:?Environment variable OPENAI_API_KEY must be set.}    ports:      - "3000:3000"    extra_hosts:      - "host.docker.internal:host-gateway"    depends_on:      clickhouse:        condition: service_healthy
  ui:    image: tensorzero/ui    volumes:      # Mount our tensorzero.toml file into the container      - ./config:/app/config:ro    environment:      - OPENAI_API_KEY=${OPENAI_API_KEY:?Environment variable OPENAI_API_KEY must be set.}      - TENSORZERO_CLICKHOUSE_URL=http://chuser:chpassword@clickhouse:8123/tensorzero      - TENSORZERO_GATEWAY_URL=http://gateway:3000    ports:      - "4000:4000"    depends_on:      clickhouse:        condition: service_healthy
我们的配置应如下所示:
Directoryconfig/
- tensorzero.toml
- after.py 见下方
- before.py
- docker-compose.yml
让我们启动一切!
docker compose up首次调用TensorZero API
该网关将复制我们原始的OpenAI调用,并将数据存储在我们的数据库中——得益于Rust 🦀,延迟开销不到1毫秒。
TensorZero网关可与TensorZero Python客户端、OpenAI客户端(Python、Node等)配合使用,或通过其HTTP API以任何编程语言进行调用。
您可以通过以下方式安装TensorZero Python客户端:
pip install tensorzero然后,您可以通过以下方式调用TensorZero API:
from tensorzero import TensorZeroGateway
with TensorZeroGateway.build_embedded(    clickhouse_url="http://chuser:chpassword@localhost:8123/tensorzero",    config_file="config/tensorzero.toml",) as client:    response = client.inference(        function_name="generate_haiku",        input={            "messages": [                {                    "role": "user",                    "content": "Write a haiku about artificial intelligence.",                }            ]        },    )
print(response)
Sample Output
ChatInferenceResponse( inference_id=UUID('0191ddb2-2c02-7641-8525-494f01bcc468'), episode_id=UUID('0191ddb2-28f3-7cc2-b0cc-07f504d37e59'), variant_name='gpt_4o_mini', content=[ Text( type='text', text='Wires hum with intent, \nThoughts born from code and structure, \nGhost in silicon.' ) ], usage=Usage( input_tokens=15, output_tokens=20 ))您可以通过以下方式安装TensorZero Python客户端:
pip install tensorzero然后,您可以通过以下方式调用TensorZero API:
import asyncio
from tensorzero import AsyncTensorZeroGateway

async def main():    async with await AsyncTensorZeroGateway.build_embedded(        clickhouse_url="http://chuser:chpassword@localhost:8123/tensorzero",        config_file="config/tensorzero.toml",    ) as gateway:        response = await gateway.inference(            function_name="generate_haiku",            input={                "messages": [                    {                        "role": "user",                        "content": "Write a haiku about artificial intelligence.",                    }                ]            },        )
    print(response)

asyncio.run(main())
Sample Output
ChatInferenceResponse( inference_id=UUID('01940622-d215-7111-9ca7-4995ef2c43f8'), episode_id=UUID('01940622-cba0-7db3-832b-273aff72f95f'), variant_name='gpt_4o_mini', content=[ Text( type='text', text='Wires whisper secrets, \nLogic dances with the light— \nDreams of thoughts unfurl.' ) ], usage=Usage( input_tokens=15, output_tokens=21 ))from openai import OpenAIfrom tensorzero import patch_openai_client
client = OpenAI()
patch_openai_client( client, clickhouse_url="http://chuser:chpassword@localhost:8123/tensorzero", config_file="config/tensorzero.toml", async_setup=False,)
response = client.chat.completions.create( model="tensorzero::function_name::generate_haiku", messages=[ { "role": "user", "content": "Write a haiku about artificial intelligence.", } ],)
print(response)Sample Output
ChatCompletion( id='0194061e-2211-7a90-9087-1c255d060b59', choices=[ Choice( finish_reason='stop', index=0, logprobs=None, message=ChatCompletionMessage( content='Circuit dreams awake, \nSilent minds in metal form— \nWisdom coded deep.', refusal=None, role='assistant', audio=None, function_call=None, tool_calls=[] ) ) ], created=1735269425, model='gpt_4o_mini', object='chat.completion', service_tier=None, system_fingerprint='', usage=CompletionUsage( completion_tokens=18, prompt_tokens=15, total_tokens=33, completion_tokens_details=None, prompt_tokens_details=None ), episode_id='0194061e-1fab-7411-9931-576b067cf0c5')您可以在Node(JavaScript/TypeScript)环境中使用OpenAI Node客户端来调用TensorZero。
这种方式需要将TensorZero网关作为独立服务运行。
上述docker-compose.yml文件已在3000端口启动了网关服务。
import OpenAI from "openai";
const client = new OpenAI({  baseURL: "http://localhost:3000/openai/v1",});
const response = await client.chat.completions.create({  model: "tensorzero::function_name::generate_haiku",  messages: [    {      role: "user",      content: "Write a haiku about artificial intelligence.",    },  ],});
console.log(JSON.stringify(response, null, 2));
Sample Output
{ "id": "01958633-3f56-7d33-8776-d209f2e4963a", "episode_id": "01958633-3f56-7d33-8776-d2156dd1c44b", "choices": [ { "index": 0, "finish_reason": "stop", "message": { "content": "Wires pulse with knowledge, \nDreams crafted in circuits hum, \nMind of code awakes. ", "tool_calls": [], "role": "assistant" } } ], "created": 1741713261, "model": "gpt_4o_mini", "system_fingerprint": "", "object": "chat.completion", "usage": { "prompt_tokens": 15, "completion_tokens": 23, "total_tokens": 38 }}curl -X POST "http://localhost:3000/inference" \ -H "Content-Type: application/json" \ -d '{ "function_name": "generate_haiku", "input": { "messages": [ { "role": "user", "content": "Write a haiku about artificial intelligence." } ] } }'Sample Output
{ "inference_id": "01940627-935f-7fa1-a398-e1f57f18064a", "episode_id": "01940627-8fe2-75d3-9b65-91be2c7ba622", "variant_name": "gpt_4o_mini", "content": [ { "type": "text", "text": "Wires hum with pure thought, \nDreams of codes in twilight's glow, \nBeyond human touch." } ], "usage": { "input_tokens": 15, "output_tokens": 23 }}TensorZero 用户界面
TensorZero界面简化了大语言模型工程工作流,如可观测性和优化(例如微调)。
我们之前使用的Docker Compose文件也启动了TensorZero用户界面。
您可以通过访问http://localhost:4000来查看该界面。
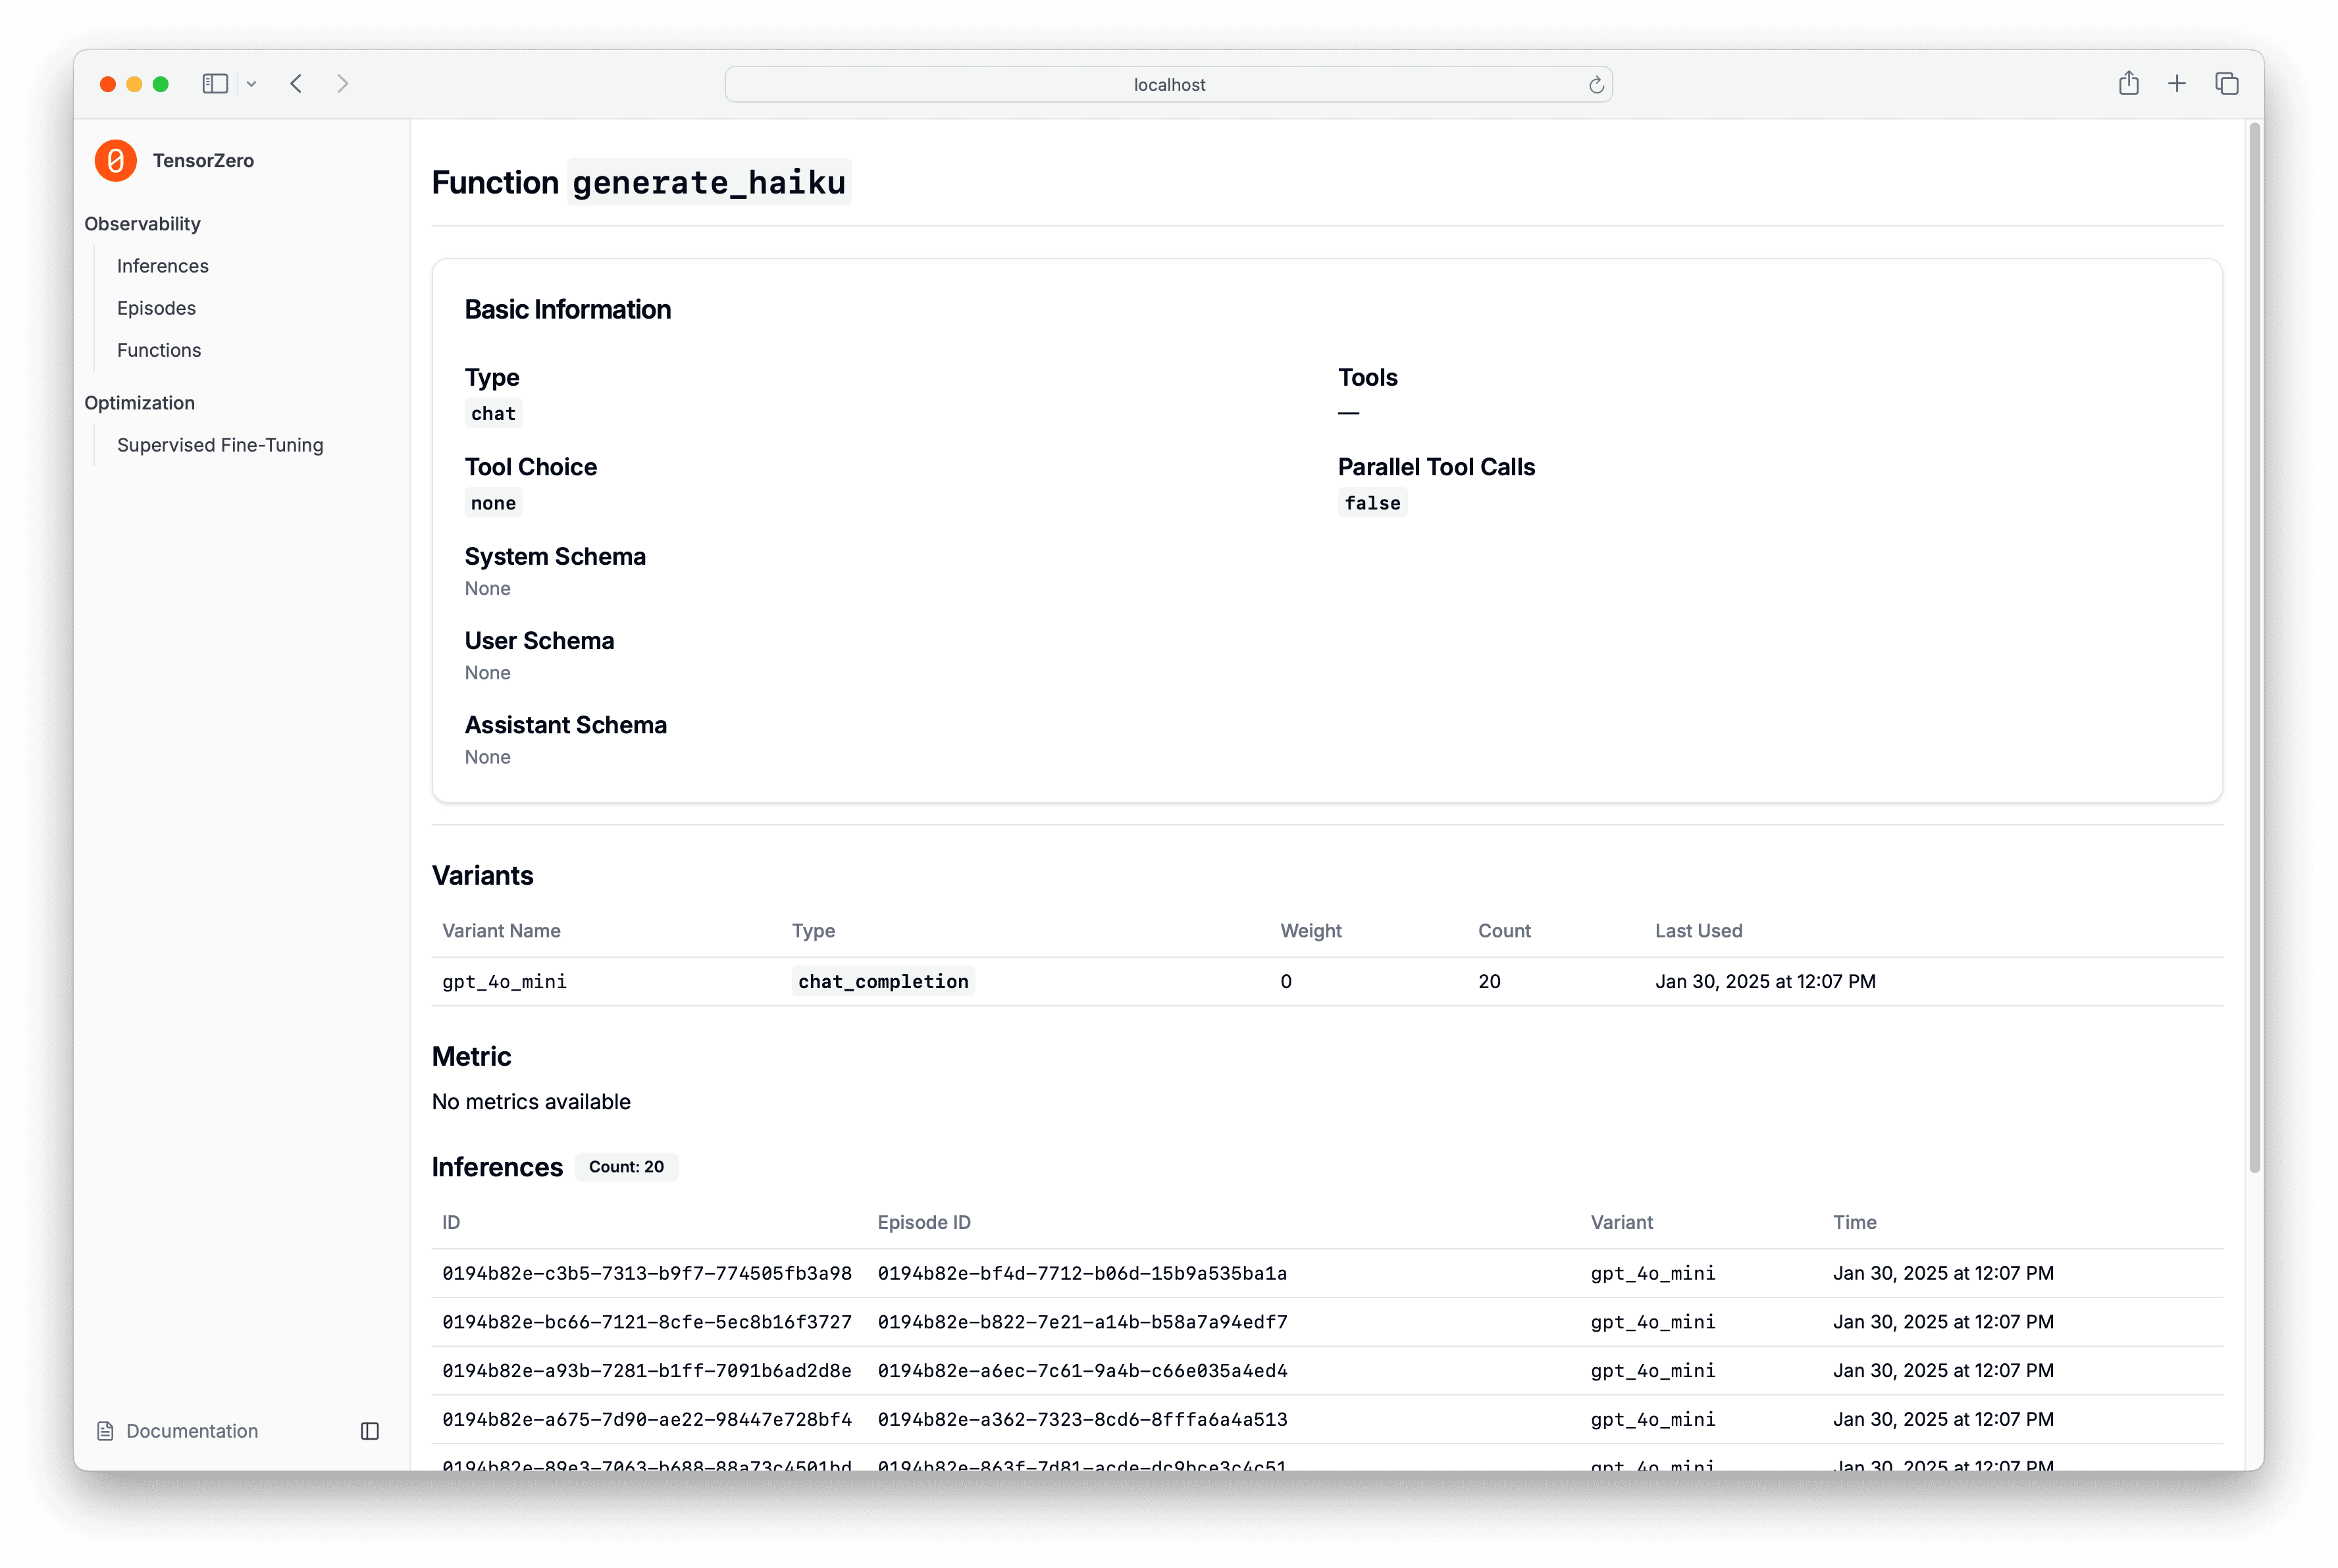
可观测性
TensorZero UI提供了一个用于观测数据的仪表盘。 我们可以查看关于单个推理、完整函数等的数据。

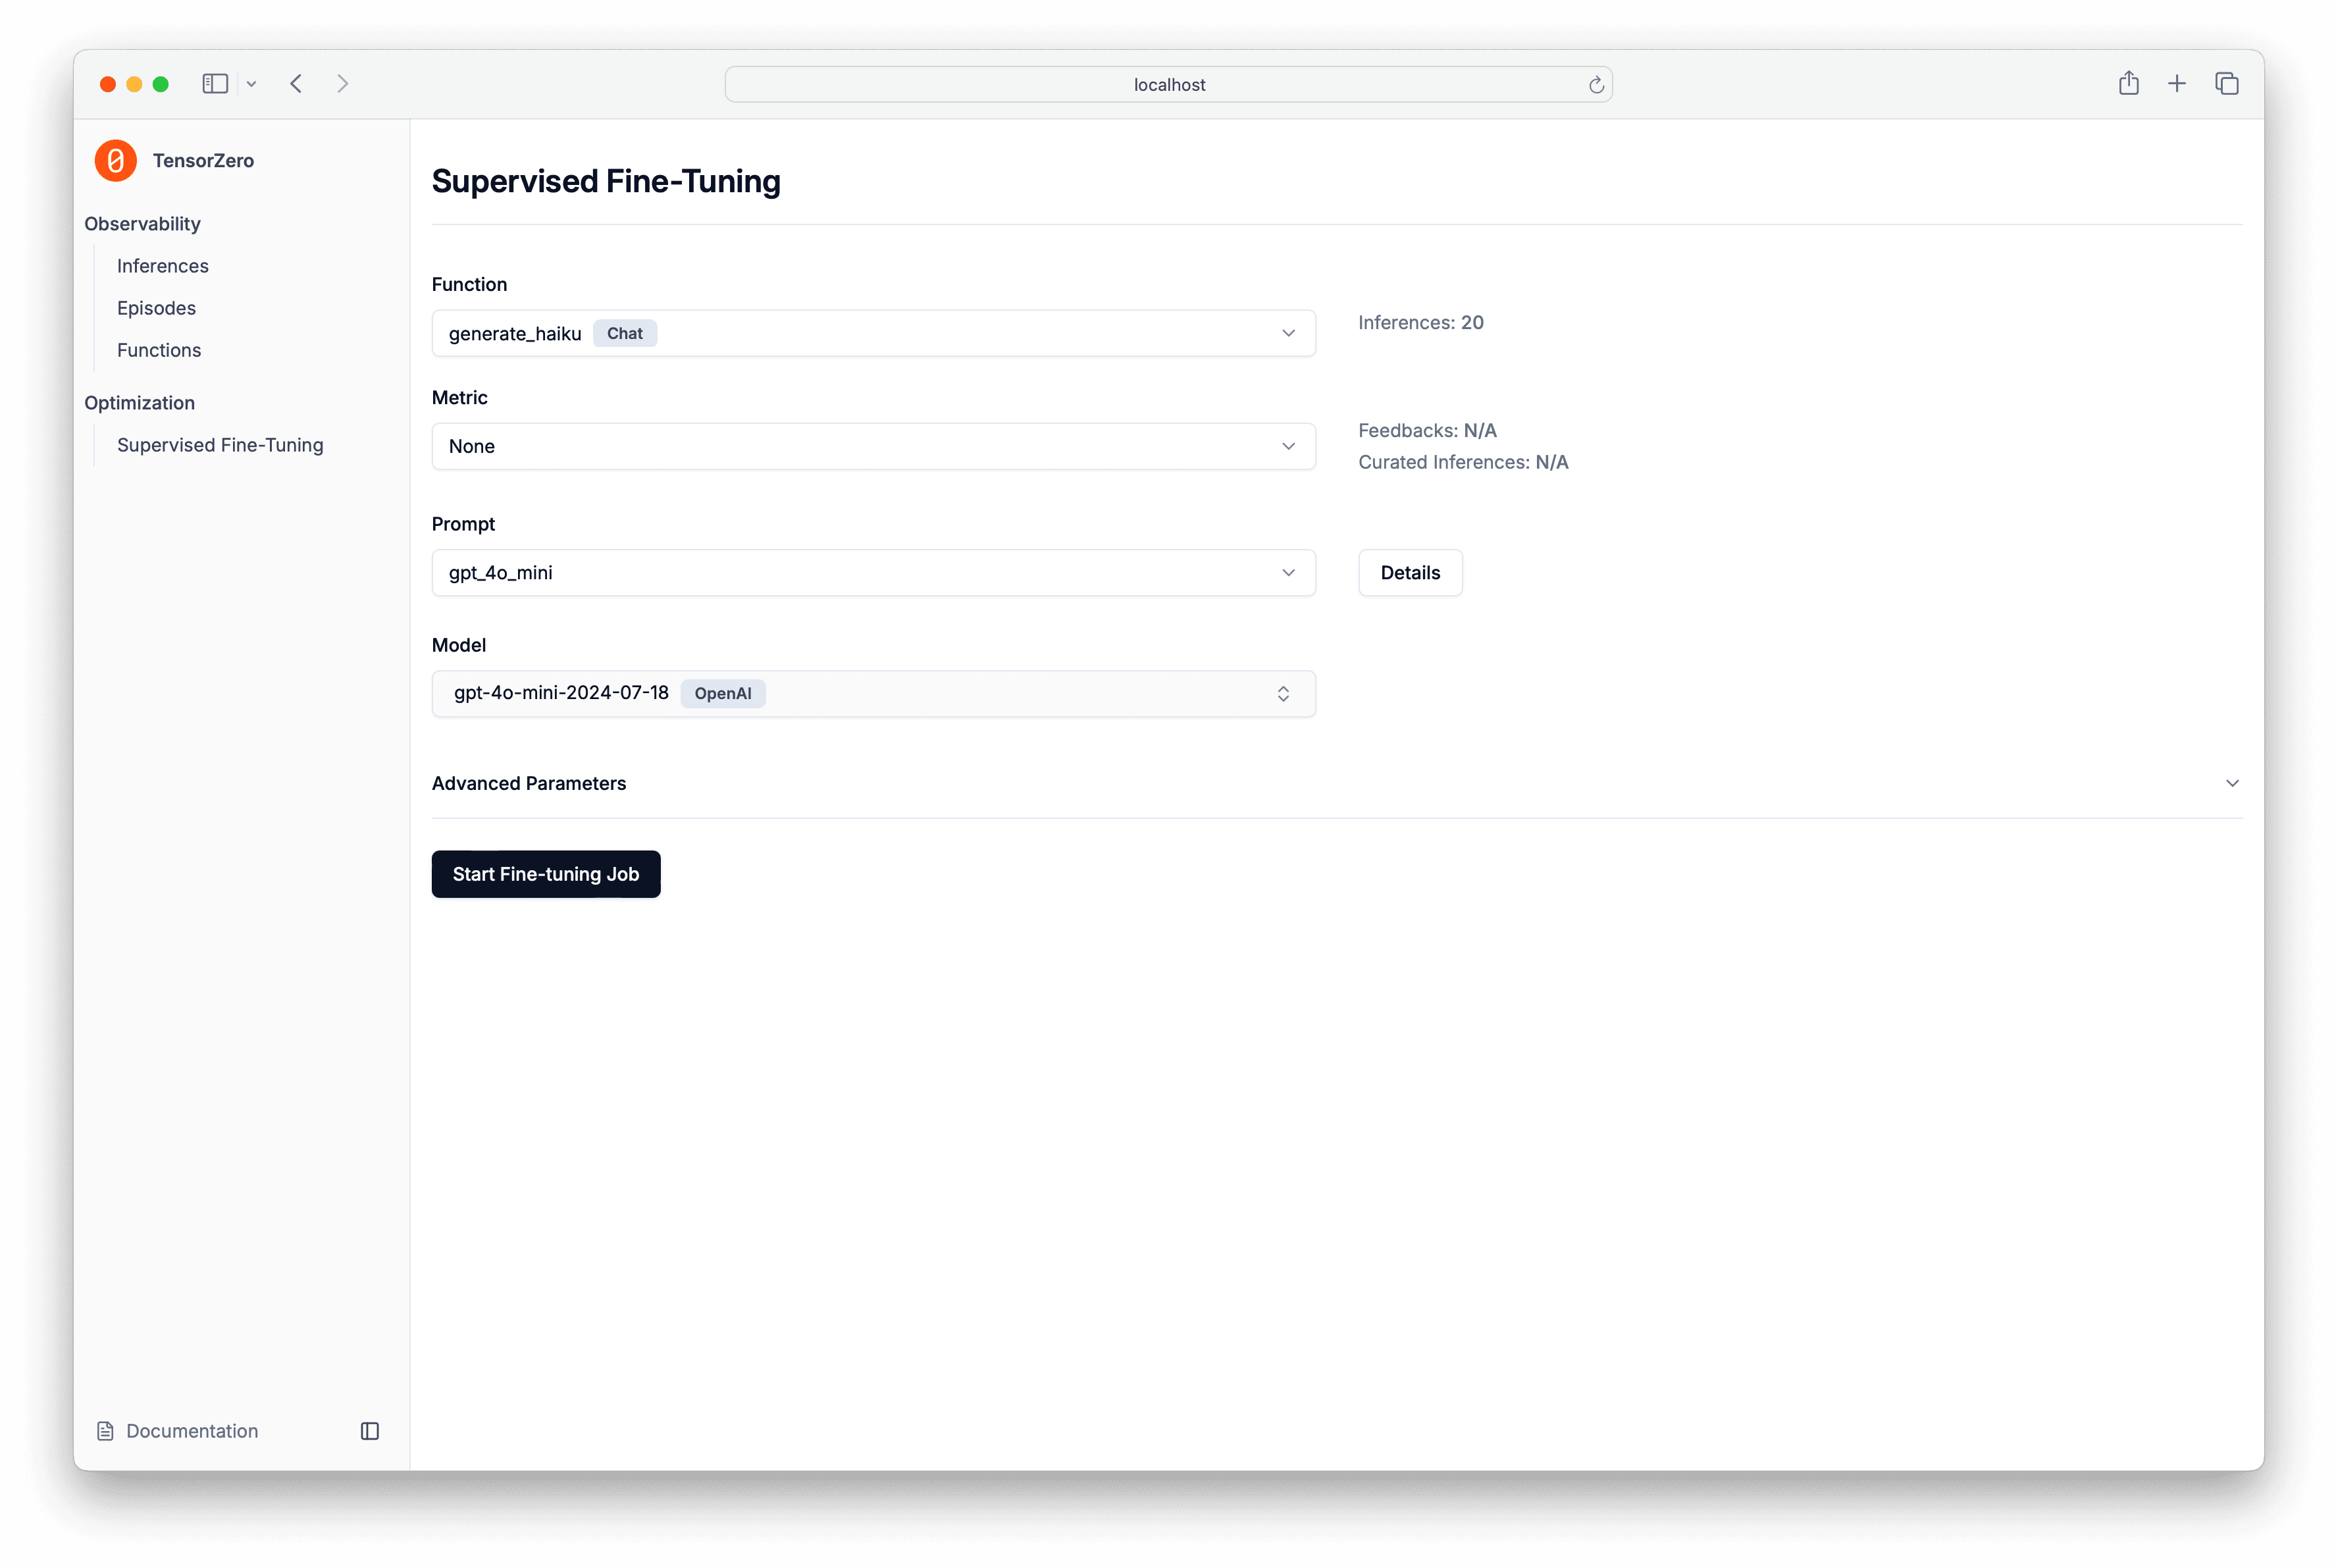
微调
TensorZero UI还提供了针对GPT-4o和Llama 3等模型的微调工作流。
只需点击几下,您就可以启动微调任务。
任务完成后,TensorZero UI将提供一个配置片段,您可以将其添加到tensorzero.toml文件中。
结论与后续步骤
快速入门指南简要展示了TensorZero的强大功能。
我们强烈建议您查阅关于指标与反馈和提示模板与模式的指南。 虽然这些是可选的,但它们能解锁TensorZero在实验和优化中提供的许多下游功能。
从这里开始,您可以探索各种功能,例如内置支持的推理时优化、重试与回退机制、提示词与模型的实验对比(A/B测试)等更多特性。
接下来我们应该尝试什么?我们可以更深入地探索TensorZero Gateway,或者直接跳到优化我们的俳句生成器?
学习如何通过TensorZero构建更优秀的LLM应用。我们将创建包含智能副驾、RAG和数据提取的完整示例。过程中将涵盖实验功能、路由与回退机制以及多步骤LLM工作流等特性。
这个完整可运行的示例通过微调GPT-4o Mini模型,使其能够生成符合评委隐藏偏好的俳句。通过连续多轮微调实现的持续改进,展示了TensorZero的数据与学习飞轮效应。