
AWS Step Functions
本教程介绍如何通过AWS Step Functions部署Kedro项目,以便在AWS无服务器计算平台上运行Kedro生产环境管道。
为什么要在AWS Step Functions上运行Kedro管道?
当数据管道进入生产环境时,一个主要问题是构建和维护底层计算基础设施,即服务器。无服务器计算将分布式计算资源的配置和管理交给云服务提供商,使数据工程师和数据科学家能够专注于解决业务问题。
Azure Functions 和 AWS Lambda 是该解决方案的优秀示例,但也有其他选择。像 AWS Step Functions 这样的服务提供了托管编排功能,可以轻松地将无服务器函数和多个云原生服务编排成业务关键型应用程序。
从Kedro的角度来看,这意味着能够运行每个节点,并通过托管编排器保持管道的正确性和可靠性,而无需担心底层基础设施的管理。在无服务器计算平台上运行Kedro管道的另一个优势是能够利用同一提供商的其他服务,例如使用Amazon SageMaker的特征存储来存储特征数据。
以下内容讨论如何在AWS Step Functions上运行来自spaceflights教程的Kedro管道。
策略
在AWS Step Functions上部署Kedro管道的通用策略是将每个Kedro节点作为AWS Lambda函数运行。整个管道会被转换为AWS Step Functions State Machine进行编排。这种方法体现了在分布式环境中运行Kedro的原则。
先决条件
要使用AWS Step Functions,请确保您具备以下条件:
一个AWS账户设置
Configured AWS credentials 已在您的本地机器上配置
使用Kedro Spaceflights starter生成的Kedro项目名为Spaceflights Step Functions。
最终项目目录的名称应为
spaceflights-step-functions。您应该完成spaceflights教程以了解项目结构。
在本教程中,我们还将使用AWS Cloud Development Kit (CDK)来编写部署脚本。要安装
cdk命令,请参考AWS指南。官方推荐的安装方式是使用npm:
$ npm install -g aws-cdk
# to verify that the cdk command has been installed
$ cdk -h
部署流程
在AWS Step Functions上部署Kedro管道的流程包含以下步骤:
像往常一样在本地开发Kedro流水线
创建一个新的配置环境,确保所有节点的输入和输出在S3上都有持久化存储位置,因为
MemoryDataset无法在AWS Lambda函数之间共享将Kedro流水线打包为AWS Lambda兼容的Docker镜像
编写一个脚本,将每个Kedro节点转换并部署为AWS Lambda函数。每个函数将使用上一步创建的相同流水线Docker镜像,并运行与之关联的单个Kedro节点。这遵循我们在分布式部署指南中阐述的原则。
上述脚本还会将整个Kedro流水线转换并部署为AWS Step Functions状态机。
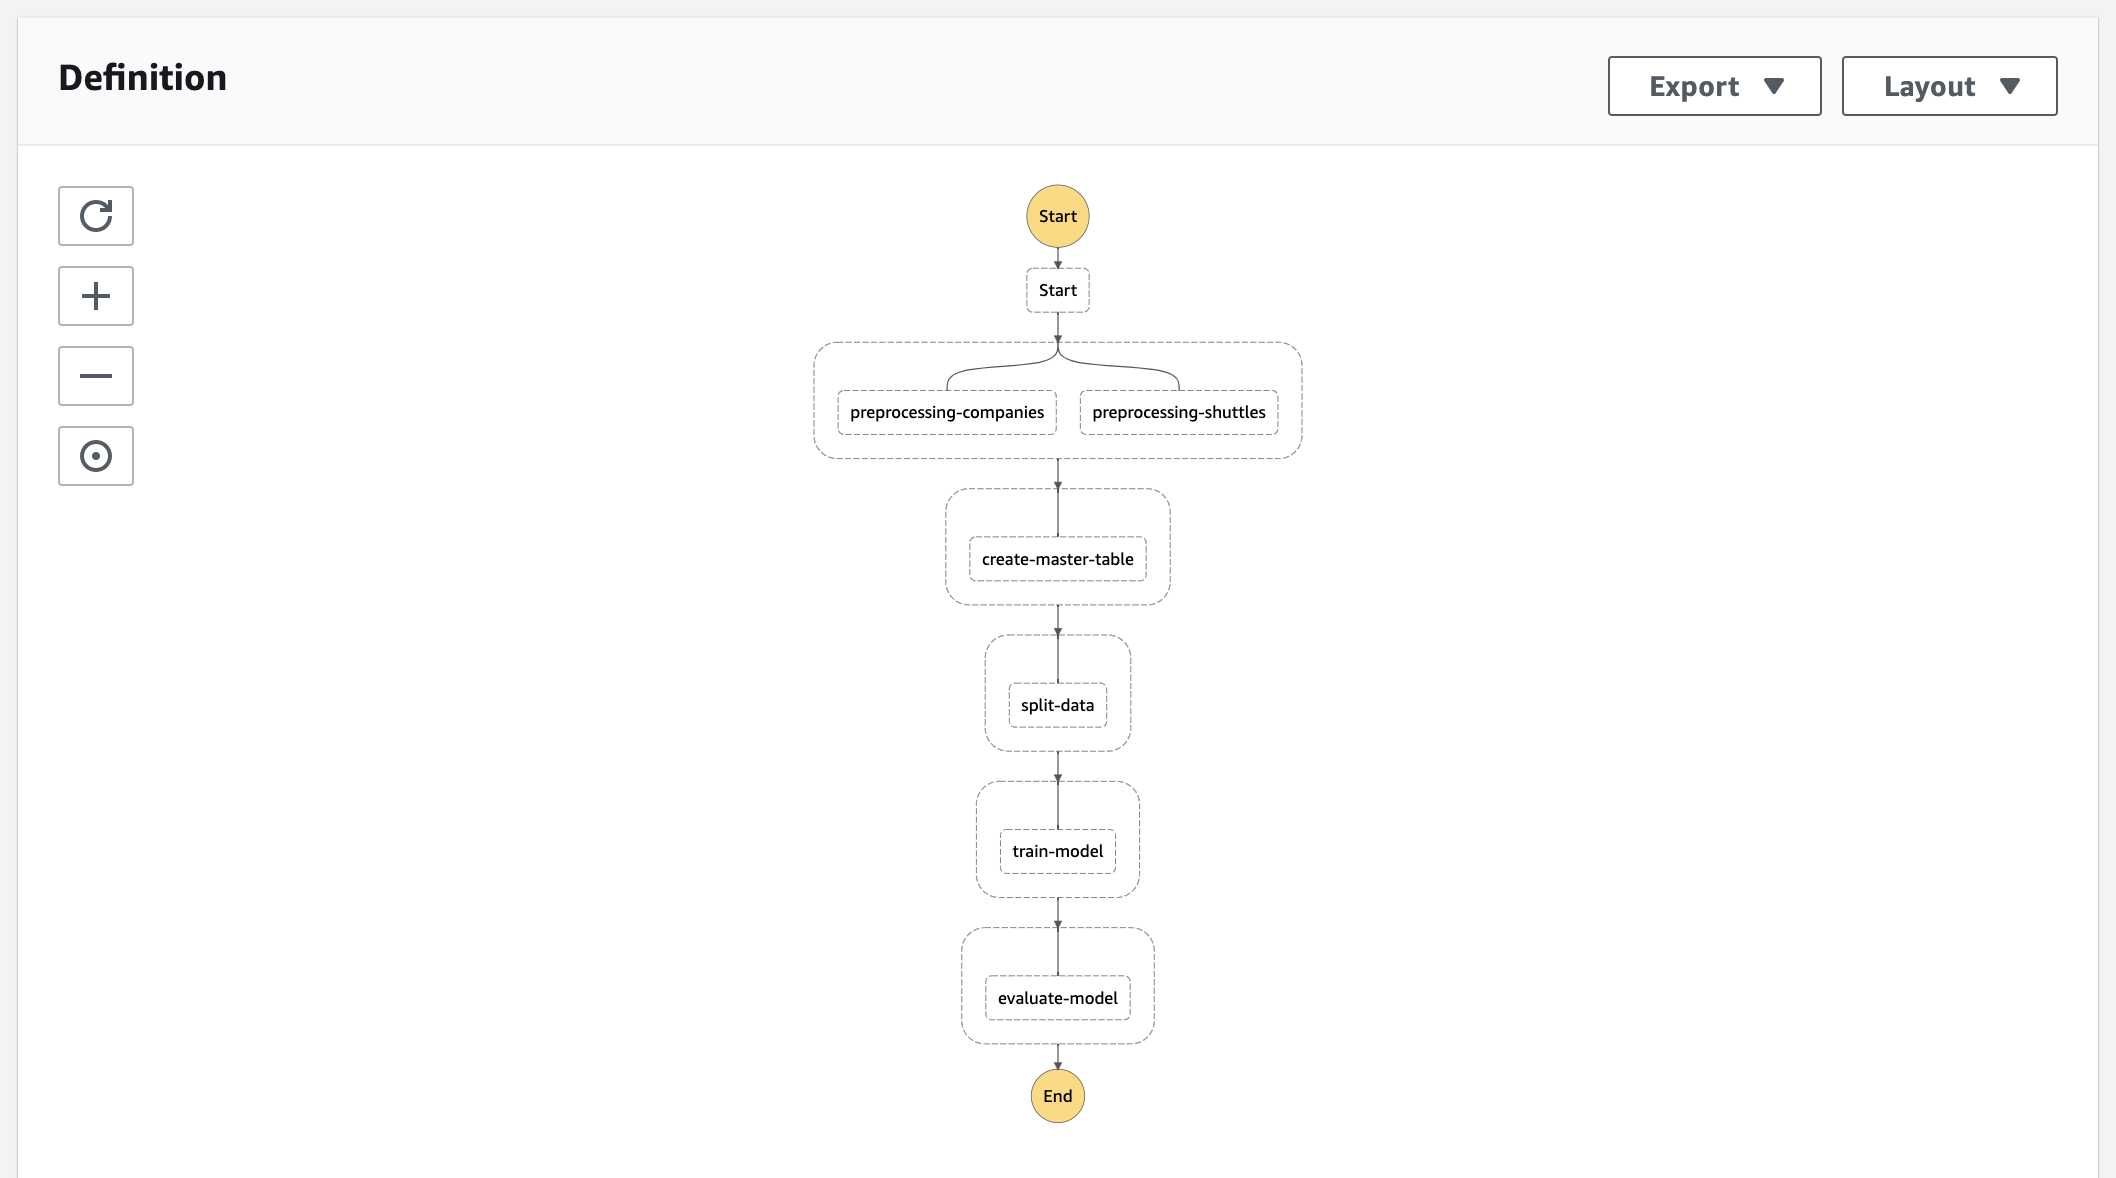
最终部署的AWS Step Functions状态机将在AWS管理控制台中显示以下可视化效果:
本教程的剩余部分将详细解释上述部署流程中的每个步骤。
步骤1. 创建新的配置环境以准备兼容的DataCatalog
在你的Kedro项目中创建
conf/aws目录在此目录下放置一个
catalog.yml文件,内容如下确保你的
requirements.txt文件中定义了s3fs>=0.3.0,<0.5,以便能够从S3读取数据。
Click to expand
companies:
  type: pandas.CSVDataset
  filepath: s3://<your-bucket>/companies.csv

reviews:
  type: pandas.CSVDataset
  filepath: s3://<your-bucket>/reviews.csv

shuttles:
  type: pandas.ExcelDataset
  filepath: s3://<your-bucket>/shuttles.xlsx

preprocessed_companies:
  type: pandas.CSVDataset
  filepath: s3://<your-bucket>/preprocessed_companies.csv

preprocessed_shuttles:
  type: pandas.CSVDataset
  filepath: s3://<your-bucket>/preprocessed_shuttles.csv

model_input_table:
  type: pandas.CSVDataset
  filepath: s3://<your-bucket>/model_input_table.csv

regressor:
  type: pickle.PickleDataset
  filepath: s3://<your-bucket>/regressor.pickle
  versioned: true

X_train:
  type: pickle.PickleDataset
  filepath: s3://<your-bucket>/X_train.pickle

X_test:
  type: pickle.PickleDataset
  filepath: s3://<your-bucket>/X_test.pickle

y_train:
  type: pickle.PickleDataset
  filepath: s3://<your-bucket>/y_train.pickle

y_test:
  type: pickle.PickleDataset
  filepath: s3://<your-bucket>/y_test.pickle
步骤2. 将Kedro流水线打包为符合AWS Lambda规范的Docker镜像
2020年12月,AWS宣布AWS Lambda函数现在除了原有的zip打包方式外,还可以使用最大10GB的容器镜像作为部署包。由于容器镜像需要满足特定要求才能正常工作,您必须构建自定义的Docker容器镜像,既要包含Kedro流水线,又要符合Lambda的运行要求。
注意
以下所有步骤都应在Kedro项目的根目录下完成。
步骤 2.1: 将Kedro流水线打包为Python包,以便稍后可以将其安装到容器中:
$ kedro package
如需了解更多信息,请参阅将Kedro打包为Python包的指南。
步骤2.2: 创建一个
lambda_handler.py文件:
from unittest.mock import patch


def handler(event, context):
    from kedro.framework.project import configure_project

    configure_project("spaceflights_step_functions")
    node_to_run = event["node_name"]

    # Since _multiprocessing.SemLock is not implemented on lambda yet,
    # we mock it out so we could import the session. This has no impact on the correctness
    # of the pipeline, as each Lambda function runs a single Kedro node, hence no need for Lock
    # during import. For more information, please see this StackOverflow discussion:
    # https://stackoverflow.com/questions/34005930/multiprocessing-semlock-is-not-implemented-when-running-on-aws-lambda
    with patch("multiprocessing.Lock"):
        from kedro.framework.session import KedroSession

        with KedroSession.create(env="aws") as session:
            session.run(node_names=[node_to_run])
该文件作为我们管道中每个Lambda函数的处理器,从触发事件接收Kedro节点的名称并相应地执行它。
步骤2.3: 创建一个
Dockerfile来定义自定义Docker镜像,作为我们Lambda函数的基础:
# Define global args
ARG FUNCTION_DIR="/home/app/"
ARG RUNTIME_VERSION="3.9"

# Stage 1 - bundle base image + runtime
# Grab a fresh copy of the image and install GCC
FROM python:${RUNTIME_VERSION}-buster as build-image

# Install aws-lambda-cpp build dependencies
RUN apt-get update && \
  apt-get install -y \
  g++ \
  make \
  cmake \
  unzip \
  libcurl4-openssl-dev

# Include global args in this stage of the build
ARG FUNCTION_DIR
ARG RUNTIME_VERSION
# Create the function directory
RUN mkdir -p ${FUNCTION_DIR}
RUN mkdir -p ${FUNCTION_DIR}/{conf}
# Add handler function
COPY lambda_handler.py ${FUNCTION_DIR}
# Add conf/ directory
COPY conf ${FUNCTION_DIR}/conf
# Install Kedro pipeline
COPY dist/spaceflights_step_functions-0.1-py3-none-any.whl .
RUN python${RUNTIME_VERSION} -m pip install --no-cache-dir spaceflights_step_functions-0.1-py3-none-any.whl --target ${FUNCTION_DIR}
# Install Lambda Runtime Interface Client for Python
RUN python${RUNTIME_VERSION} -m pip install --no-cache-dir awslambdaric --target ${FUNCTION_DIR}

# Stage 3 - final runtime image
# Grab a fresh copy of the Python image
FROM python:${RUNTIME_VERSION}-buster
# Include global arg in this stage of the build
ARG FUNCTION_DIR
# Set working directory to function root directory
WORKDIR ${FUNCTION_DIR}
# Copy in the built dependencies
COPY --from=build-image ${FUNCTION_DIR} ${FUNCTION_DIR}
ENTRYPOINT [ "/usr/local/bin/python", "-m", "awslambdaric" ]
CMD [ "lambda_handler.handler" ]
该Dockerfile改编自官方指南中关于如何创建自定义镜像的内容,专门针对Lambda进行了调整以包含Kedro特有的步骤。
步骤2.4: 构建Docker镜像并推送至AWS弹性容器注册表(ECR):
# build and tag the image
$ docker build -t spaceflights-step-functions .
$ docker tag spaceflights-step-functions:latest <your-aws-account-id>.dkr.ecr.<your-aws-region>.amazonaws.com/spaceflights-step-functions:latest
# login to ECR
$ aws ecr get-login-password | docker login --username AWS --password-stdin <your-aws-account-id>.dkr.ecr.<your-aws-region>.amazonaws.com
# push the image to ECR
$ docker push <your-aws-account-id>.dkr.ecr.<your-aws-region>.amazonaws.com/spaceflights-step-functions:latest
步骤3. 编写部署脚本
由于您将使用AWS CDK in Python编写我们的部署脚本,您需要从CDK安装一些必需的依赖项。
步骤3.1: 创建一个
deploy_requirements.txt文件,包含以下内容:
aws_cdk.aws_s3
aws_cdk.core
aws-cdk.aws_ecr
aws-cdk.aws_lambda
aws-cdk.aws-stepfunctions
aws-cdk.aws-stepfunctions-tasks
然后使用 pip 安装这些依赖项:
$ pip install -r deploy_requirements.txt
步骤3.2: 创建一个
deploy.py文件:
import re
from pathlib import Path

from aws_cdk import aws_stepfunctions as sfn
from aws_cdk import aws_s3 as s3
from aws_cdk import core, aws_lambda, aws_ecr
from aws_cdk.aws_lambda import IFunction
from aws_cdk.aws_stepfunctions_tasks import LambdaInvoke
from kedro.framework.project import pipelines
from kedro.framework.session import KedroSession
from kedro.framework.startup import bootstrap_project
from kedro.pipeline.node import Node


def _clean_name(name: str) -> str:
    """Reformat a name to be compliant with AWS requirements for their resources.

    Returns:
        name: formatted name.
    """
    return re.sub(r"[\W_]+", "-", name).strip("-")[:63]


class KedroStepFunctionsStack(core.Stack):
    """A CDK Stack to deploy a Kedro pipeline to AWS Step Functions."""

    env = "aws"
    project_path = Path.cwd()
    erc_repository_name = project_path.name
    s3_data_bucket_name = (
        "spaceflights-step-functions"  # this is where the raw data is located
    )

    def __init__(self, scope: core.Construct, id: str, **kwargs) -> None:
        super().__init__(scope, id, **kwargs)

        self._parse_kedro_pipeline()
        self._set_ecr_repository()
        self._set_ecr_image()
        self._set_s3_data_bucket()
        self._convert_kedro_pipeline_to_step_functions_state_machine()

    def _parse_kedro_pipeline(self) -> None:
        """Extract the Kedro pipeline from the project"""
        metadata = bootstrap_project(self.project_path)

        self.project_name = metadata.project_name
        self.pipeline = pipelines.get("__default__")

    def _set_ecr_repository(self) -> None:
        """Set the ECR repository for the Lambda base image"""
        self.ecr_repository = aws_ecr.Repository.from_repository_name(
            self, id="ECR", repository_name=self.erc_repository_name
        )

    def _set_ecr_image(self) -> None:
        """Set the Lambda base image"""
        self.ecr_image = aws_lambda.EcrImageCode(repository=self.ecr_repository)

    def _set_s3_data_bucket(self) -> None:
        """Set the S3 bucket containing the raw data"""
        self.s3_bucket = s3.Bucket(
            self, "RawDataBucket", bucket_name=self.s3_data_bucket_name
        )

    def _convert_kedro_node_to_lambda_function(self, node: Node) -> IFunction:
        """Convert a Kedro node into an AWS Lambda function"""
        func = aws_lambda.Function(
            self,
            id=_clean_name(f"{node.name}_fn"),
            description=str(node),
            code=self.ecr_image,
            handler=aws_lambda.Handler.FROM_IMAGE,
            runtime=aws_lambda.Runtime.FROM_IMAGE,
            environment={},
            function_name=_clean_name(node.name),
            memory_size=256,
            reserved_concurrent_executions=10,
            timeout=core.Duration.seconds(15 * 60),
        )
        self.s3_bucket.grant_read_write(func)
        return func

    def _convert_kedro_node_to_sfn_task(self, node: Node) -> LambdaInvoke:
        """Convert a Kedro node into an AWS Step Functions Task"""
        return LambdaInvoke(
            self,
            _clean_name(node.name),
            lambda_function=self._convert_kedro_node_to_lambda_function(node),
            payload=sfn.TaskInput.from_object({"node_name": node.name}),
        )

    def _convert_kedro_pipeline_to_step_functions_state_machine(self) -> None:
        """Convert Kedro pipeline into an AWS Step Functions State Machine"""
        definition = sfn.Pass(self, "Start")

        for i, group in enumerate(self.pipeline.grouped_nodes, 1):
            group_name = f"Group {i}"
            sfn_state = sfn.Parallel(self, group_name)
            for node in group:
                sfn_task = self._convert_kedro_node_to_sfn_task(node)
                sfn_state.branch(sfn_task)

            definition = definition.next(sfn_state)

        sfn.StateMachine(
            self,
            self.project_name,
            definition=definition,
            timeout=core.Duration.seconds(5 * 60),
        )


app = core.App()
KedroStepFunctionsStack(app, "KedroStepFunctionsStack")
app.synth()
该脚本包含将Kedro流水线转换为AWS Step Functions状态机的逻辑,其中每个Kedro节点都定义为使用步骤2中Docker镜像的Lambda函数。然后您需要通过创建具有以下内容的cdk.json来将其注册到CDK:
{
  "app": "python3 deploy.py"
}
就是这样!您现在已准备好在AWS Step Functions上部署和运行Kedro管道了。
步骤4. 部署管道
使用CDK进行部署非常简单。您只需运行:
$ cdk deploy
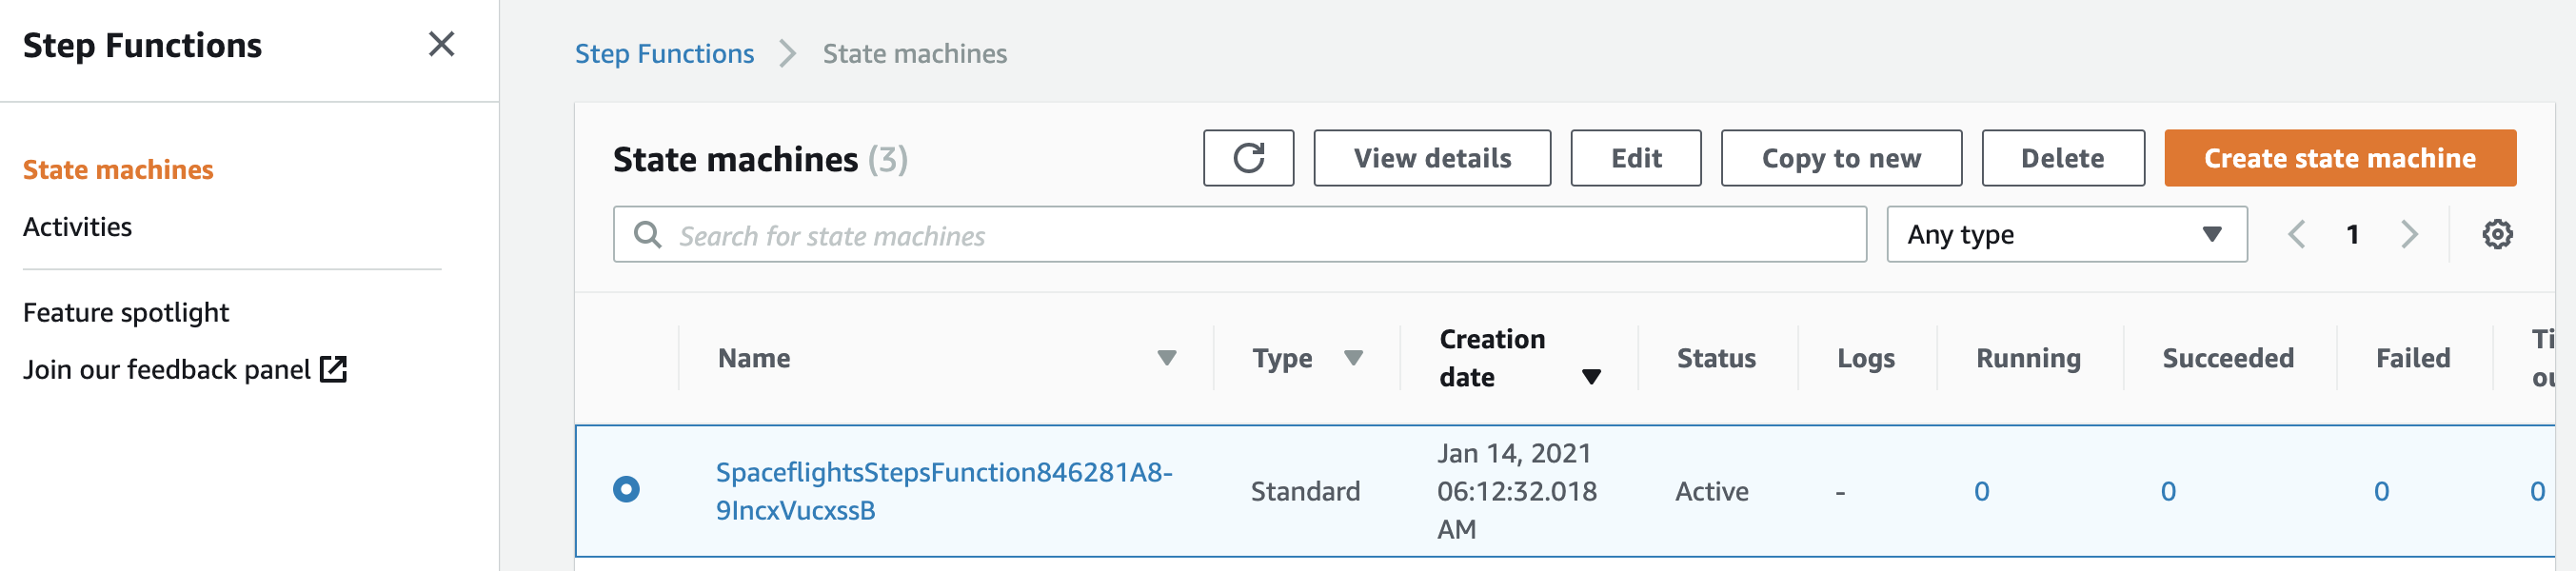
部署完成后,当您登录AWS管理控制台时,应该能看到为您的流水线创建的AWS Step Functions状态机:
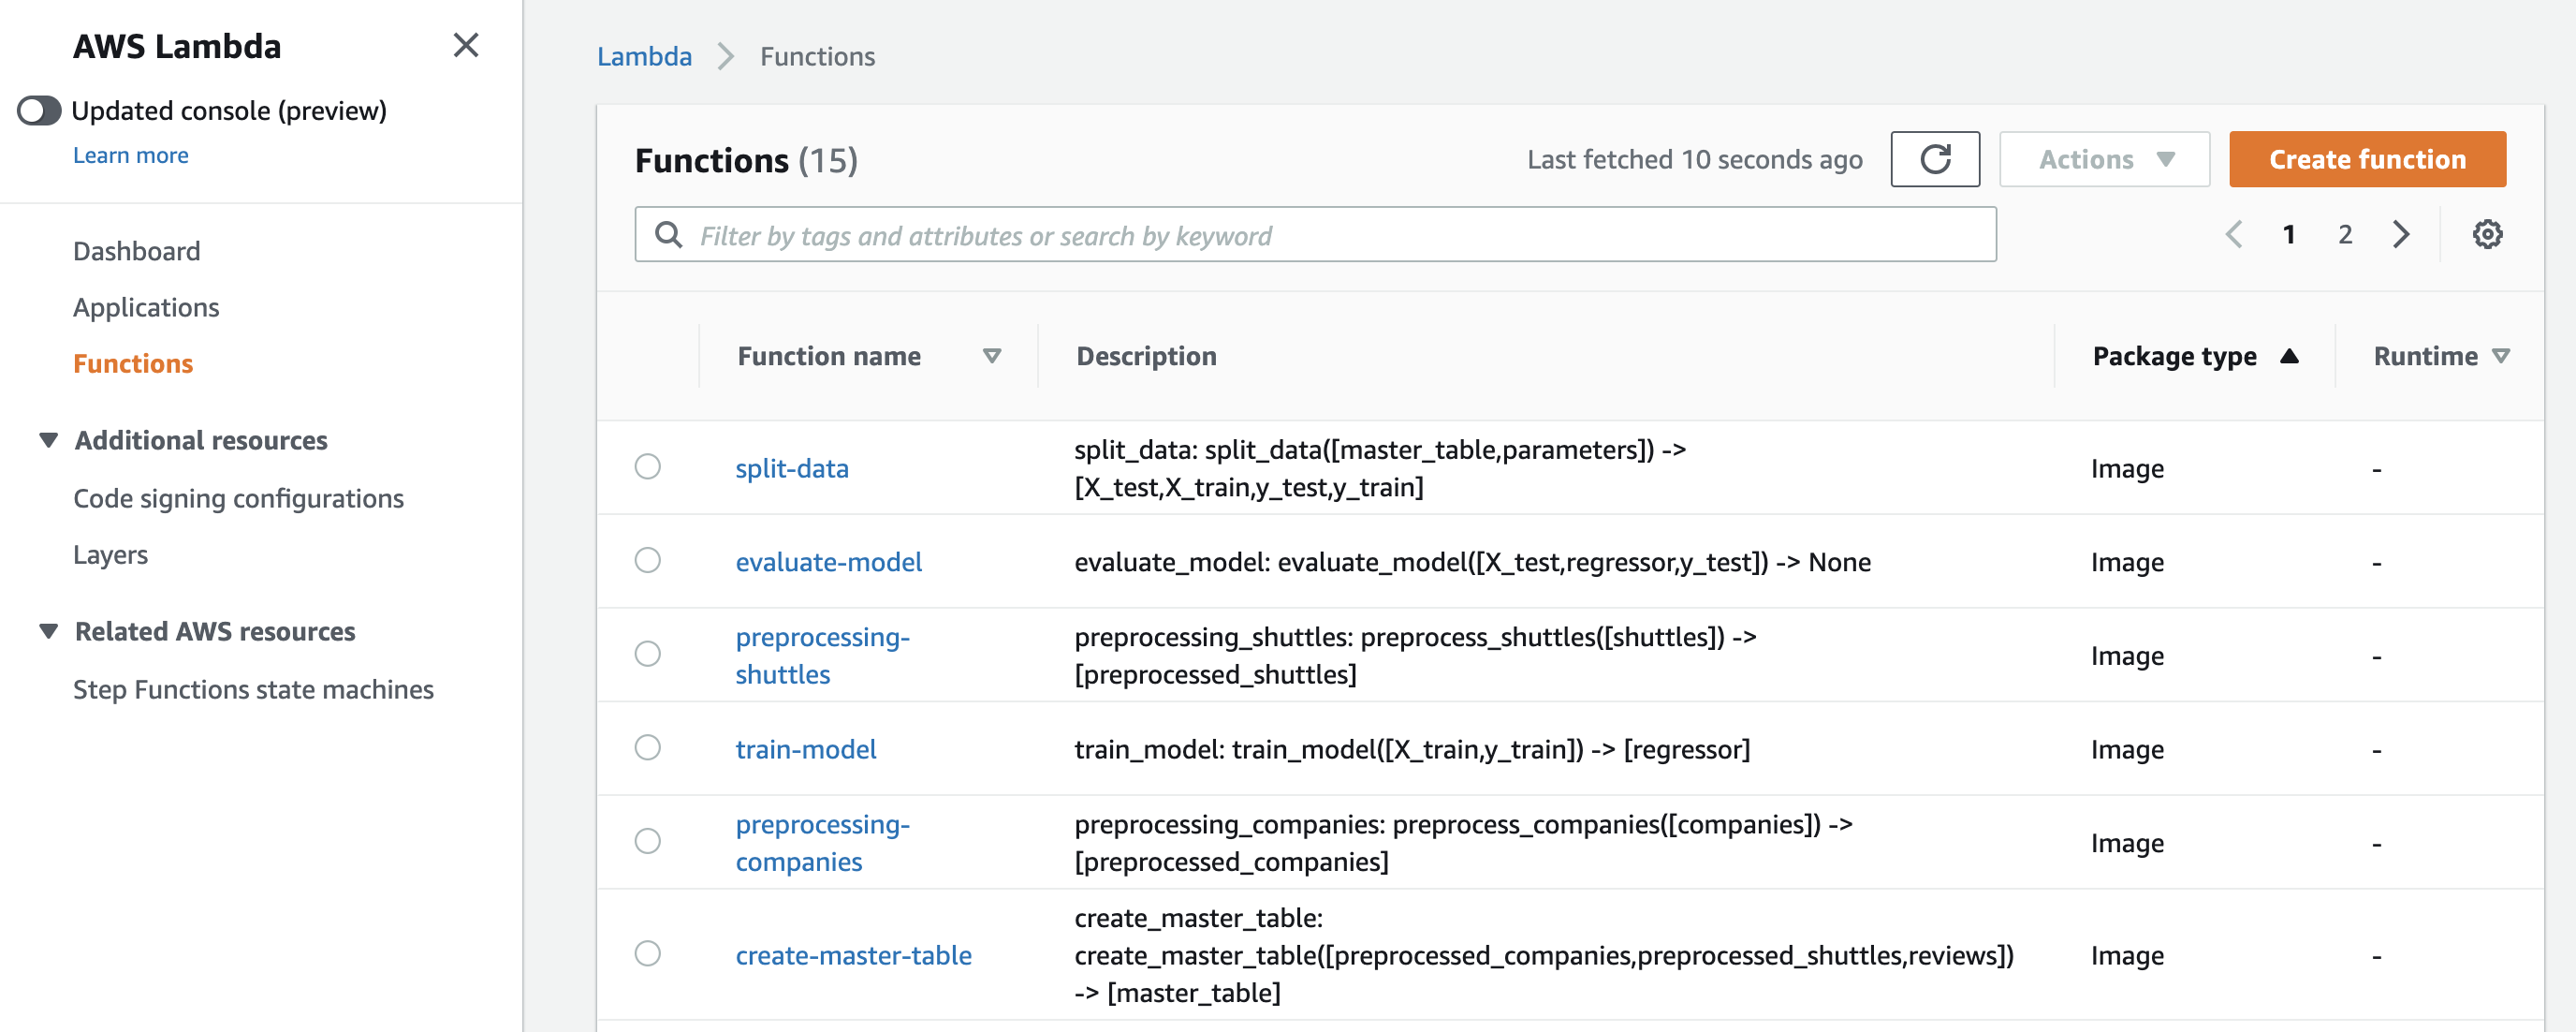
以及每个Kedro节点对应的Lambda函数:
如果进入状态机并点击Start Execution,你将能够看到Kedro管道在AWS Step Functions上的完整端到端(E2E)运行。
局限性
总体而言,AWS Lambda的限制条件近年来已有显著改善。但值得注意的是,每个Lambda函数仍存在15分钟超时限制、10GB最大内存限制以及10GB容器镜像代码包大小限制。这意味着,举例来说,如果您有一个运行时间超过15分钟的节点,就应该改用其他AWS服务(如AWS Batch或AWS ECS)来执行该节点。